DIY origami Christmas decorations

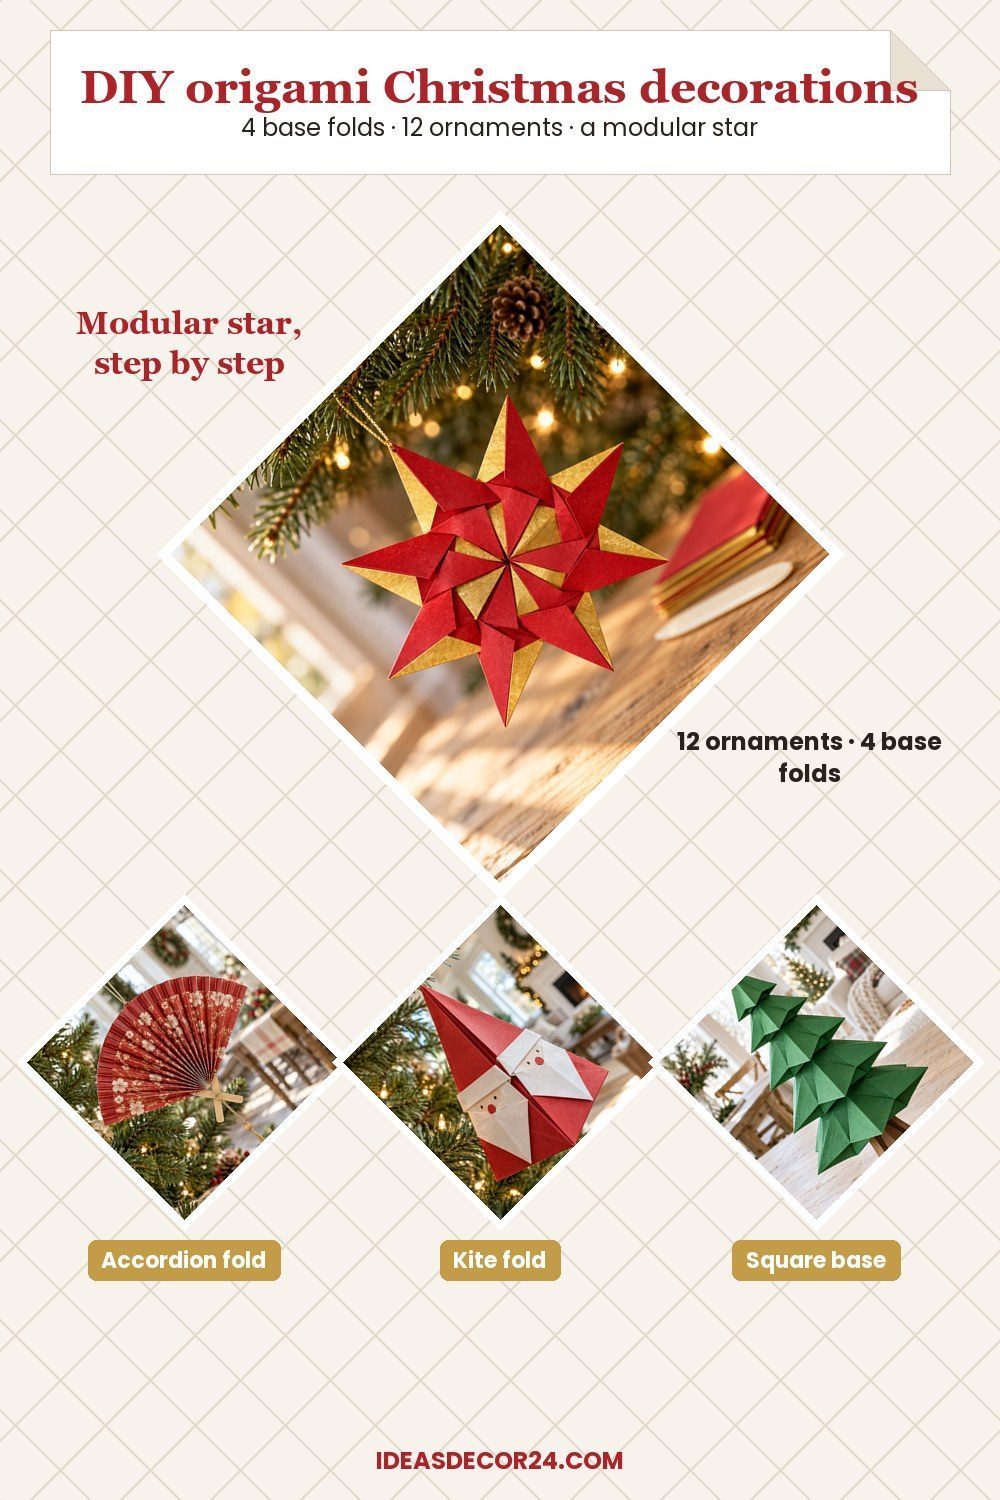
Learn four bases for 12 DIY origami Christmas decorations, then build one modular star as the showpiece. Buy 6 in (15 cm) squares of kami, around 60–63 gsm, for the small folded models; keep larger sheets for the rosette and the stacked tree. The waterbomb bauble and the paper fan are the quickest warm-ups, each a few minutes by their makers' own timing. The modular origami star is the project to save for a clear table and an unhurried session.
Paper first
Start with smooth paper that takes a clean crease. White-backed kami makes it easy to follow instructions that switch between the colored and white sides, while double-sided sheets give hanging ornaments a finished reverse. Moon Petal’s paper guide puts standard kami at 60–63 gsm and explains why foil permanently records stray creases. The sizes below come from the linked model tutorials; they are starting sheets, rather than finished ornament dimensions. Keep the rectangles for the accordion projects: those folds work across a strip, while the traditional bases begin with an accurate square.
| Paper | Size | Best for | Notes |
|---|---|---|---|
| Kami / origami paper | 6 in (15 cm) square | Star box, waterbomb and lily | About 60–63 gsm; smooth, thin paper keeps the layered folds manageable. |
| Double-sided origami paper | 6 in (15 cm) square | Ornaments viewed from both sides | The paper guide lists this size for duo paper; choose colors that look good together when a reverse flap shows. |
| Foil paper | About 50+ gsm; a 6 in (15 cm) square suits the star. | A metallic version after practicing the folds | This is the star tutorial’s square size; foil is a finish option, and its early creases remain visible. |
| Scrapbook or wrapping paper cut square | 6 in (15 cm) square for each Santa panel | Patterned Santa ornaments | Choose a white reverse for the beard; use flexible paper that folds neatly into the kite shape. |
| Book or sheet-music pages | Trim to 6 × 4 in (15 × 10 cm) rectangles for the fan | A vintage-looking pleated fan | The fan tutorial allows decorative paper; the National Park Service’s written fan instructions specifically include book and music pages. Use sound, expendable pages. |
The accordion fold
Fold a strip forward, turn the sheet over, then fold it back by the same width to build alternating valley and mountain creases. Compress the pleats together, keeping their ends aligned so they open evenly. This base makes the fan, rosette and angel below, although each ornament also needs tying, cutting or gluing to finish.
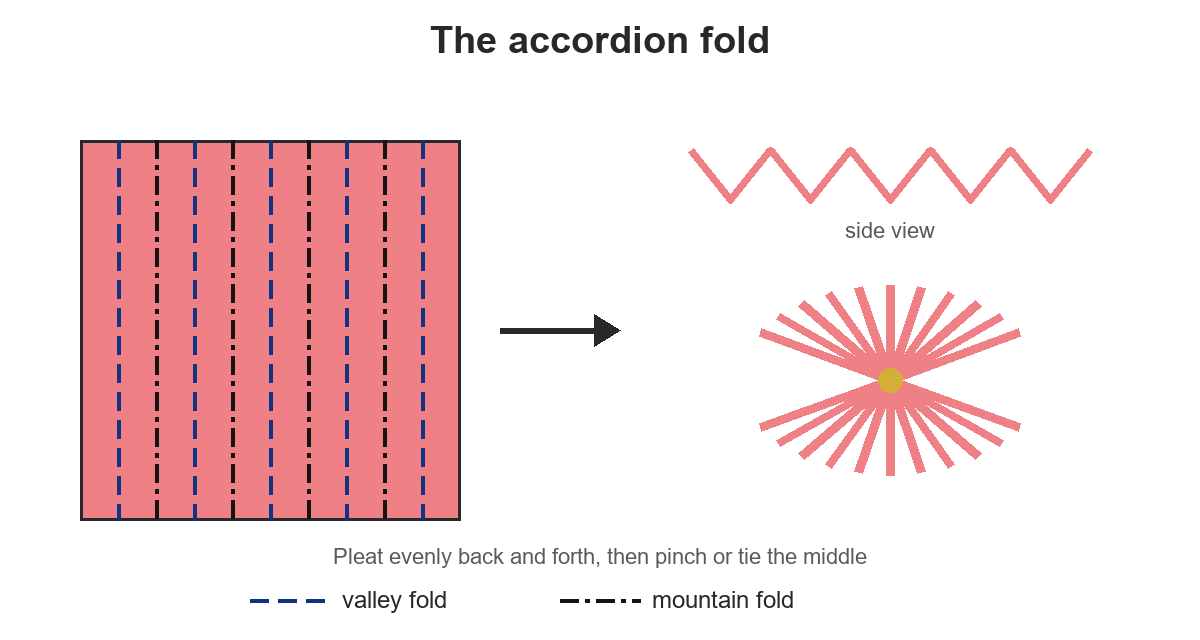
Blue dashed lines show valley folds, black dash-dot lines show mountain folds and solid outlines show paper edges; the result is a compact stack of alternating accordion pleats.
Pleated paper fan ornament

A broad paper fan with crossed wooden handles brings a little pattern to the tree. After making the accordion pleats about 1/4 in (0.5 cm) wide, overlap and glue the folded sheets together. Attach wooden sticks at the outer edges, then cross the sticks to spread the fan and secure its hanging string. This is an easy starter, and Kathy describes it as taking a few minutes. Use a glue stick for the paper joins; an adult should handle the hot-glue dot that holds the crossed handles.
Paper: 2 rectangles, each 6 × 4 in (15 × 10 cm), trimmed from origami squares.
Diagram and tutorial by Kathy Baugher, Home Made by Carmona
Pleated paper rosette medallion
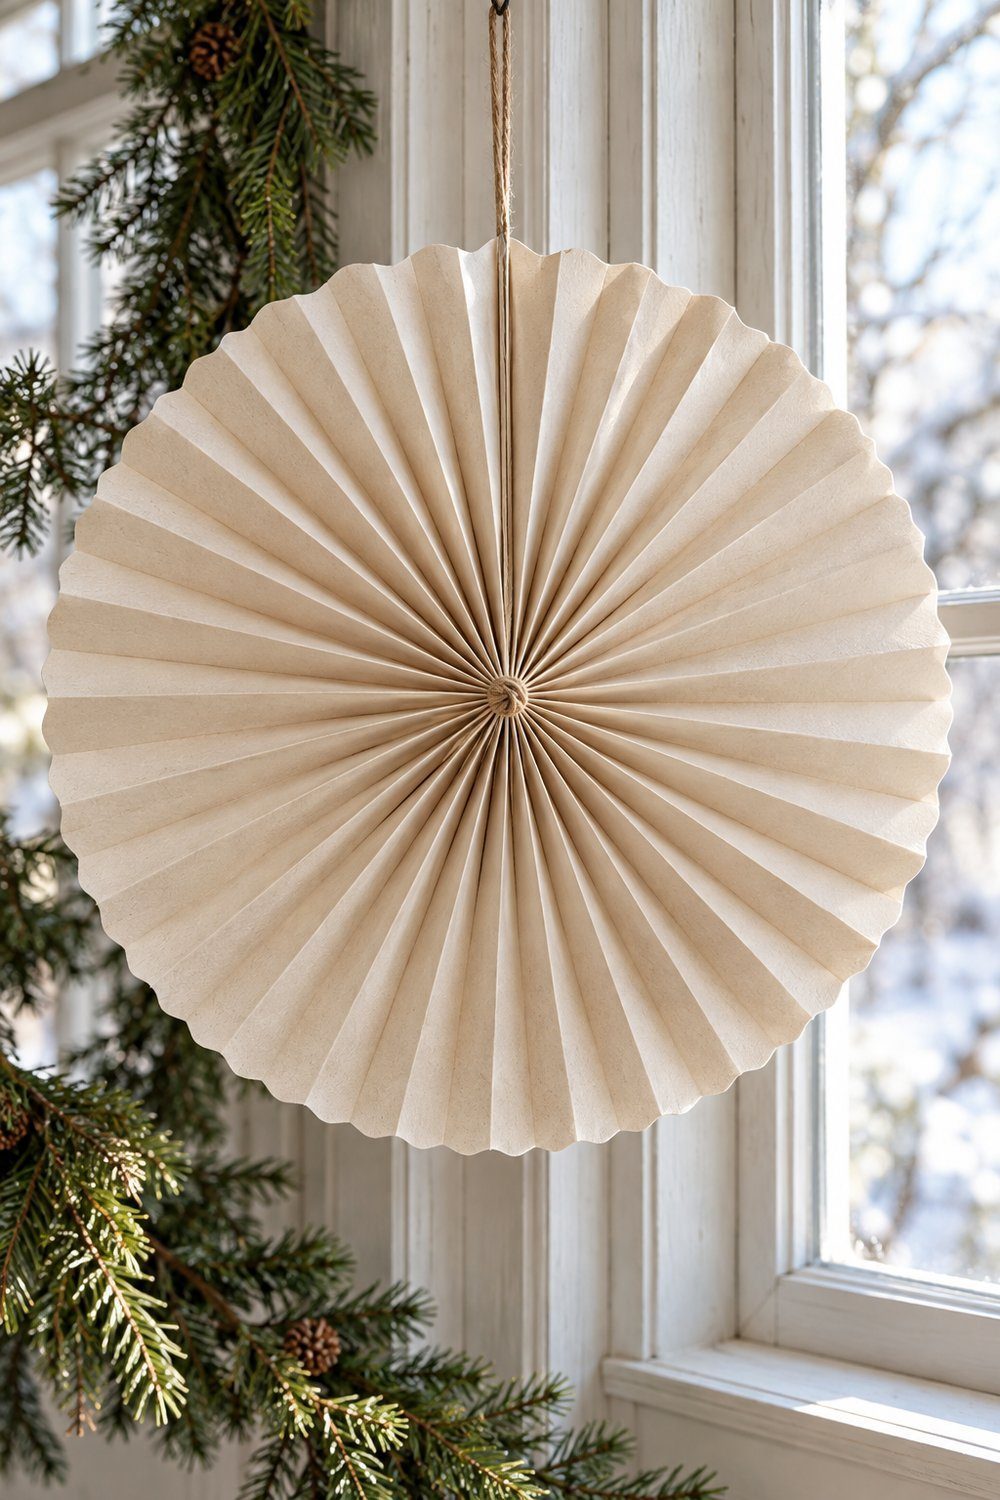
A circular medallion is the large-scale member of the group, suited to a window or the wall behind a Christmas table. After accordion-folding the rectangle, trim both ends into rounded or pointed profiles. Fold the bundle at its middle and tie it firmly, then bring the edges around to form a circle and join them. The center tie needs care to keep the pleats gathered. Choose a quiet pattern so the radial folds stay visible against greenery, and use paper clips for a removable join.
Paper: 1 rectangle, approximately 16 × 24 in (40 × 60 cm), using gift wrap, kraft paper or leftover wallpaper.
Diagram and tutorial by Elina Henttonen, Kotona Living
Accordion paper angel

The angel’s skirt and wings come from pleats, with a small folded head instead of a separate bead. Accordion-fold the papers along their long sides, hold the bundles together and bend them in half. Tie ribbon around the folded top, then spread the dress and wings into the shape shown in the tutorial. This quick fold has a soft silhouette that works among darker branches. Mix a plain skirt with patterned wings, or keep everything cream for an ornament that sits comfortably beside wooden and natural decorations.
Paper: 2 sheets: 8 × 5 1/8 in (20 × 13 cm) and a 6 in (15 cm) square.
Diagram and tutorial by Karin & Freja, Pysselbolaget
The kite fold
Crease a square diagonally, reopen it and bring the two lower edges into that center line. The resulting kite has a narrow point and a broader end, ready to become a neck, a hat or a decorative kite. Align the long edges before pressing the folds, because a tidy point here makes the later folds easier to position.
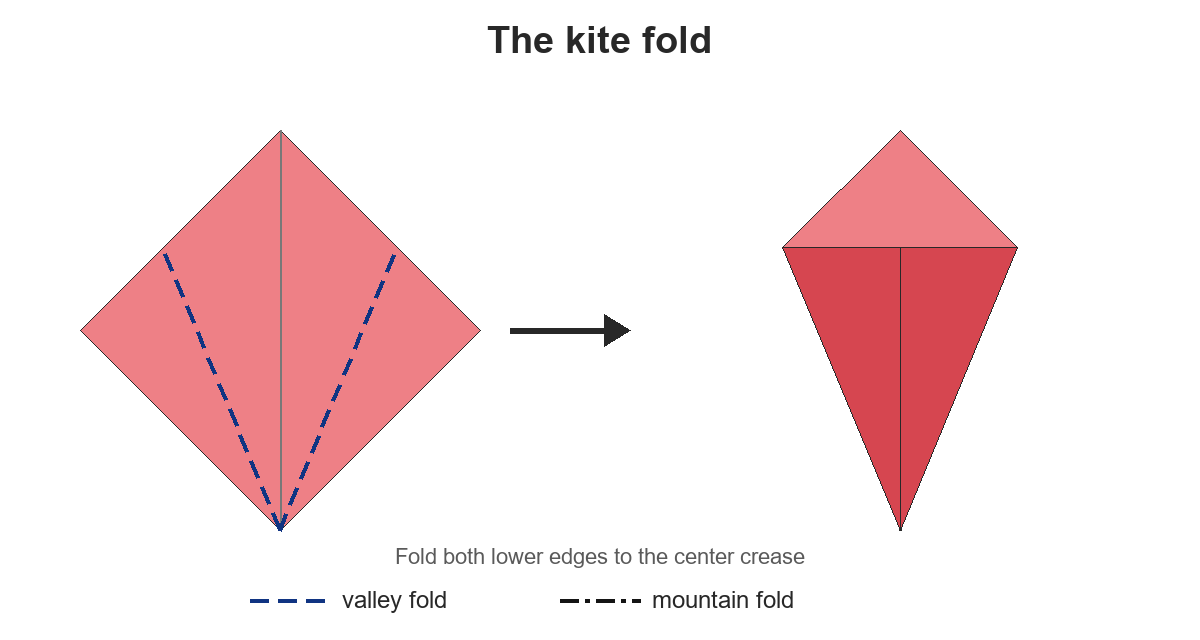
Blue dashed lines show valley folds, black dash-dot lines show mountain folds and solid outlines show paper edges; the result is a narrow kite base with its side edges meeting at the center.
Origami swan ornament
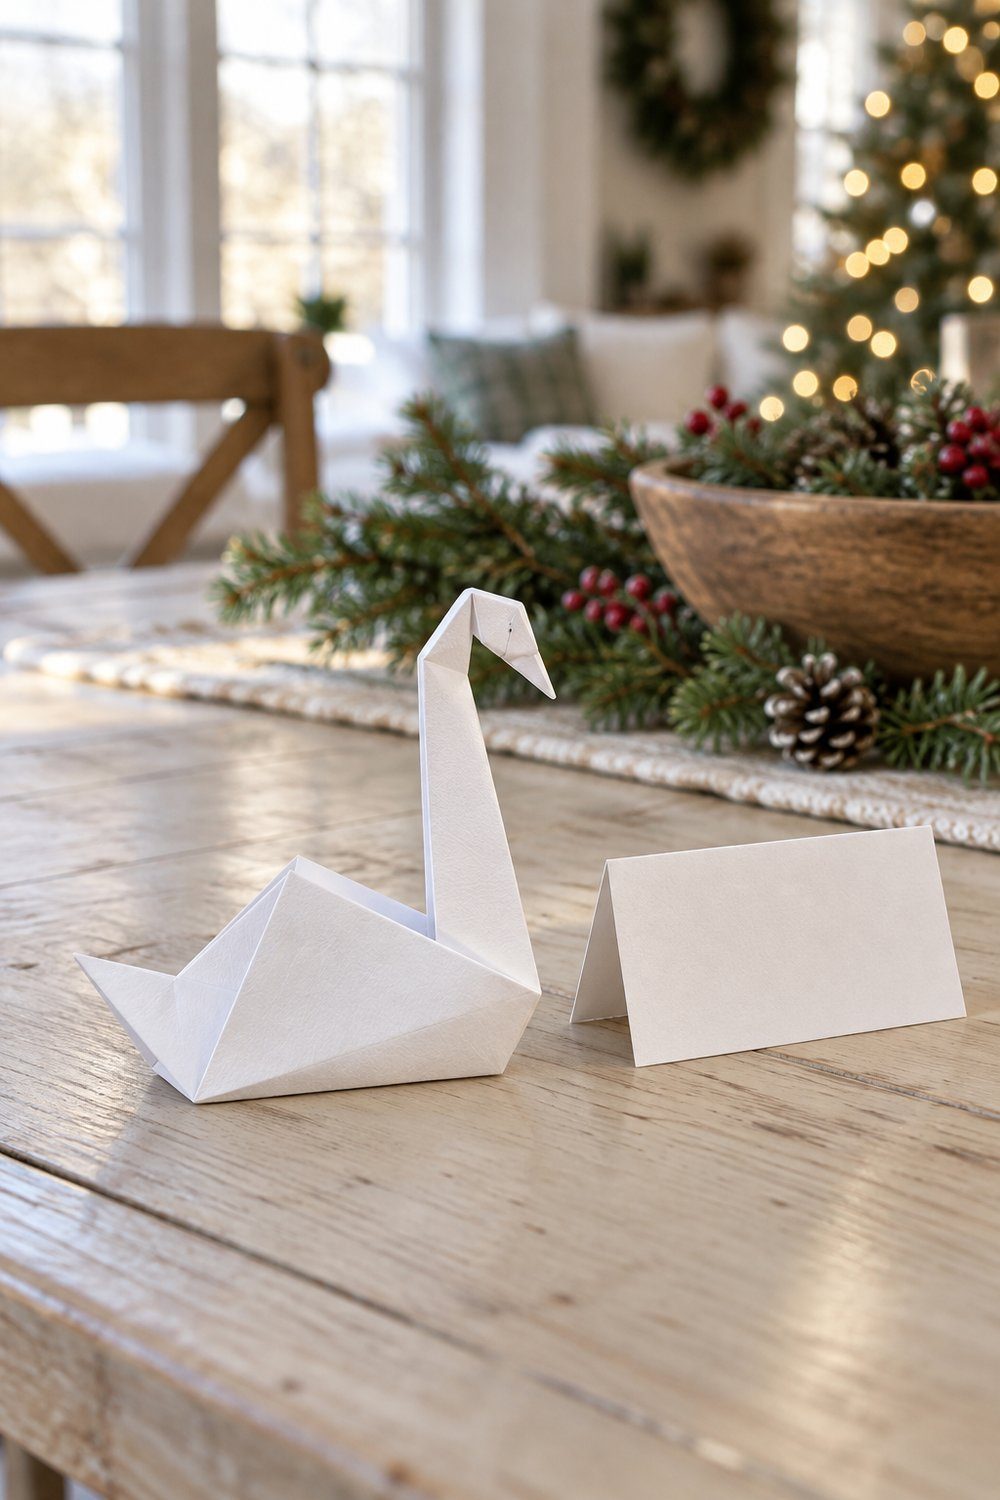
A white swan brings a calm, graceful shape to a Christmas place setting or a branch display. After the first kite, turn it over and fold the outer edges toward the center again. Bend the narrow point upward for the neck and its tip downward for the head, then fold the body lengthwise and raise the neck. Keri rates this as an easy project; her activity card allows 10 minutes of active folding. The example finishes approximately 3.5 in (9 cm) from nose to tail, small enough to rest beside a place card.
Paper: 1 square, 5 in (13 cm), in origami or craft paper.
Diagram and tutorial by Keri, Backyard Summer Camp
Dimensional origami Santa ornament
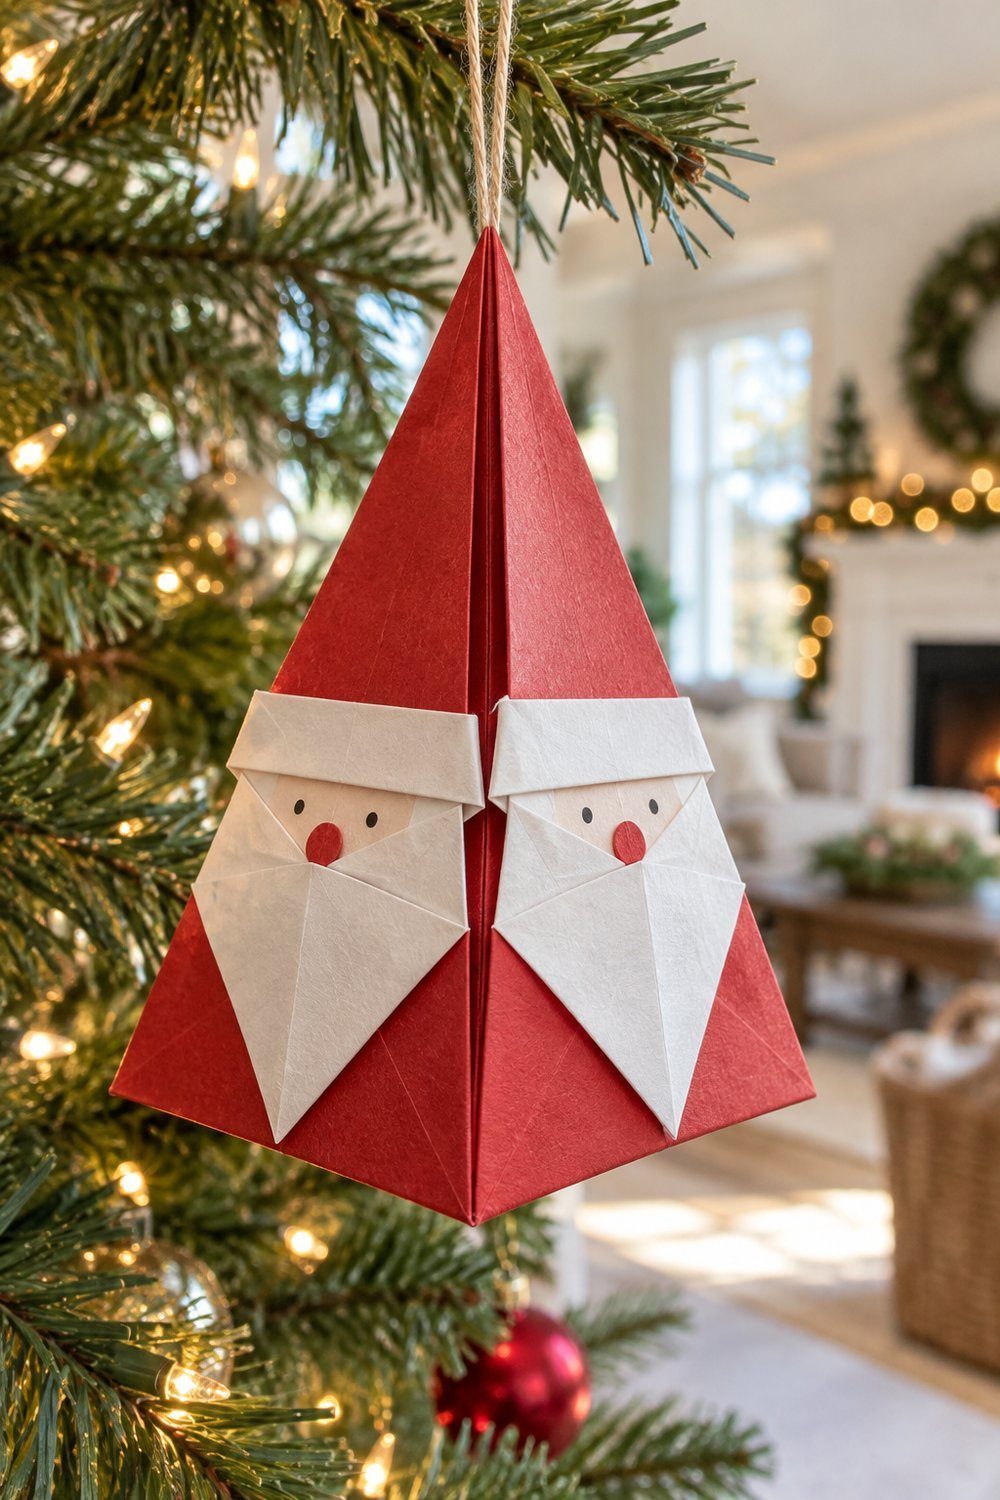
A triangular Santa has a triangular body with a face on each side, so it looks cheerful as it turns on the tree. From each kite, bring the long point to the opposite end. Turn over, fold the white face and beard down, and turn a narrow strip back for the hat brim. Fold the sides behind, draw a nose and repeat the panel; join the panels around a knotted hanging loop with adhesive dots. The source calls the folds easy, with the final assembly adding depth to an otherwise flat Santa.
Paper: 3 squares, each 6 in (15 cm), white on one side and red or patterned on the other.
Diagram and tutorial by Maggy Woodley, Red Ted Art
Miniature folded kite gift decoration

A tiny kite makes an easy gift decoration in red gingham or green patterned paper. After the diagonal guide crease, fold the side edges to the center to form the kite itself. Add the tutorial’s drawn border, then secure the folded flaps and mount the kite on a gift card with foam pads. Finish with a drawn tail and bows on the card. This quick fold is especially useful when you want a flat decoration that travels with a present; the Christmas paper choice is a seasonal adaptation of Gathered’s card topper.
Paper: 1 patterned square, 2 3/8 in (6 cm), using the largest kite size in the tutorial.
Diagram and tutorial by Thomas Poad, Gathered
The showpiece in depth: a modular origami star
Make this origami Christmas star when you want a broad, pointed ornament for a window or a prominent branch. Origami-Instructions.com credits the model to Francisco Caboblanco: 8 identical folded units lock together through their flaps. Treat the unit folding as practice in repetition, then give the assembly your attention.
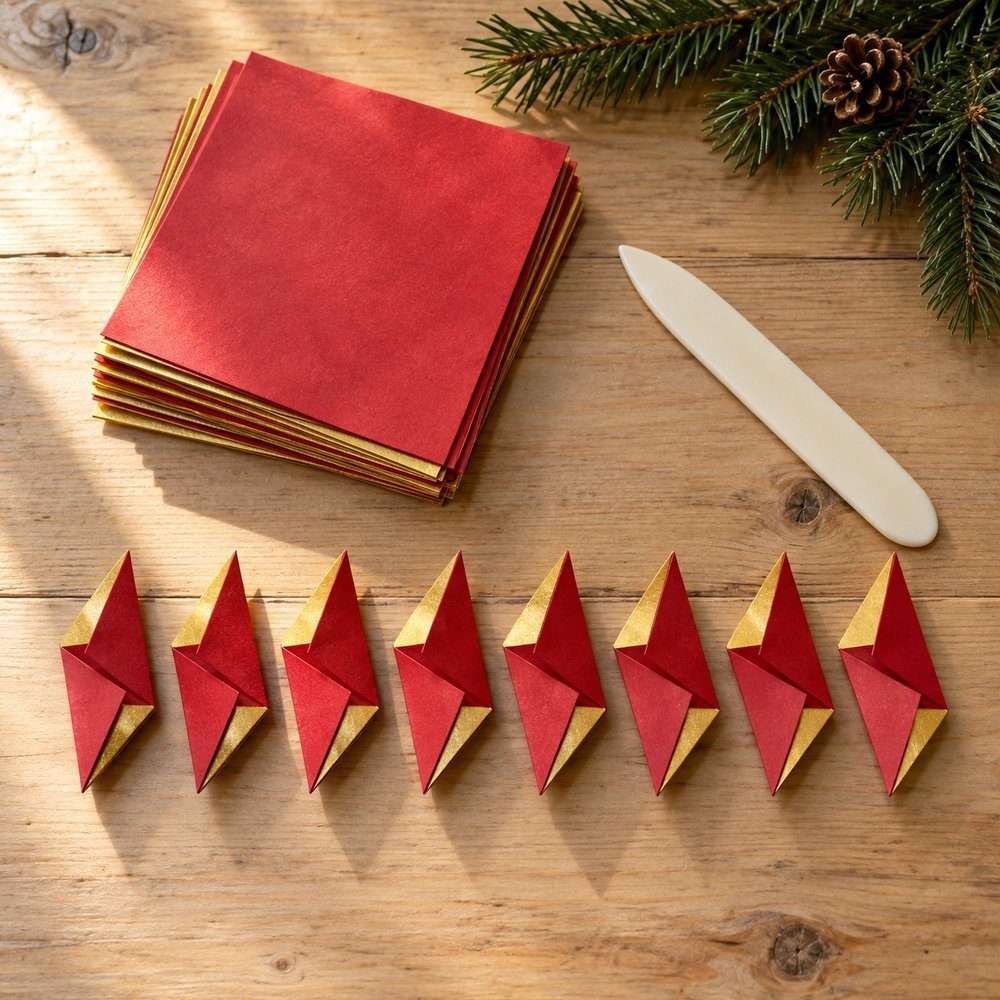
- 8 squares of origami paper, each 6 in (15 cm), matching in size.
- A clear, flat work surface for arranging the units.
- Thread for displaying the finished star; this hanging addition is separate from the folded construction.
- Start color side down. Crease both diagonals and open the square again; fold the left edge toward the diagonal guide shown in the source diagram.
- Make the illustrated mountain fold, then fold only the upper layer’s marked edge to its neighboring reference edge. Keep the lower layers free.
- Turn over, bring the right side to the vertical guide, and fold the bottom tip up diagonally. Repeat the sequence until all 8 units match.
- Open the right side of a unit and insert the next unit, aligning its edges with the first unit’s diagonal crease.
- Bring the first unit’s right tip across and tuck it between the layers of the inserted unit. Push the tip fully into place to lock the pair.
- Repeat that insertion and tuck around the developing star. Keep the points facing outward as the remaining units join the ring.
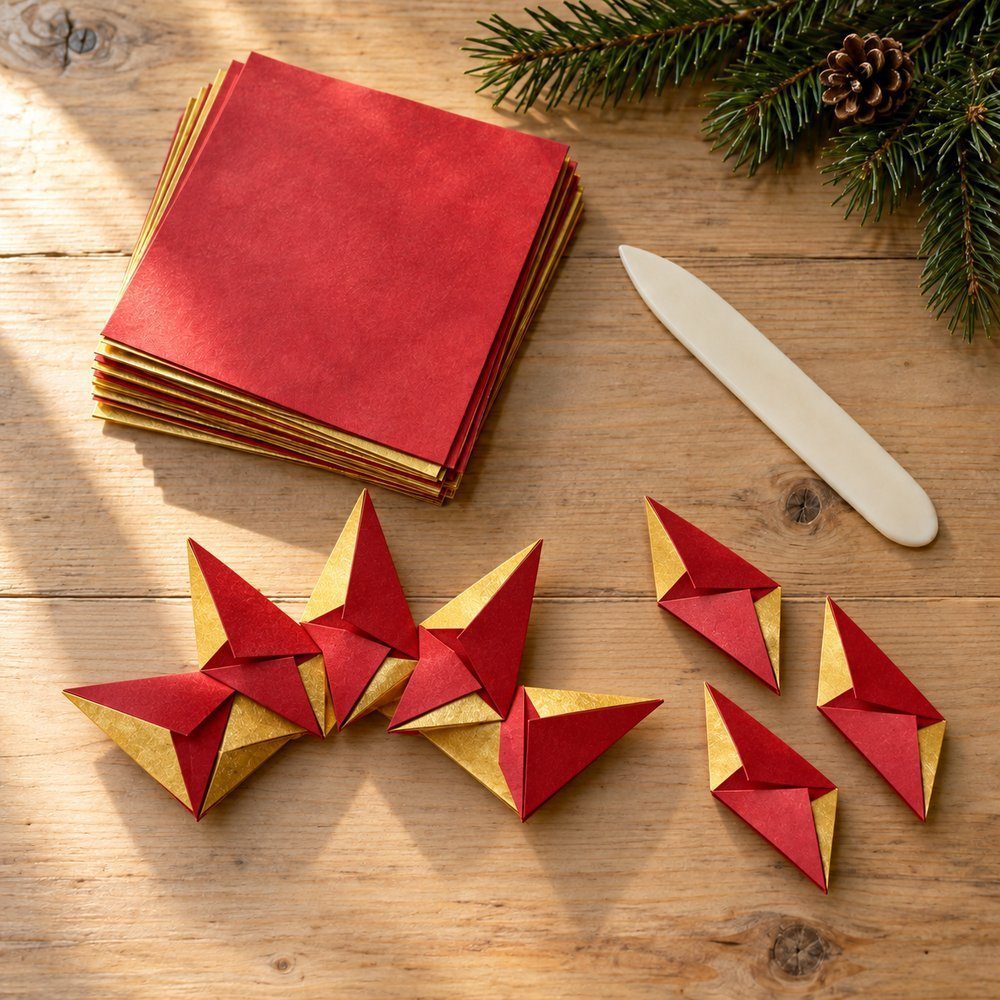
- Turn the star over and lift the starting unit slightly. Bring the units concealed underneath to the front as shown in the assembly photos, then turn back.
- Connect the starting unit into the final unit with the same tuck. Support the assembled center and thread a loop through the finished star.

Diagram and tutorial by Origami-Instructions.com; follow its linked assembly page for the close-up connections.
For a moving demonstration of modular assembly, watch Origamite fold a different modular star from 6 units. This model differs from the showpiece above, so use the written tutorial for that exact star and the video to see how separate folded units come together.

The square base
The preliminary base collapses a creased square into a smaller layered square, usually held like a diamond. Make the diagonal and side-to-side creases in opposite directions, then bring the corners together along the existing folds. These projects use that same beginning for very different results: a stacked tree, a small open box and an interlocking pendant.
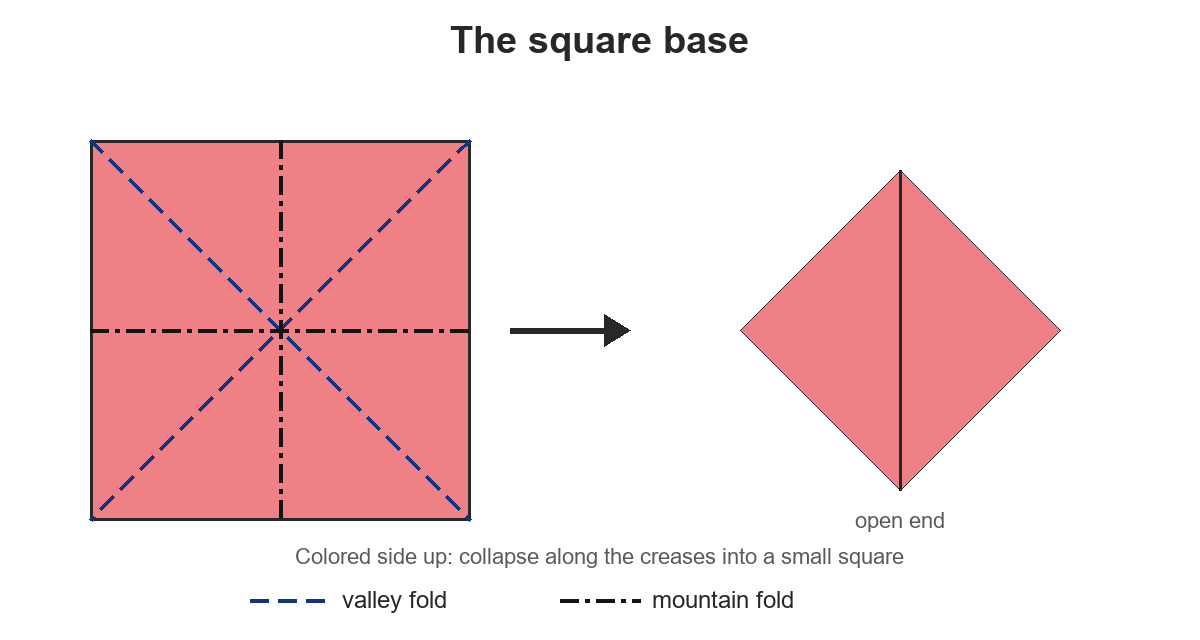
Blue dashed lines show valley folds, black dash-dot lines show mountain folds and solid outlines show paper edges; the result is a collapsed layered square, also called the preliminary base.
Stacked origami Christmas tree
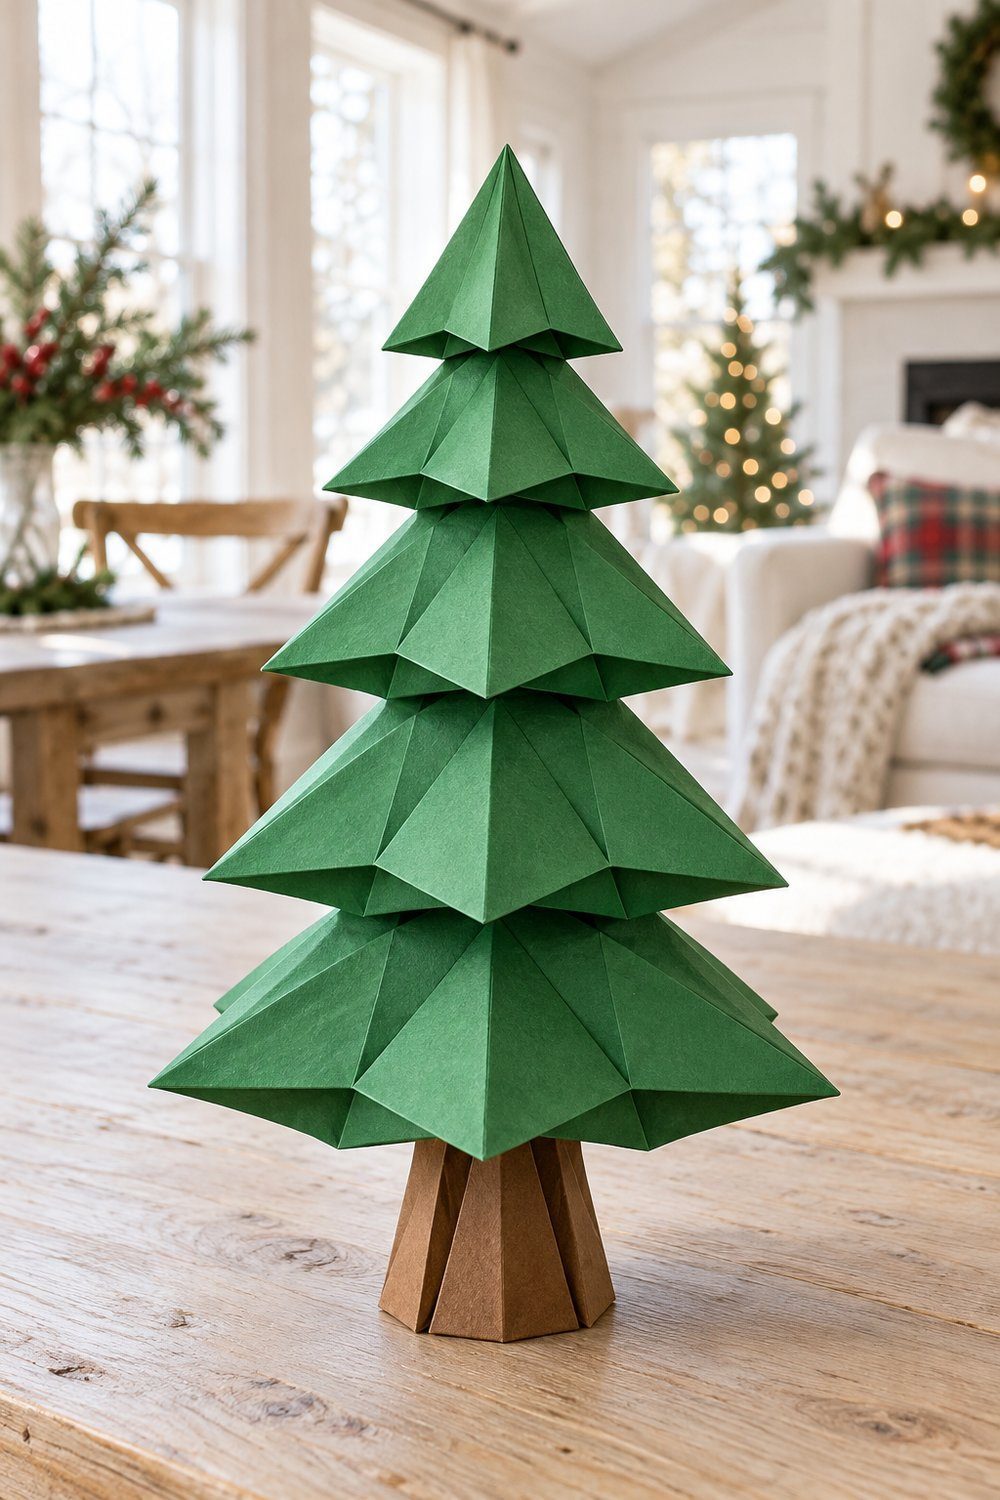
On a table, this stacked tree has sharply folded shelves and more presence than a flat silhouette. From each square base, fold the bottom point upward on the front, back and remaining layers. Reopen and tuck the small triangular sections into pockets to form the shelves. Make the trunk from another base, then push the completed sections together. The shelf folds need care: repeat the shelf folds carefully, and place the finished tree where guests can appreciate its layered construction from every side.
Paper: 5 canopy squares: 9, 8, 7, 6 and 5 in (23, 20, 18, 15 and 13 cm); plus a 9 in (23 cm) square for the trunk.
Diagram and tutorial by Ellie Kneeland, B+C Guides
Origami star-rimmed box
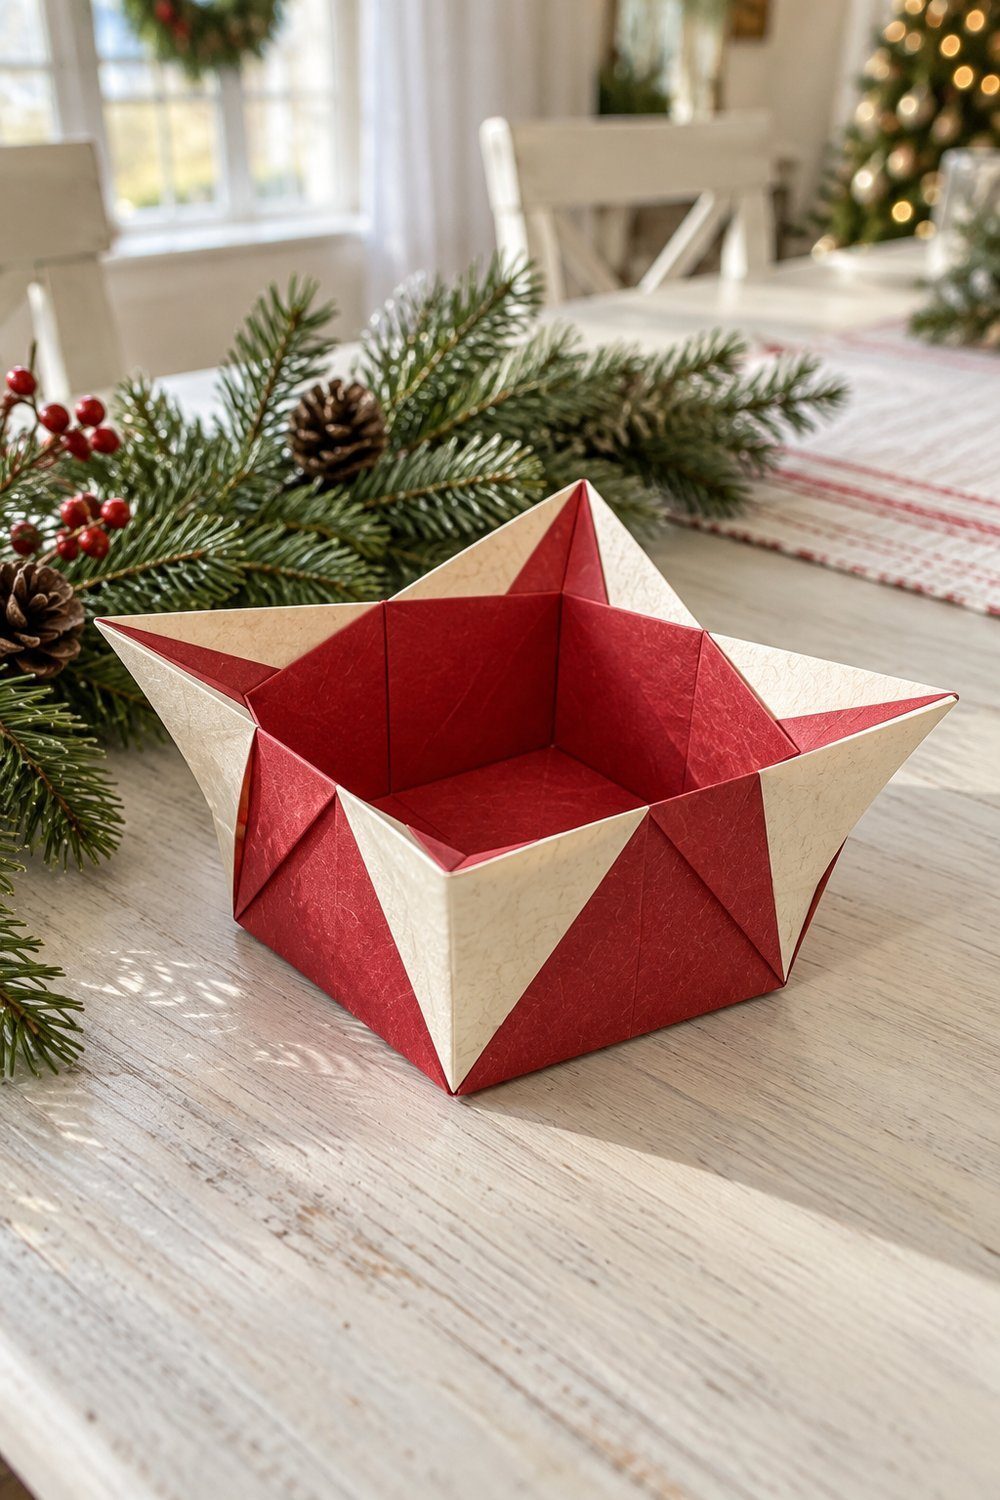
An open box has a pointed rim and a small flat bottom, making it a useful Christmas table decoration for a written wish or a place card. From the square base, fold the upper edges inward, then open and squash the flaps according to the diagrams. Fold the rim sections down and crease the bottom before opening the container. It is a beginner project with some careful flap work; the source gives a folding time of 5–10 minutes. Let the rim remain the focal point by choosing a simple paper pattern.
Paper: 1 square of kami, 6 in (15 cm).
Diagram and tutorial by Florent Fabre, Origami.me
Interlocking geometric paper pendant
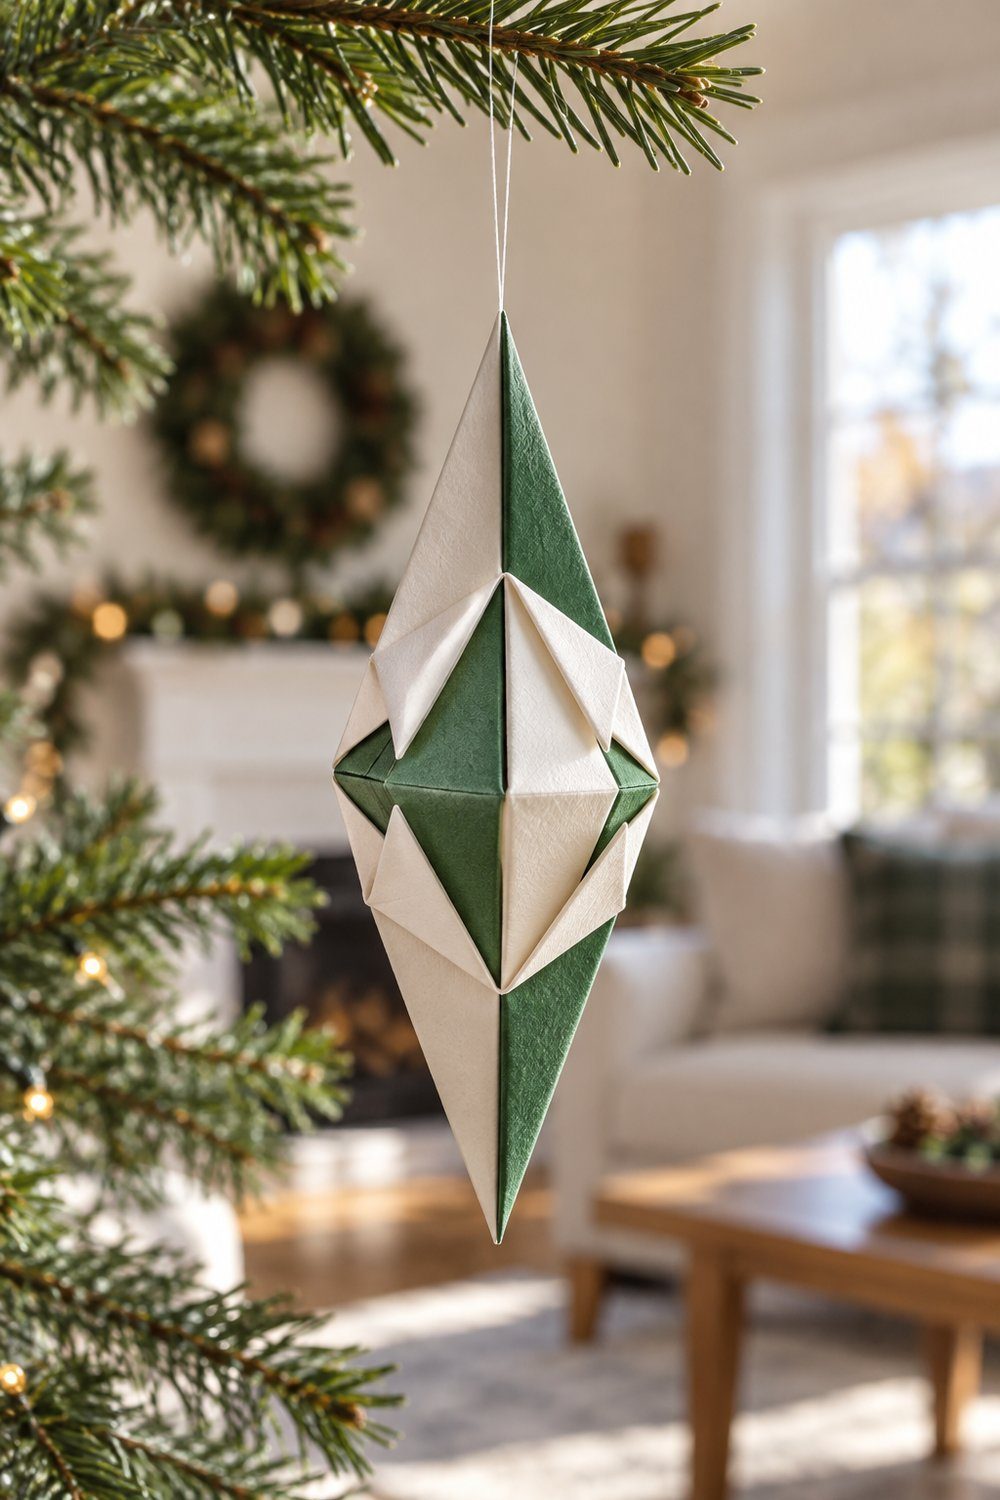
A compact angular pendant joins matching folded halves into a closed hanging decoration. From each square base, bring the outside edges to the center on both faces. Fold the bottom corner upward on each face, then press the outside edges together as shown; repeat for the matching half and slide the pieces into one another. The folds are short, but the interlocking stage needs care. Thread the hanging end before closing the halves, and use contrasting paper so the join becomes part of the finished pattern.
Paper: 2 squares, each approximately 3 in (7.5 cm), in thin origami paper.
Diagram and tutorial by Kate, Mini Eco
The waterbomb base
The waterbomb base collapses into a layered triangle instead of the square shape above. Fold the square across its center lines, turn it over for the diagonals, and gently bring the side creases inward until the triangle lies flat. Those broad flaps become an airy bauble, butterfly wings or lily petals, depending on the folds that follow.
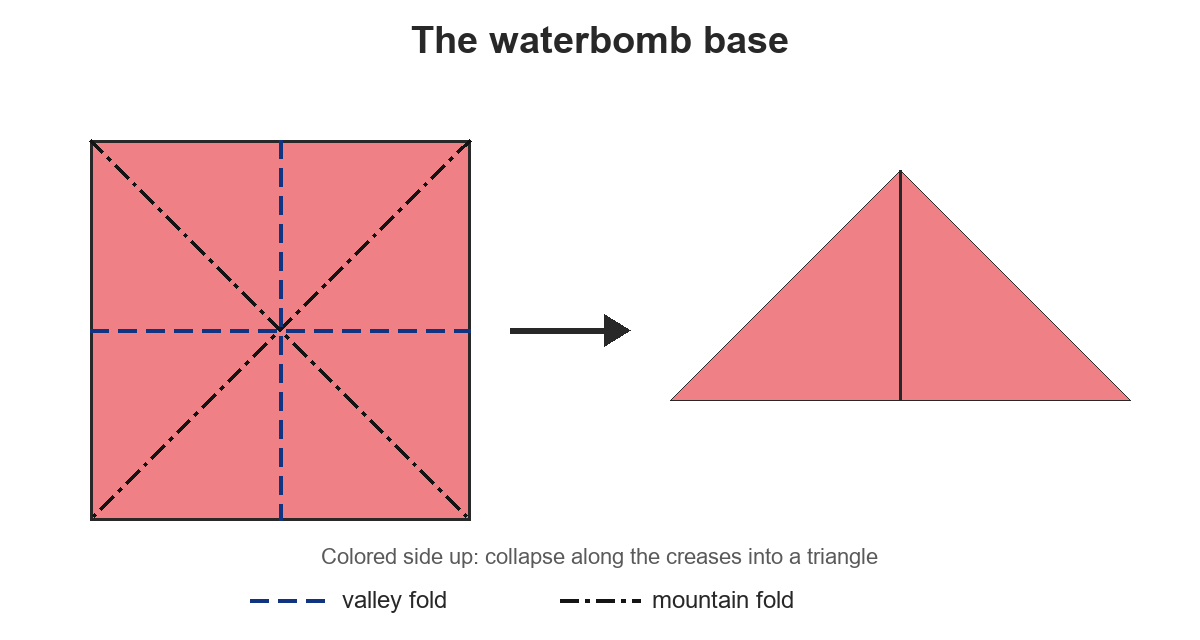
Blue dashed lines show valley folds, black dash-dot lines show mountain folds and solid outlines show paper edges; the result is a collapsed triangular waterbomb base.
Inflated paper waterbomb bauble
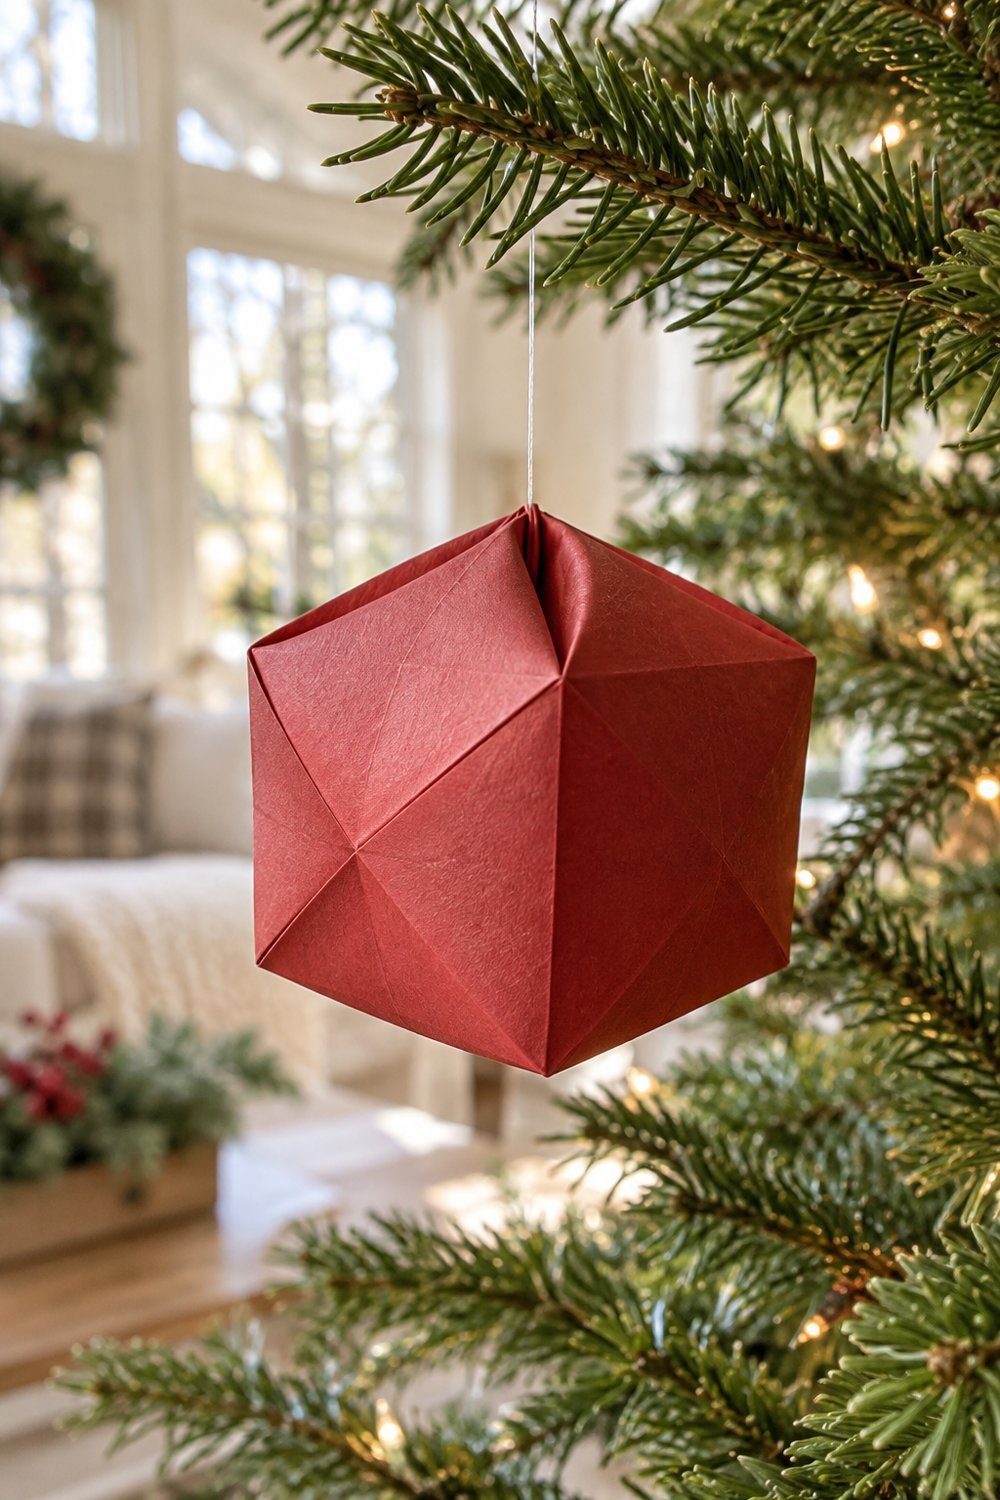
The waterbomb makes a hollow, softly angular bauble that catches light along its flat faces. After forming the base, fold the front edges toward the center as diagrammed, shape the upper corners, and tuck the little flaps into their pockets. Repeat behind, then open the sides and puff air gently into the small hole while guiding the top into shape. This is an easy model; the source gives less than 5 minutes of folding time. Add thread through a sturdy folded flap to use it as an air-filled tree ornament.
Paper: 1 square of light, crisp kami, 6 in (15 cm).
Diagram and tutorial by Jimena Candia, Origami.me
Origami butterfly branch ornament
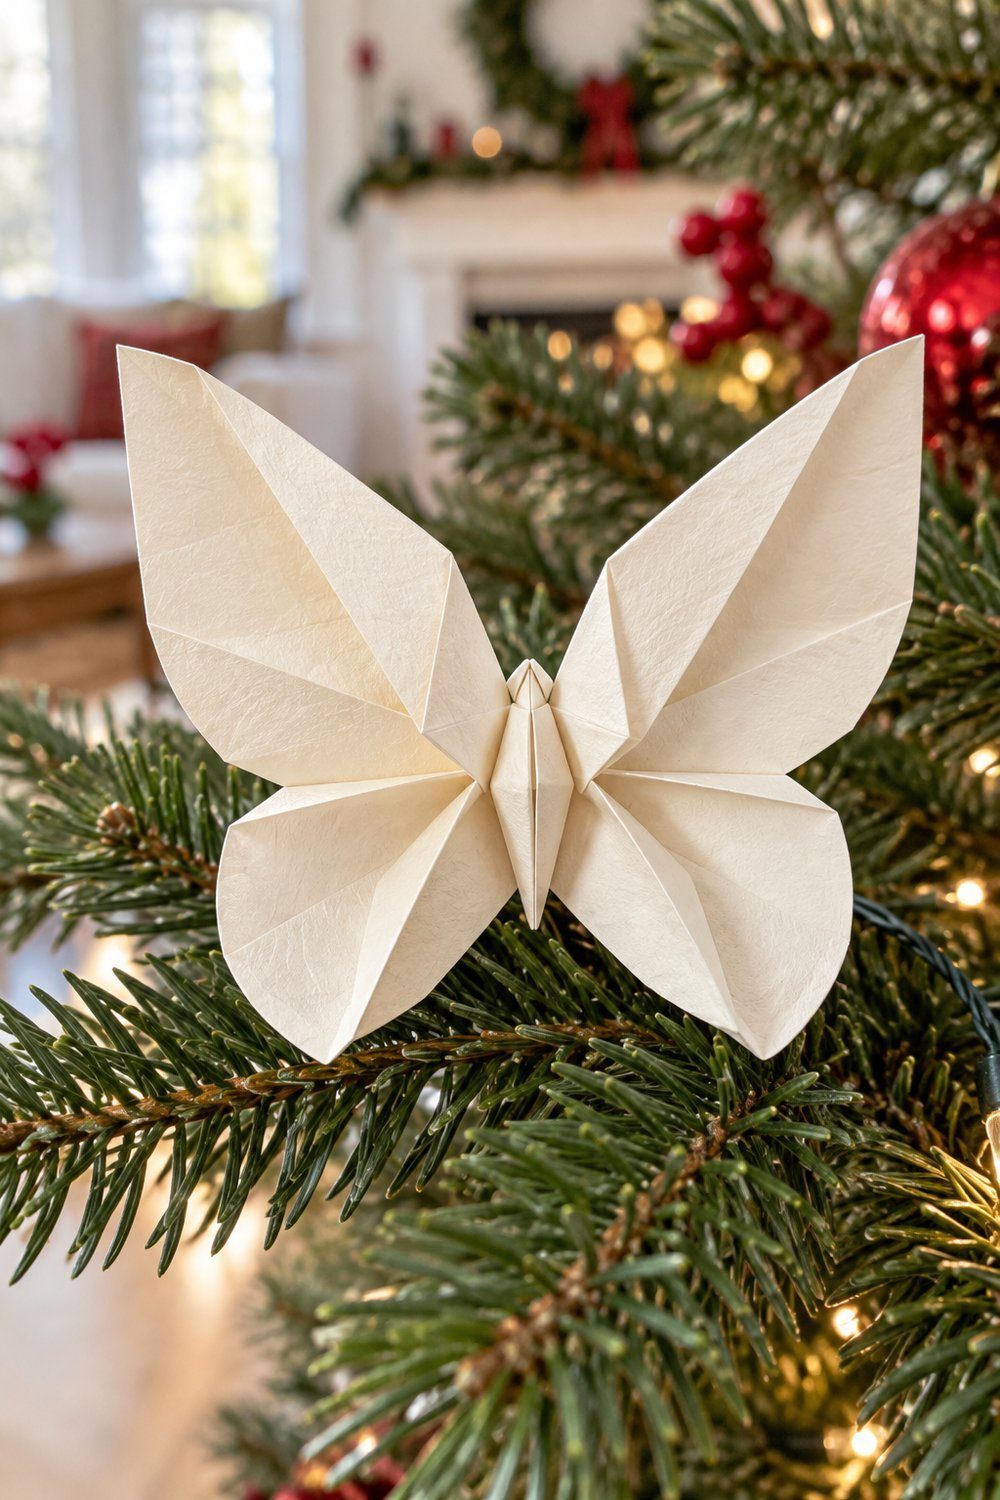
A folded butterfly adds a light woodland detail to the Christmas tree, especially in cream or muted red paper. From the waterbomb base, fold the side corners upward and turn the piece over. Pull the opposite tip just beyond the edge, flatten the shifted wing corners, then fold the tip over and pinch the body before angling the wings. Sherry presents this version of an Akira Yoshizawa butterfly as simple. Let the raised wings stay slightly open, and nestle the butterfly on a branch or attach it to a wrapped gift.
Paper: 1 square, 6 in (15 cm), the practice size recommended in the tutorial.
Diagram and tutorial by Sherry Gerstein, B+C Guides
Curled-petal origami lily ornament
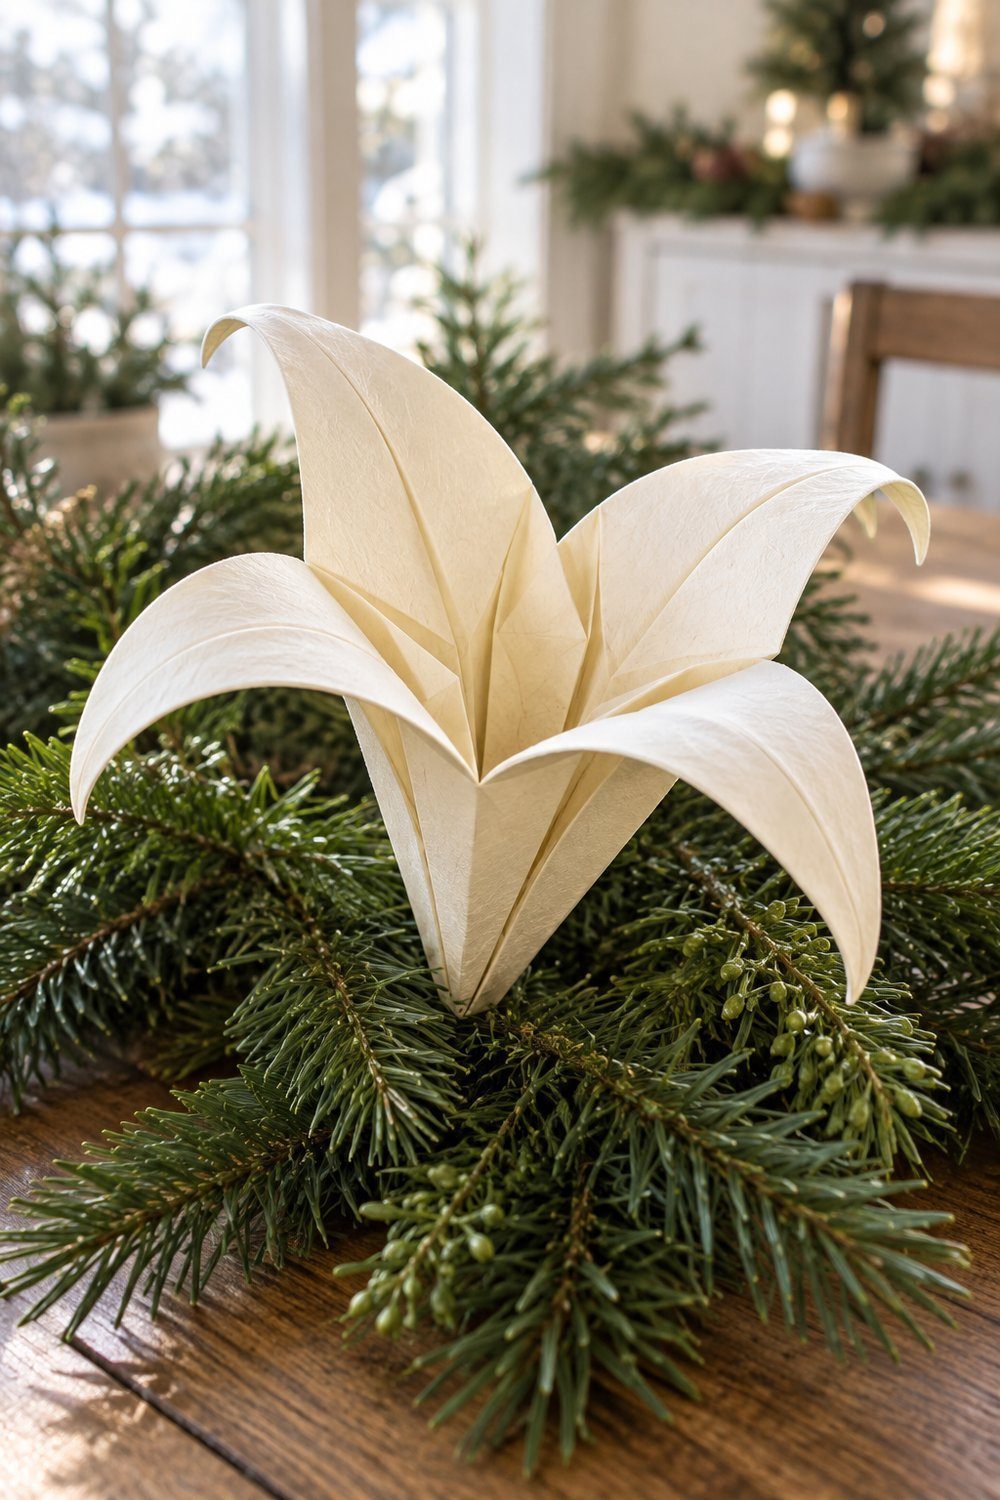
A cream lily adds a floral accent to the tree, with pointed petals curling away from a narrow center. After the waterbomb base, squash its corners into the layered kite form. Precrease the lower edges and top point, then lift the lower flap into the petal fold and repeat around the model. Narrow the edges, open the petals and curl them gently around a pencil. This is the intermediate option in the group because the petal folds need care. Rest the finished flower in table greenery or fasten it to a gift.
Paper: 1 square, 6 in (15 cm), in origami paper.
Diagram and tutorial by Origami-Instructions.com
Hanging, storing and next year
Use fine thread or a narrow ribbon loop, then slip an ornament hook through the loop to reach the branch. Position the hanging point over the ornament’s center of balance. For the interlocking pendant, pass the thread through before closing the halves; support the modular star at its joined center while moving it.
Store flat kites between clean sheets of paper, and box the swans with the other dimensional pieces. Keep Santas, lilies, the star and inflated baubles in separate boxed spaces. Unclip the rosette for flatter storage. Choose a dry indoor cupboard, away from humidity and window condensation.
Next step: Plan another family craft session with Christmas crafts with toilet paper rolls, add natural texture with Christmas pinecone decorations, or pair the paper folds with dried fruit Christmas decorations.