Christmas crafts with toilet paper rolls

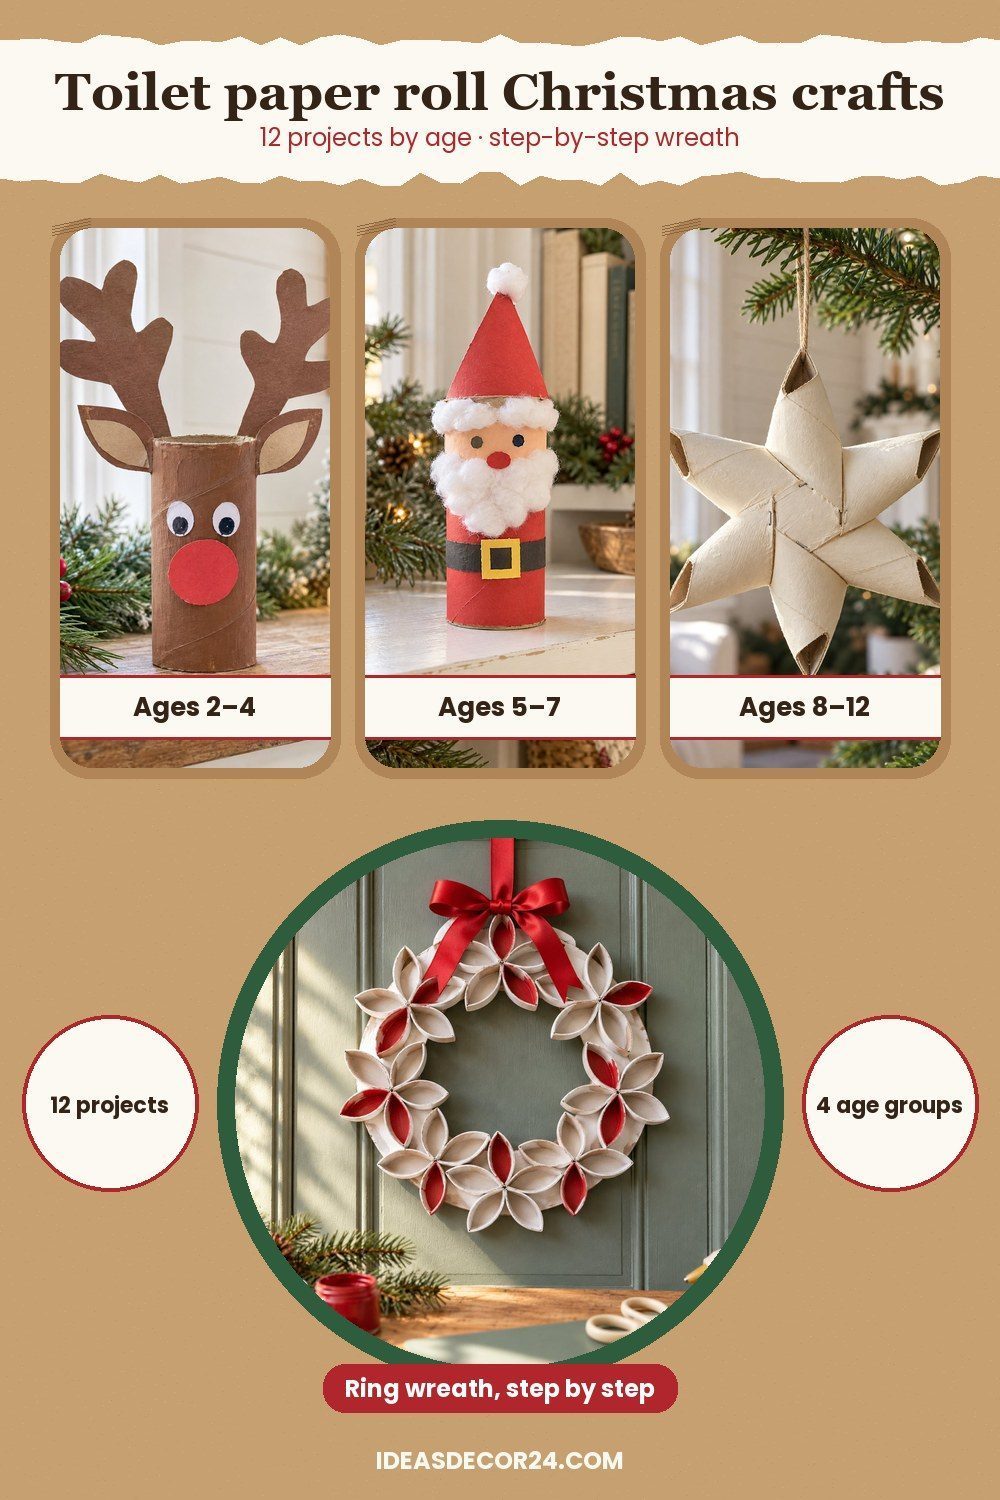
Choose Christmas crafts with toilet paper rolls by who can handle the steps: ages 2 to 4, ages 5 to 7, ages 8 to 12, and teens and grown-ups. Here are 12 projects, plus a detailed ring wreath. Save 24 rolls for the Advent countdown and 10 more for the wreath; gather the smaller projects separately. A pinched-roll stamp is the quickest toddler starting point, while the painted petal wreath is the grown-up showpiece.
How many rolls and what else to collect
Start with clean, dry tubes, scrap paper, paint, white school glue, scissors, ribbon, and a protected work surface. The table gives published quantities where available; n/a means the tutorials leave the mixed batch total unspecified. Ages here describe the division of work, rather than tested age ratings. For everyday uses, see Original Ideas with Toilet Paper Rolls at Home; for a different material route, try Cardboard Christmas Decorations: Cheap and Creative.
| Age group | Projects | Rolls needed | Grown-up does |
|---|---|---|---|
| Ages 2 to 4 | 3 projects: reindeer, snowman, stamps | n/a | All cutting, hanging loops, final assembly |
| Ages 5 to 7 | 3 projects: Santa, elf, angel | n/a | Guide safety scissors and secure halo wire ends |
| Ages 8 to 12 | 3 projects: penguin, star, countdown | 3 rolls per star; 24 rolls per countdown; penguin n/a | Help with stapling, small parts, and display |
| Teens and grown-ups | 3 shelf projects plus the wreath | 10 rolls for wreath; mixed shelf batch n/a | Craft knife, hot glue, light fitting, hanging |
Ages 2 to 4
Set out broad brushes and large paper shapes, then let the child choose the face and colors. An adult handles every cut and the hanging cords. Googly eyes, pompoms, and beads are not for under-3s; use drawn features and generous paper shapes for that group. Stay alongside the child while painting and sticking.
Paper-antler reindeer
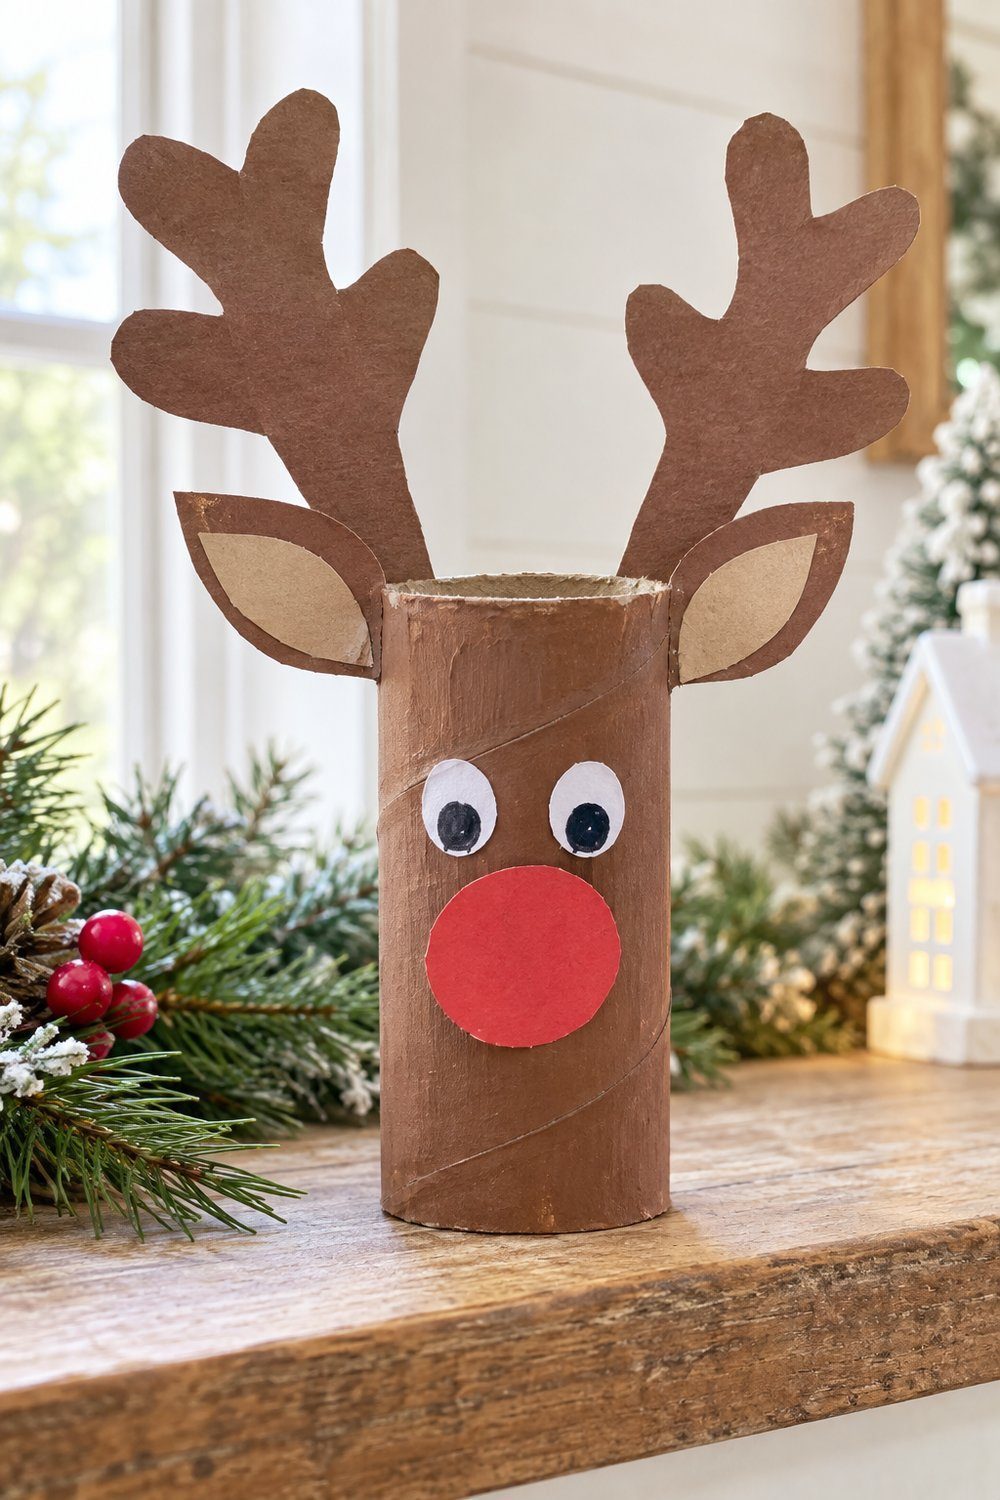
A brown tube, branching antlers, and a bright paper nose make a cheerful reindeer for a low Christmas display. Have the adult cut the antlers, ears, and face pieces from scrap paper using the linked shapes as a guide. The child can paint the roll brown, then stick the pieces onto the dry tube with help placing the antlers inside the rim. Finish with white paper circle eyes with drawn pupils. This is a paper-nose adaptation of the source's glitter-paper version; the source lists 10 minutes total, before any added paint drying.
Materials: Toilet paper tube, brown and white paper, plain red paper, paint, marker, white glue; source total 10 minutes.
Tutorial by Mommy Made That
Snowman ornaments from stacked tube rings
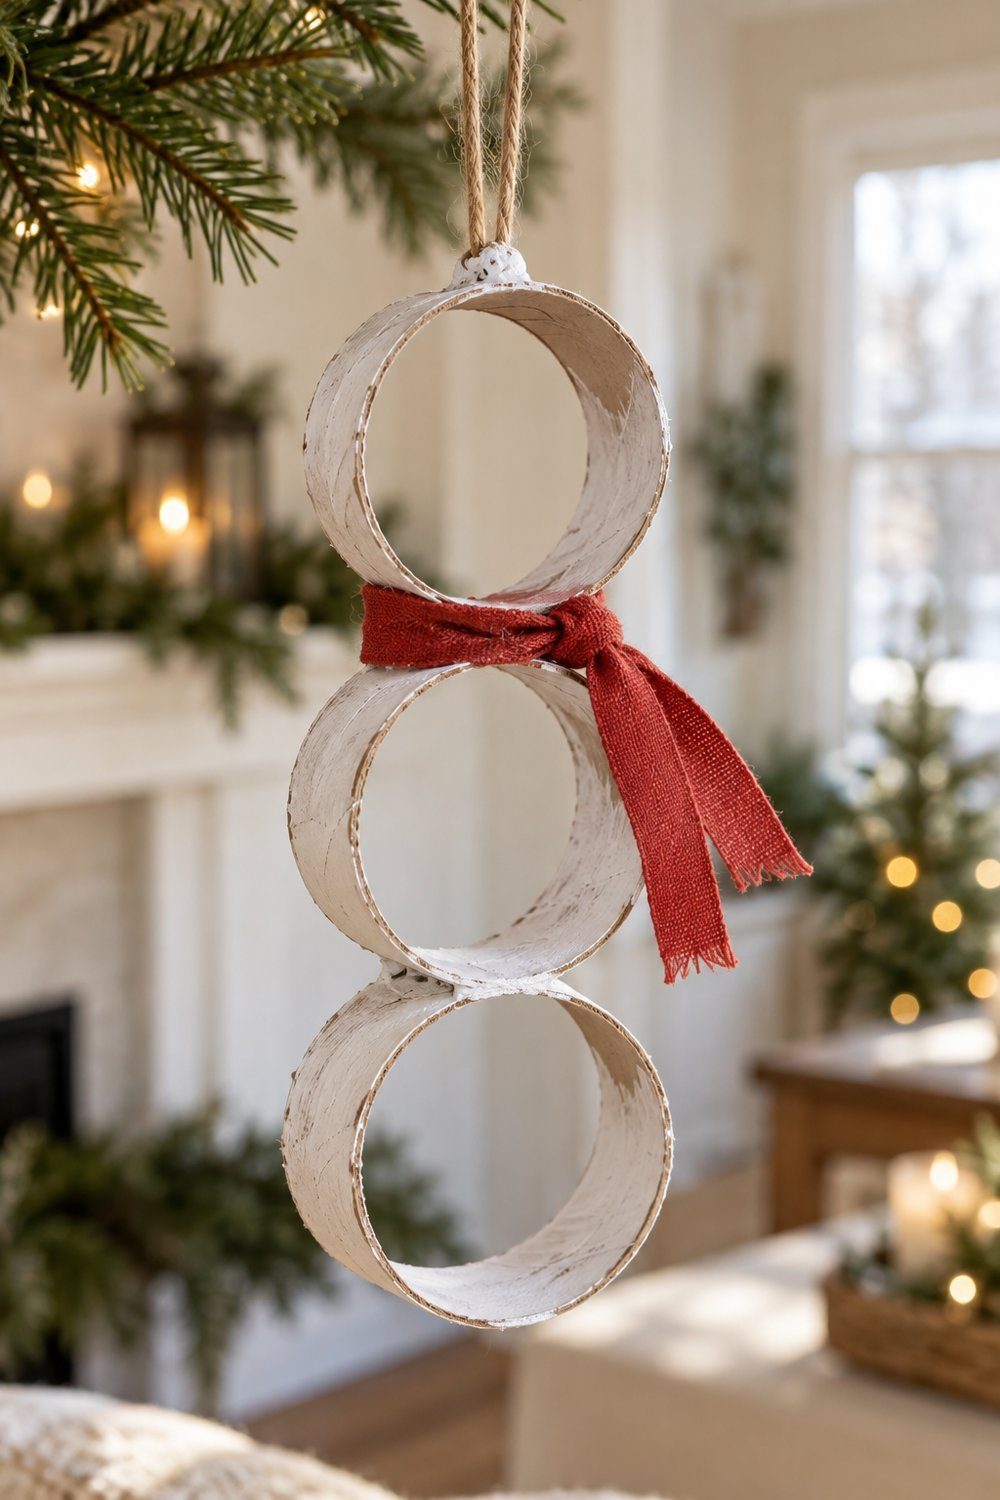
Open white rings give this snowman a lighter look than a solid standing figure. An adult cuts the tube into 3 equal pieces; the child paints the rings white and leaves them to dry. Help the child arrange and glue the rings in a vertical stack, then have the adult secure a ribbon scarf and hanging loop. Hang the finished snowman from an indoor branch where its open shape shows against greenery.
Materials: Toilet paper tube cut into 3 pieces, white paint, white glue, ribbon, hanging string.
Tutorial by The Resourceful Mama
Christmas light stamps from pinched rolls
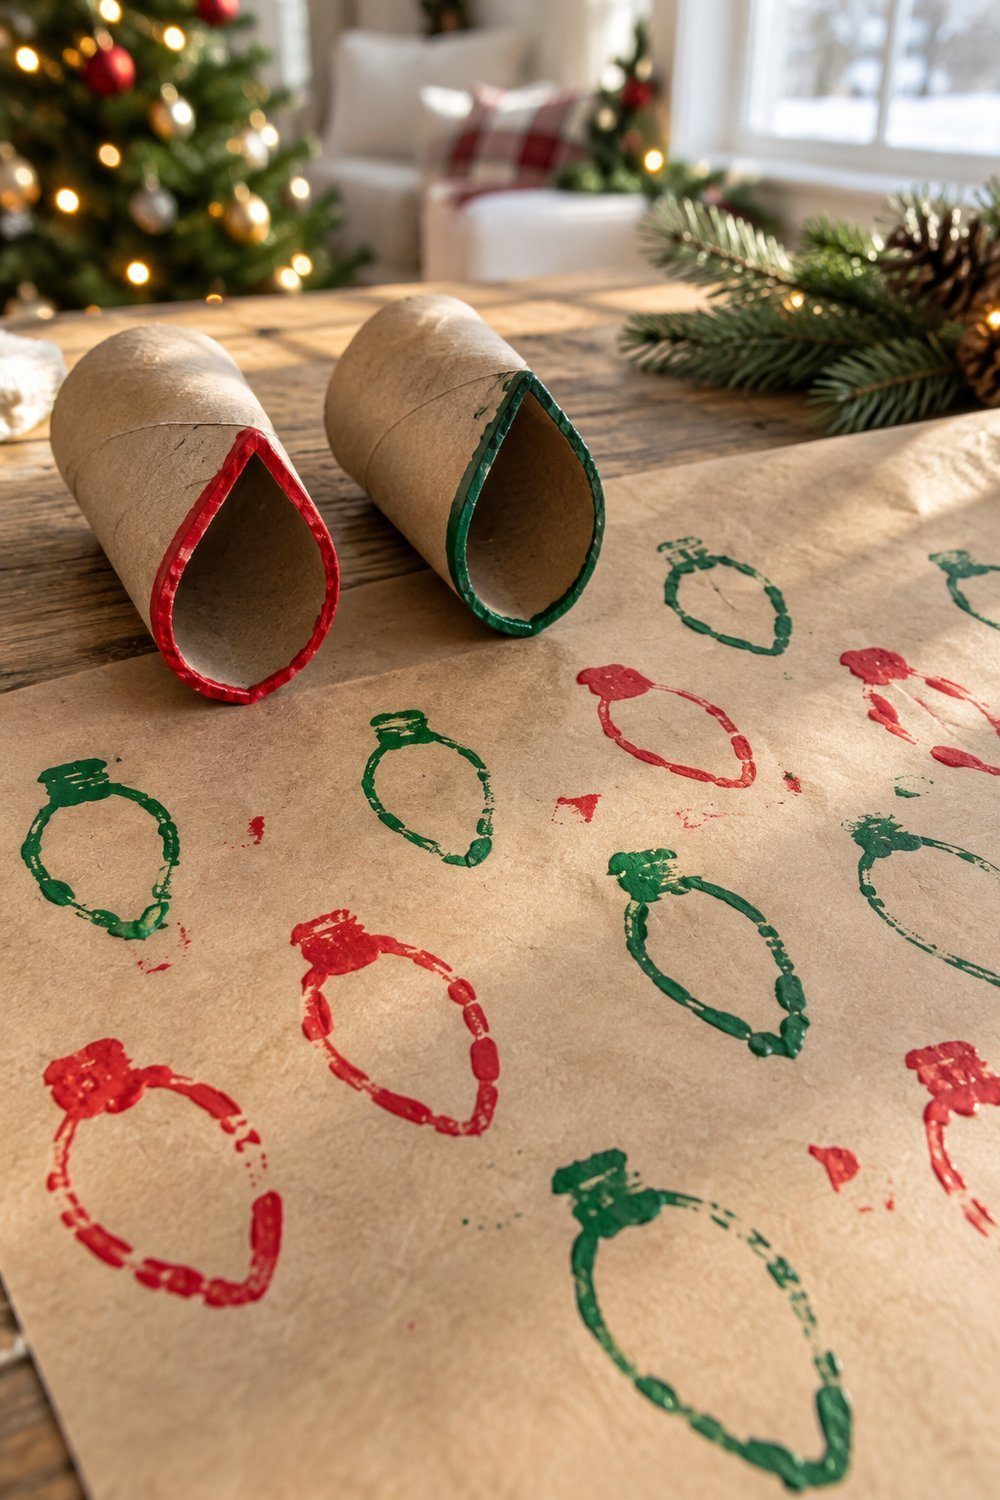
For the fastest start, turn the end of a roll into a teardrop and stamp Christmas light outlines onto kraft paper. The adult prepares the paper and shapes the tube; the child dips its edge into paint, presses it down, and lifts it away. Repeat across the sheet, then let it dry flat before using it as wrapping paper. Glo Pals shows circles and stars as well as teardrops, so choose the easiest shape to grip.
Materials: 1 empty paper roll per stamp, paint, shallow paint plate, kraft paper; per-stamp quantity is an editorial allocation. Choose child-appropriate washable paint for this adaptation.
Tutorial by Brittney LeighAnn Dowell, Glo Pals
Ages 5 to 7
Give this group safety scissors, white glue, and paper that bends around a tube easily. Children can cut broad strips and assemble their own figures; adults help with curved faces, cone hats, and any slippery decorations.
Santas with cotton beards
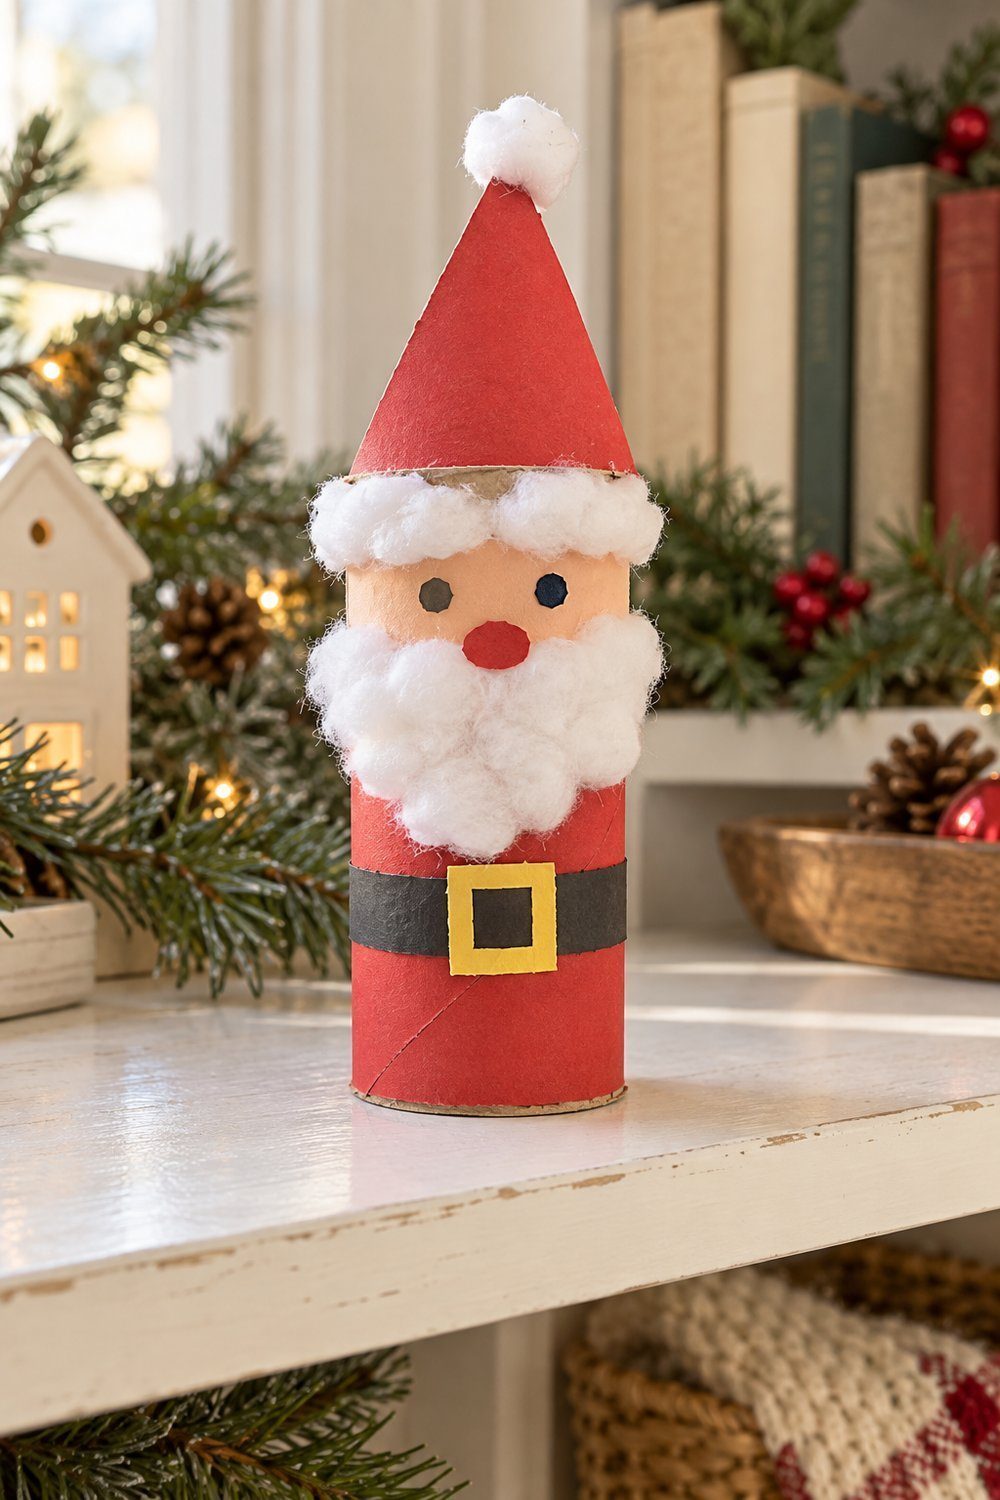
A red paper coat and cotton beard make Santa recognizable from across the room. The child cuts and glues a red wrapper around the tube, then adds a black paper belt and a face shape. An adult helps cut the face curve and hat triangle before the child glues on cotton trim and facial details. Stand Santa on a bookcase beside holiday cards. Kate Williams lists 20 minutes total for her version; allow the glue to set before moving yours. A yellow paper buckle is an easy substitute for the original jewel.
Materials: Toilet paper tube, red, black, yellow and skin-tone card, cotton wool, white glue, marker, optional small decorations; source total 20 minutes.
Tutorial by Kate Williams, Crafts on Sea
Elves with green cone hats
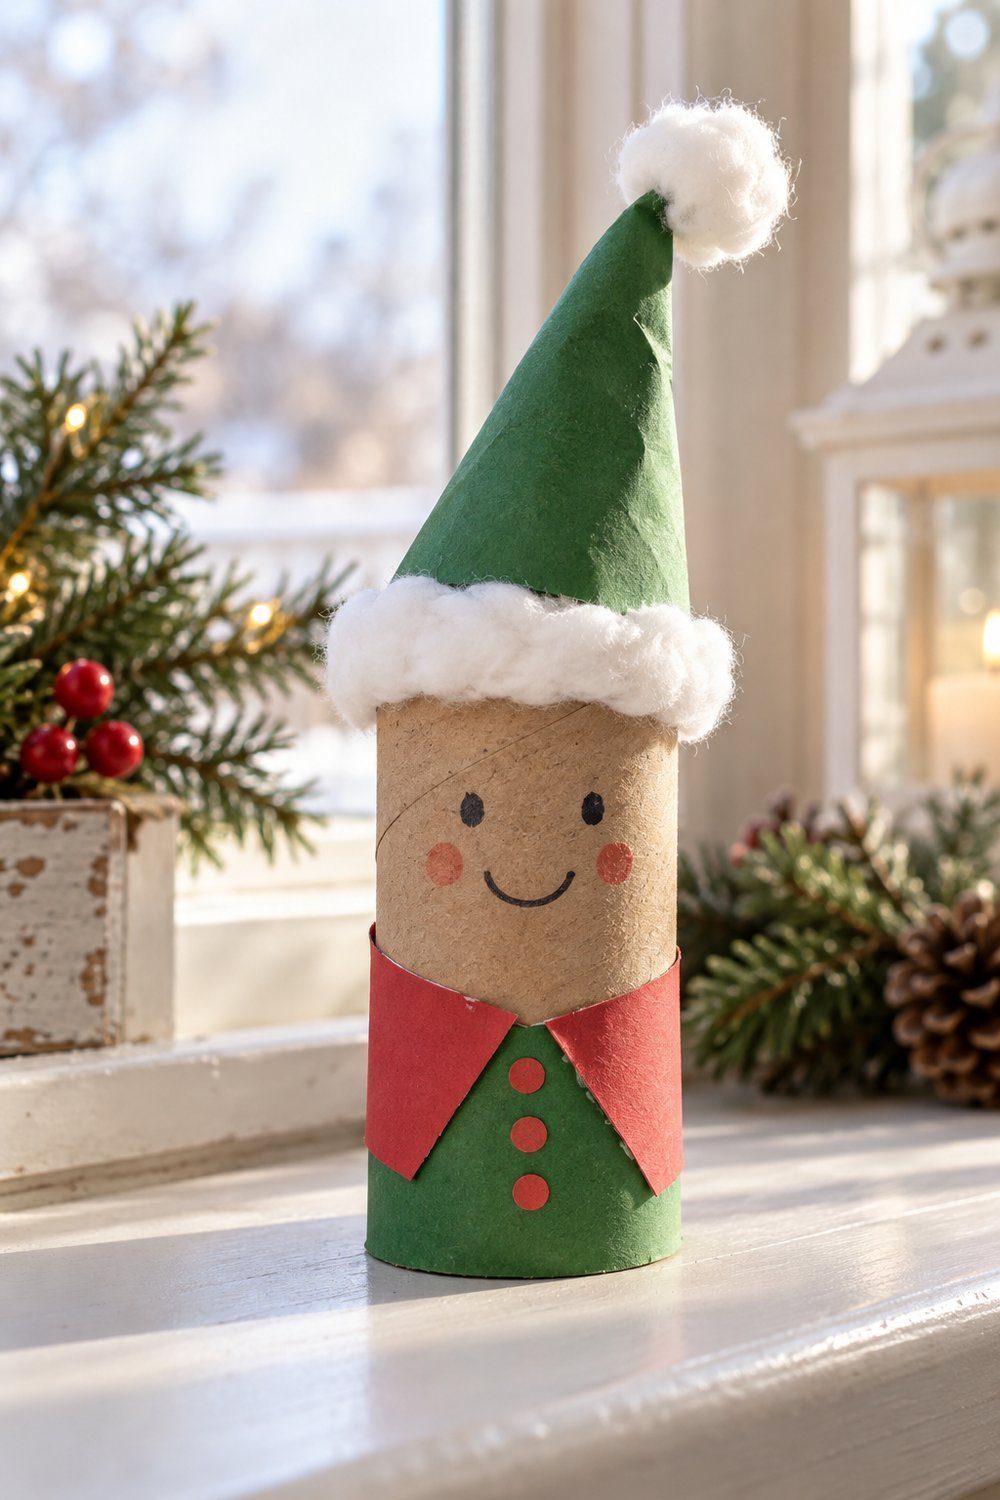
A pointed green hat and matching jacket turn a tube into Santa's helper. Have the child cut and glue a green strip around the lower tube, then curl a separate paper arc into a hat. The adult holds the cone seam while the child presses it together; finish with cotton trim, a drawn smile, and the source's little decorations if suitable. Display the elf beside Santa on the sill. This white-glue, plain-paper adaptation replaces glitter foam and hot-glued details. Marci's 17 minutes covers all three characters.
Materials: Empty tube, green paper, cotton, white glue, marker, optional buttons and pompoms; original set total 17 minutes.
Tutorial by Marci, DIY & Crafts
Angels with feathered wings
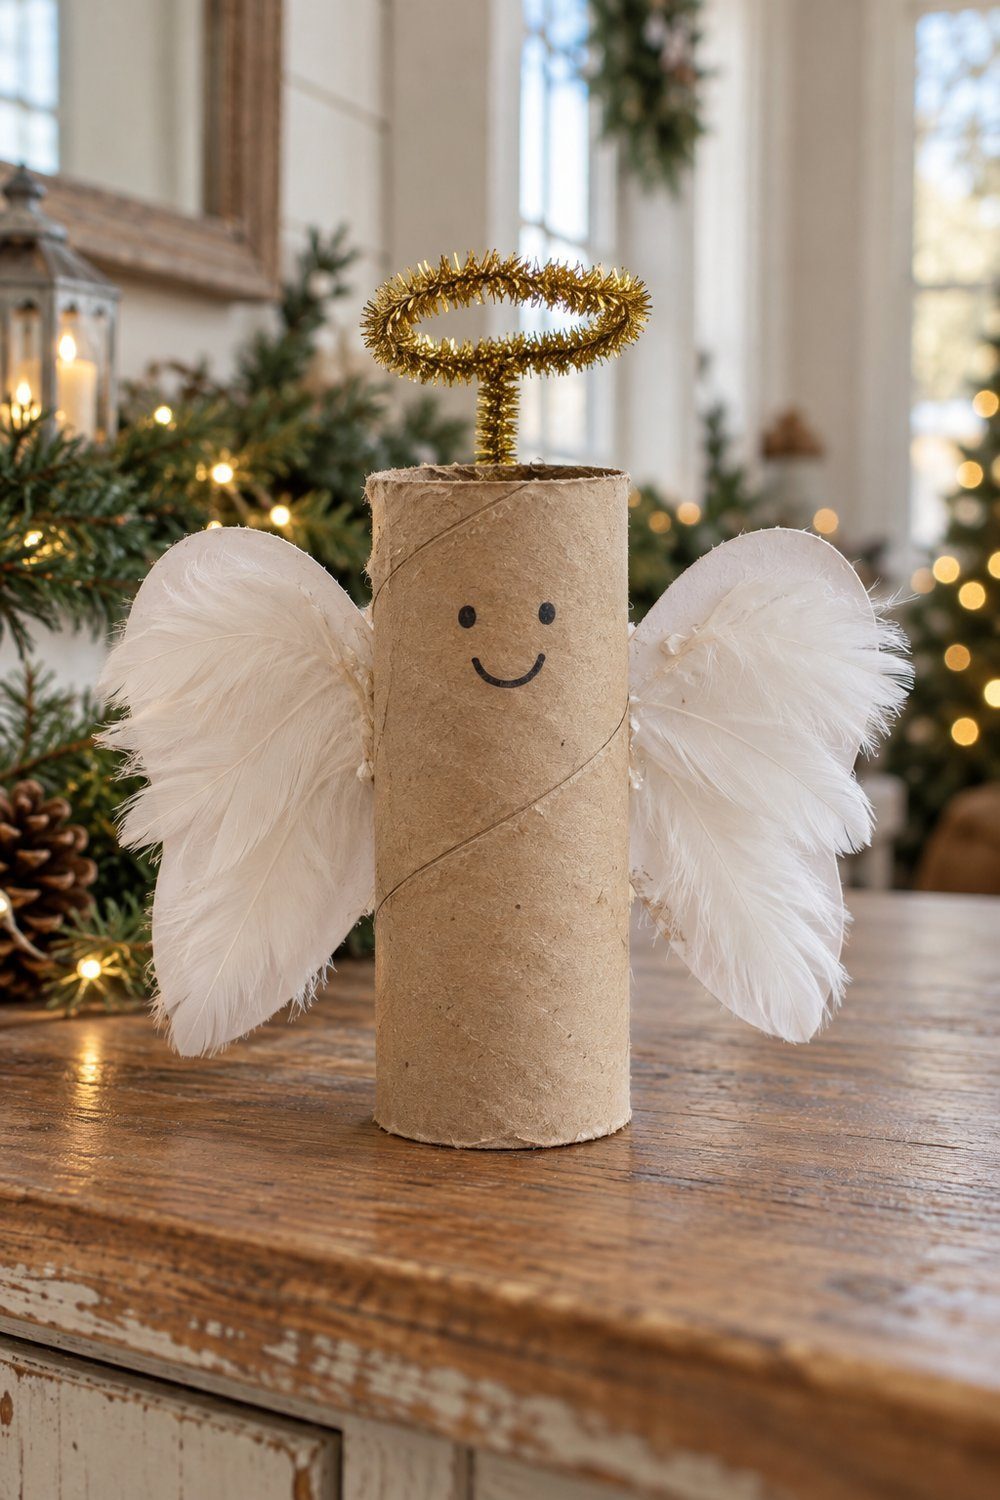
White feathered wings and a gold halo frame a plain kraft tube with a drawn smile. Adapt Leanne Guenther's paper-roll angel by omitting the printed dress, face, and hair and drawing directly on the tube. For ages 5 to 7, an adult outlines paper wings; the child cuts with safety scissors, adds white feathers, and glues the wings behind the tube. An adult bends a gold pipe cleaner into a halo, tapes it behind the head, and secures the wire ends. Stand the angel on a sideboard once the glue dries.
Materials: 1 toilet paper roll per angel (our allocation), white paper for wings, white feathers, gold pipe cleaner, glue, tape, markers, safety scissors.
Tutorial adapted from Leanne Guenther, DLTK's Crafts for Kids
Ages 8 to 12
Older children can take over repeated cuts, firm folds, and careful placement of small parts. Keep a grown-up nearby for stapling and sharp wire ends.
Penguins with folded paper beaks
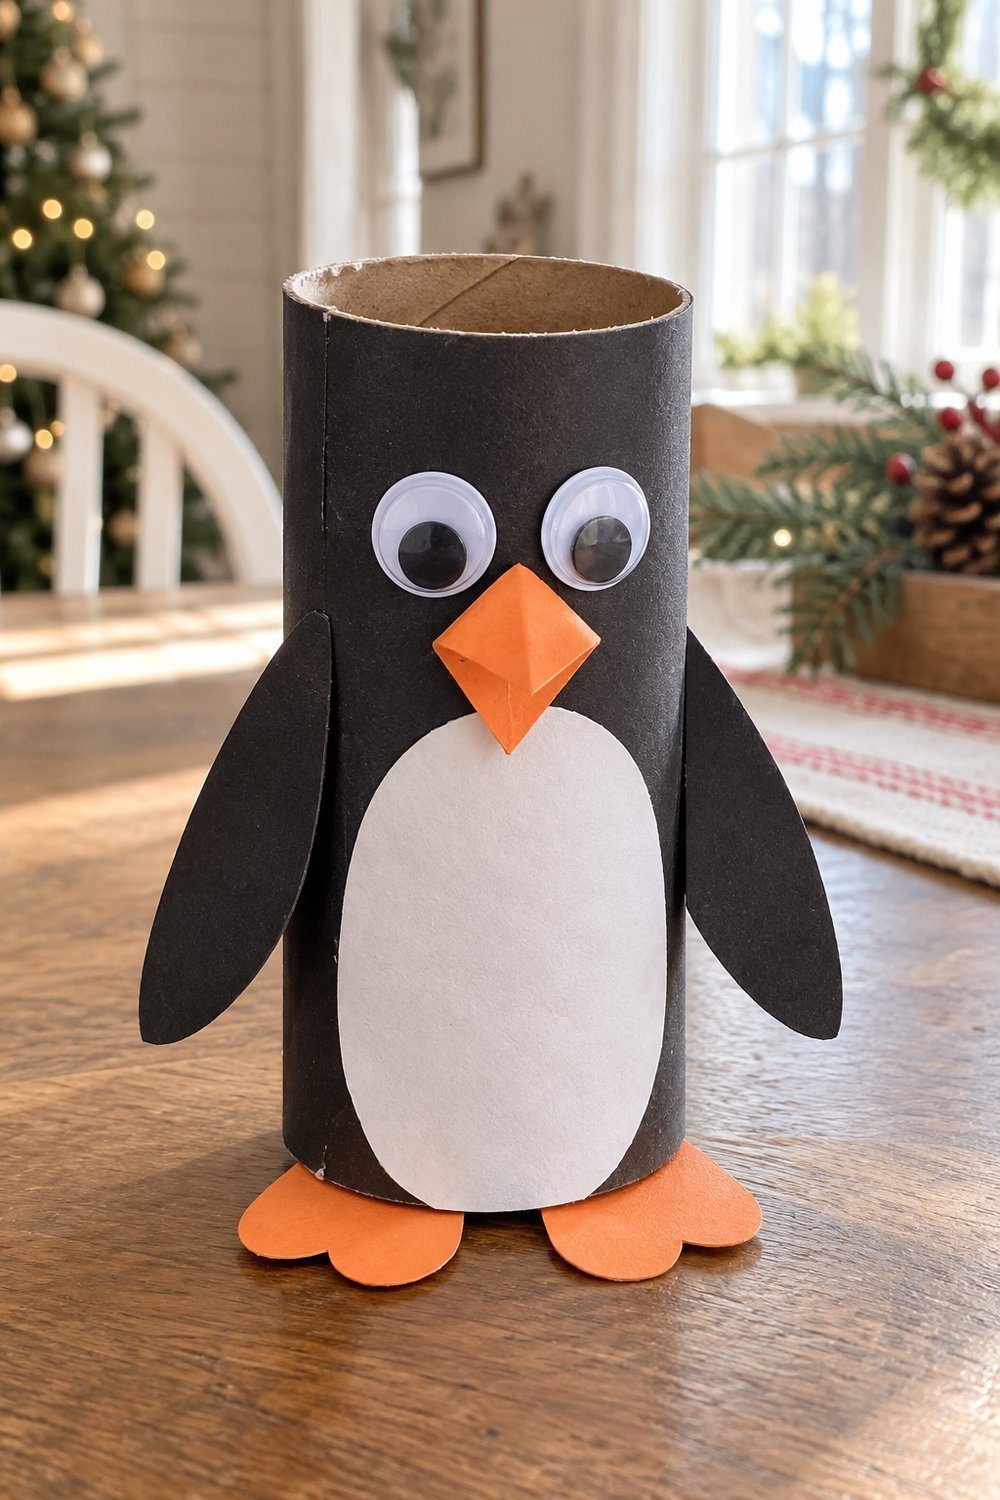
A black wrapper, white tummy, and projecting orange beak make a penguin with plenty of personality. The child wraps and glues black paper around the tube, cuts a white belly, and attaches it to the front. For ages 8 to 12, let the child cut the feet and diamond-shaped beak, fold the beak, and add wings and googly eyes. A grown-up helps tape the feet inside the base as needed. Set the penguin near a snowy paper backdrop on a shelf. The original uses 1 in (2.5 cm) googly eyes.
Materials: Toilet paper tube, black, white and orange construction paper, googly eyes, white school glue, tape; source eyes 1 in (2.5 cm).
Tutorial by Ducks 'n a Row
Dimensional stars from folded whole rolls
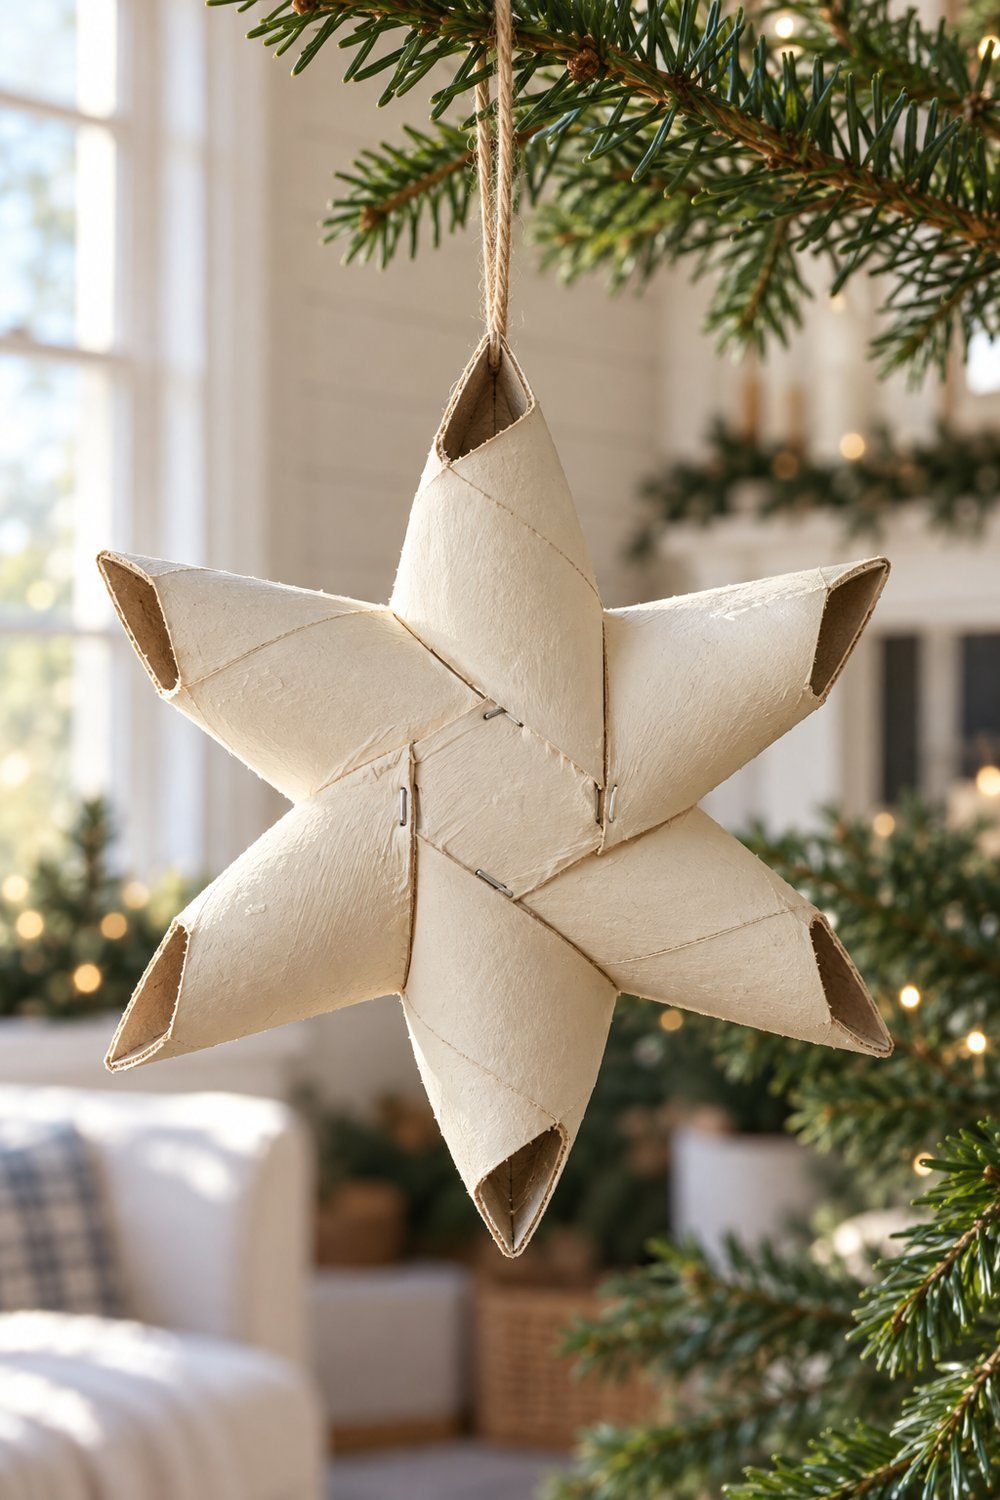
Firm folds turn 3 whole rolls into a sculptural star with a surprisingly full shape. The child flattens the tubes, pushes their ends inward into points, and folds each tube across the middle. A grown-up helps staple the folded centers and join the units as Kathrin demonstrates; the child can paint the finished star and add string. Hang it from a wall hook with space around it so the depth is visible.
Materials: 3 toilet paper rolls per star, stapler, string, optional paint and bone folder.
Tutorial by Kathrin, Miom Studio
Advent countdown tubes with cotton closures
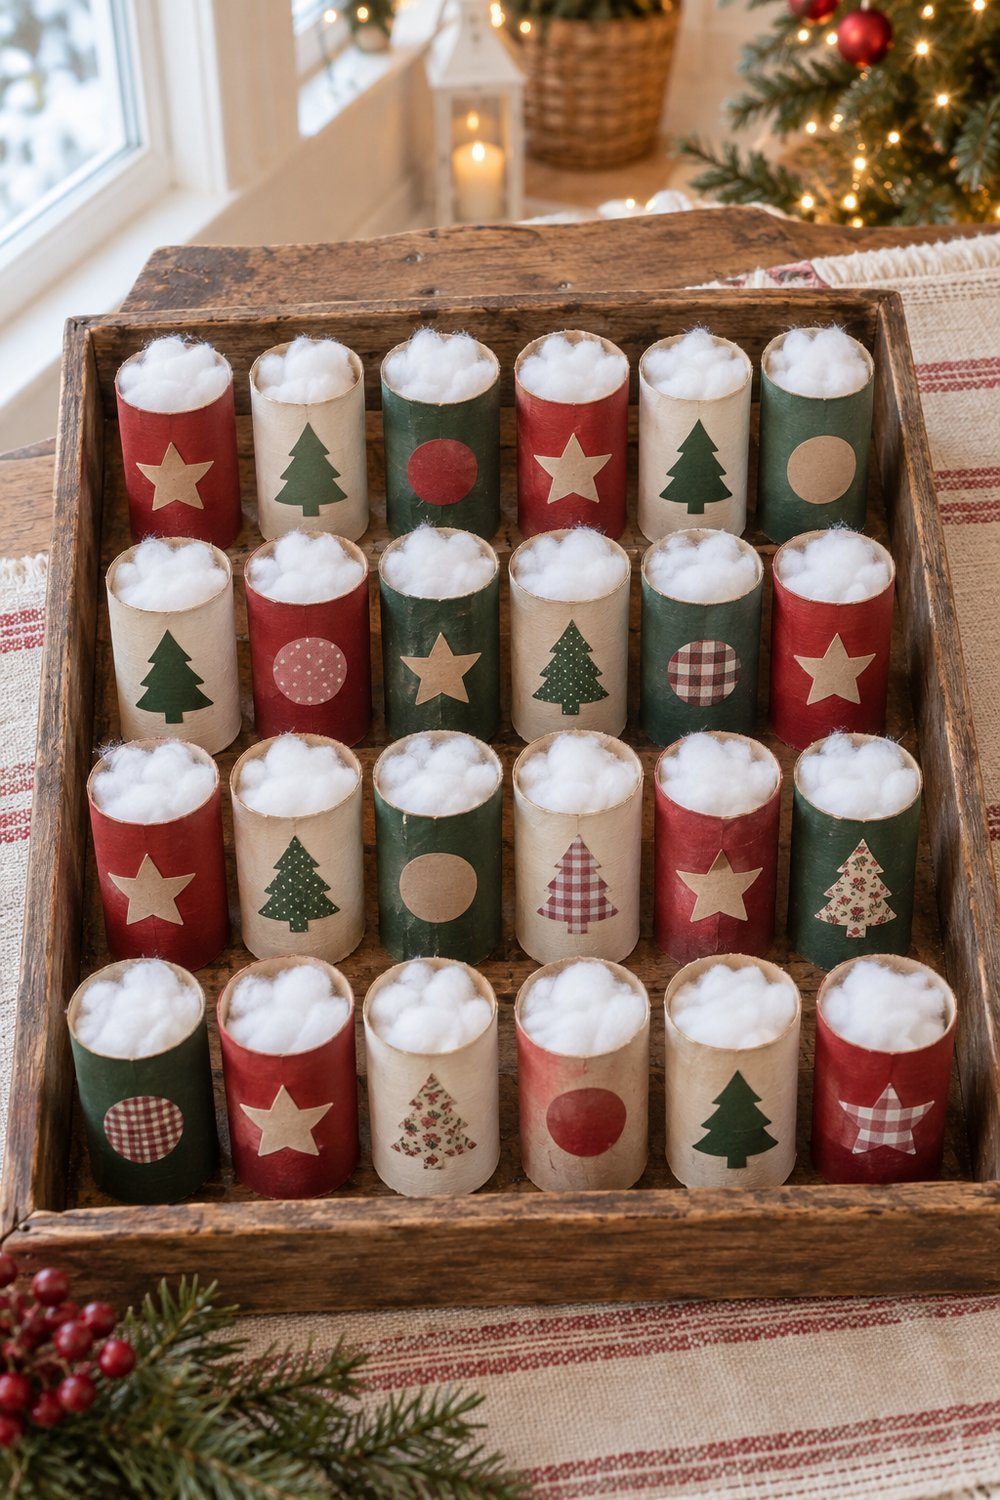
Painted tubes lined up on a sideboard make a countdown that can be opened and refilled. Following HABA's simple version, the child paints the rolls, adds dates, and closes the openings with cotton wool. A grown-up helps prepare paper motifs and fills the tubes with folded activity notes before closing them. Keep the arrangement upright on a stable tray, with each date easy to find. The source calls for 24 rolls, so this is the project to save for first.
Materials: 24 toilet paper rolls, pens, glue, colored cardboard, scissors, cotton wool; activity notes are an editorial filling suggestion.
Tutorial by HABA
Teens and grown-ups: a toilet paper roll wreath in depth
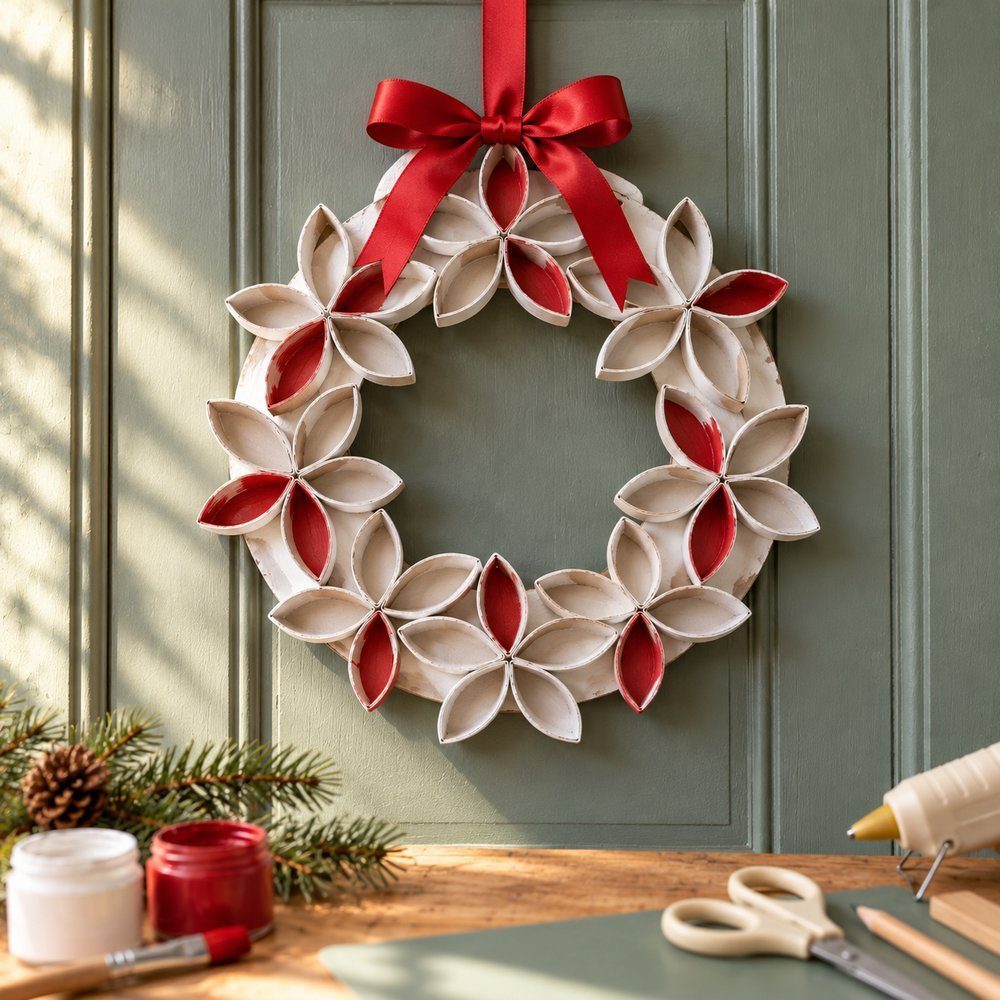
Open rings grouped into flowers give this wreath its shape. The method of gluing flattened roll rings onto a cardboard backing, the 10-roll supply, and the sizes below come from Denise Hahn's wreath at B+C Guides. Hahn attaches plain rings in layers; grouping them into 5-petal flowers and painting them white with red accents are our Christmas variation. Work flat so the flowers sit evenly around the backing. The finished wreath has a red ribbon bow at the top and hangs on a door.
- 10 empty toilet paper rolls.
- Lightweight cardboard strips 1 in (2.5 cm) wide and about 8 in (20 cm) long; Hahn joins strips into a ring about 4.5 to 5 in (11 to 13 cm) across.
- Ruler, pencil, scissors, and a cutting mat; an adult may use a craft knife.
- Hot glue gun and sticks, used by an adult or a teen with a low-temperature gun.
- White paint, red paint, brush, and red ribbon for our Christmas variation.
- On a cutting mat, cut the flattened roll into rings about 1 in (2.5 cm) wide. Repeat with the remaining rolls; adults alone handle any craft knife.
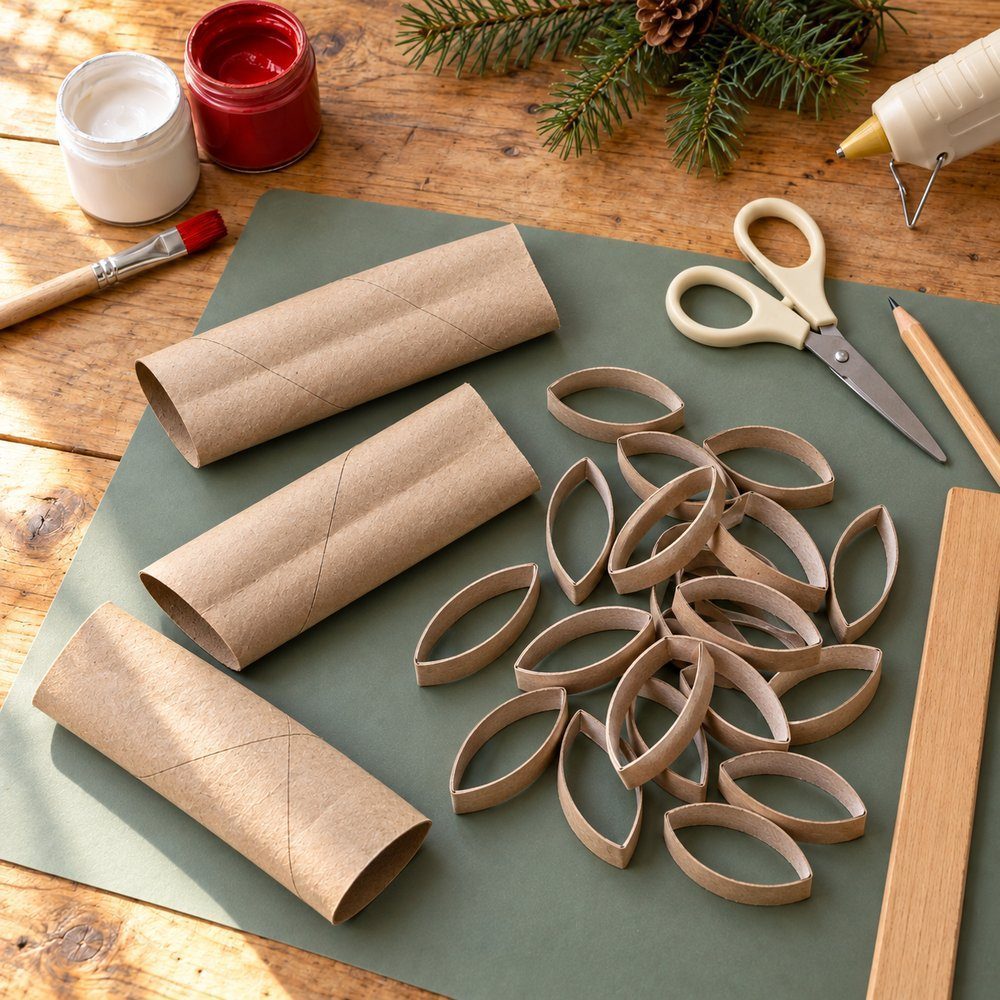
- Join the cardboard strips into a circular backing band. Glue the overlap securely and lay the band flat.
- For our flower variation, arrange 5 rings with their ends meeting in the center. Glue the touching sides together and repeat to make more flowers.
- Arrange the flowers in a circle on the cardboard backing. Adjust their spacing before gluing each flower to the band and its neighbors.
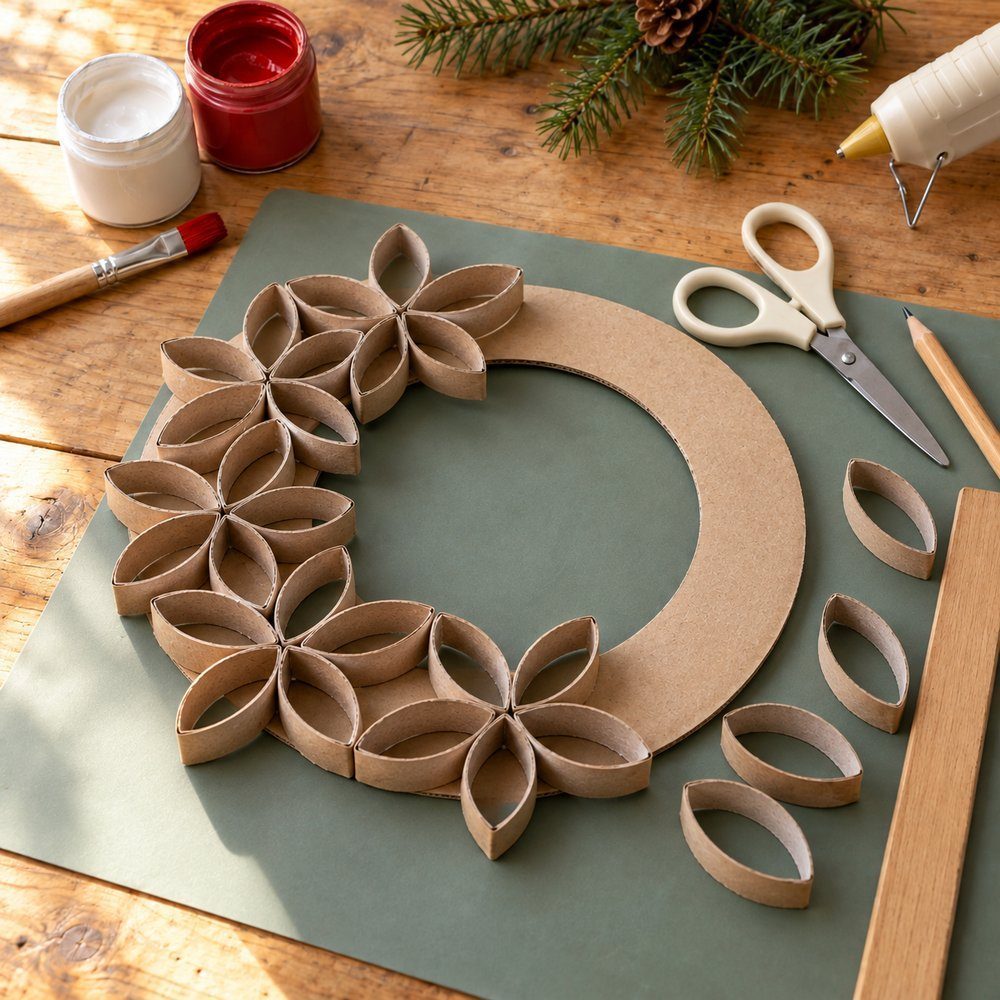
- Finish attaching the flowers, leaving the center of the wreath open. Let the glue cool fully with the wreath lying flat.
- Paint the assembled wreath white, including the visible cardboard edges. Let it dry flat, then add red accents inside some petals and leave them to dry.
- Fasten a red ribbon bow at the top of the backing. Keep the bow clear of the open flower centers.
- Tie a ribbon hanger around the backing band and hang the wreath on a door.
For another Christmas project using toilet paper rolls, watch Mona of Craft Klatch make a frosty star ornament in her English-language tutorial. It demonstrates a separate ornament design with painted cardboard, glitter, and decorative centers.

For the grown-ups' shelf
Ivory, warm gold, and deep green sit comfortably with thrifted trays and plain linens. Adults handle hot glue and all craft knife work; teens can help with a low-temperature glue gun. For anything that glows, use battery LED lights only, never a real candle. Keep battery compartments secured away from under-3s.
Ivory LED candle sets with raised wax drips
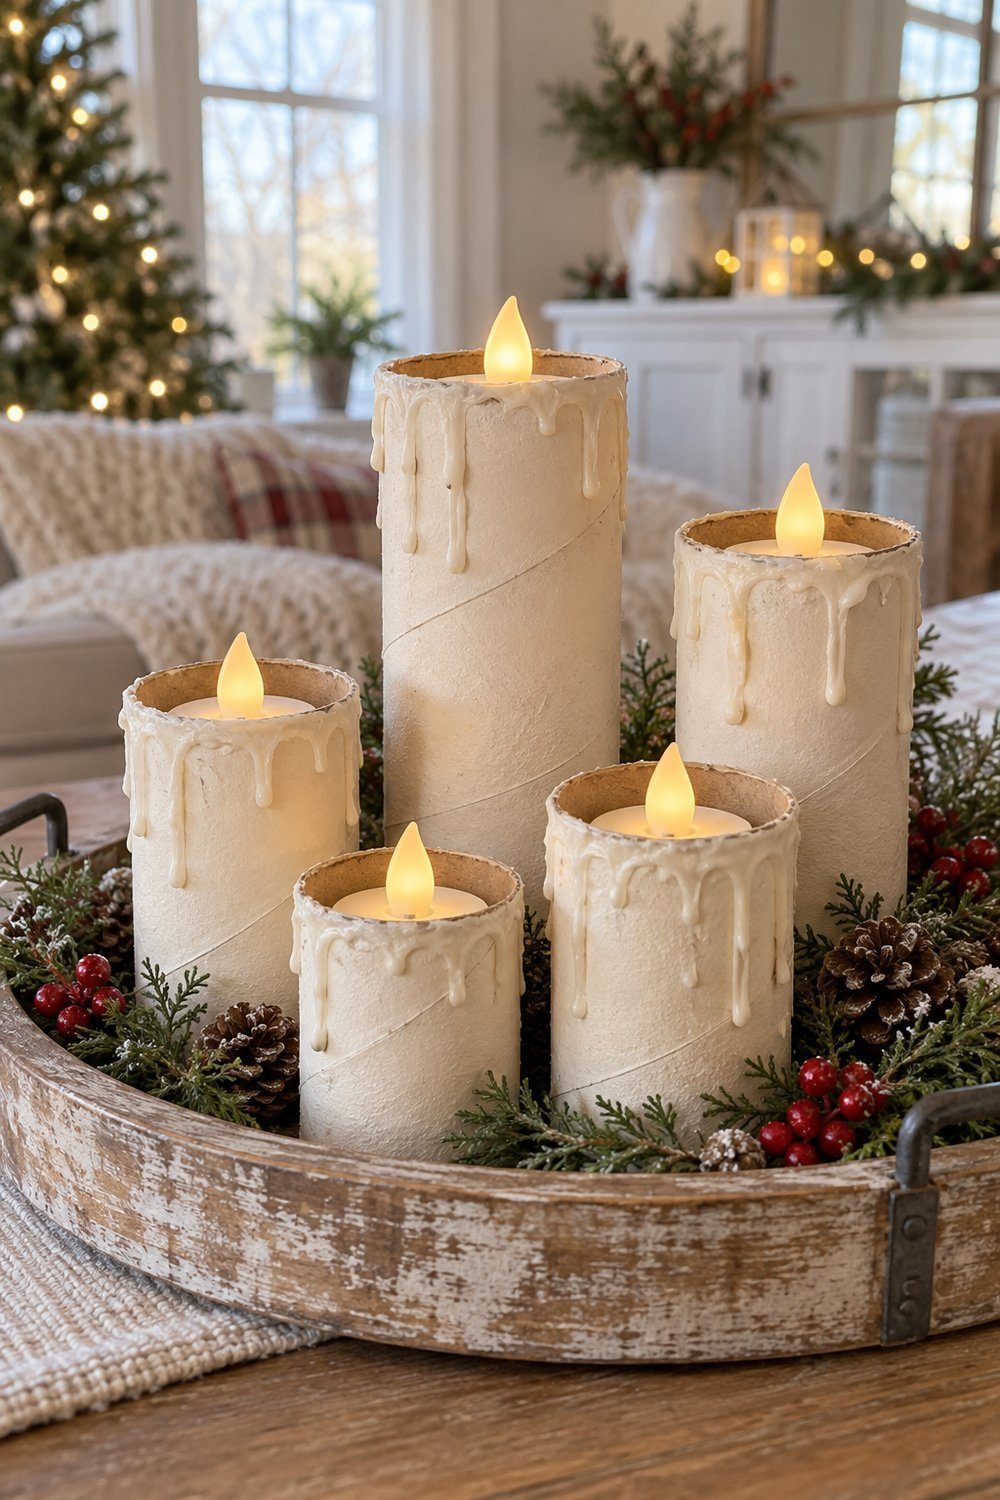
Raised glue drips give these ivory candles a waxy look. Follow Debbie Chapman's toilet paper roll method: an adult adds an inner hot-glue ledge for the battery tea light, then drips glue down the outside. Once cool, paint ivory and let dry before fitting the light. For candles taller than a toilet paper roll, use a paper-towel tube, as Chapman suggests. Group varied heights on a stable shelf tray. Use battery LED lights only; keep battery compartments secured away from under-3s.
Materials: Toilet paper rolls, paper-towel tubes for taller candles, battery LED tea lights, hot glue, ivory acrylic paint, brush; source painting depth inside the rim: about 1.5 in (4 cm).
Tutorial by Debbie Chapman, One Little Project
Crepe paper napkin rings with holly accents
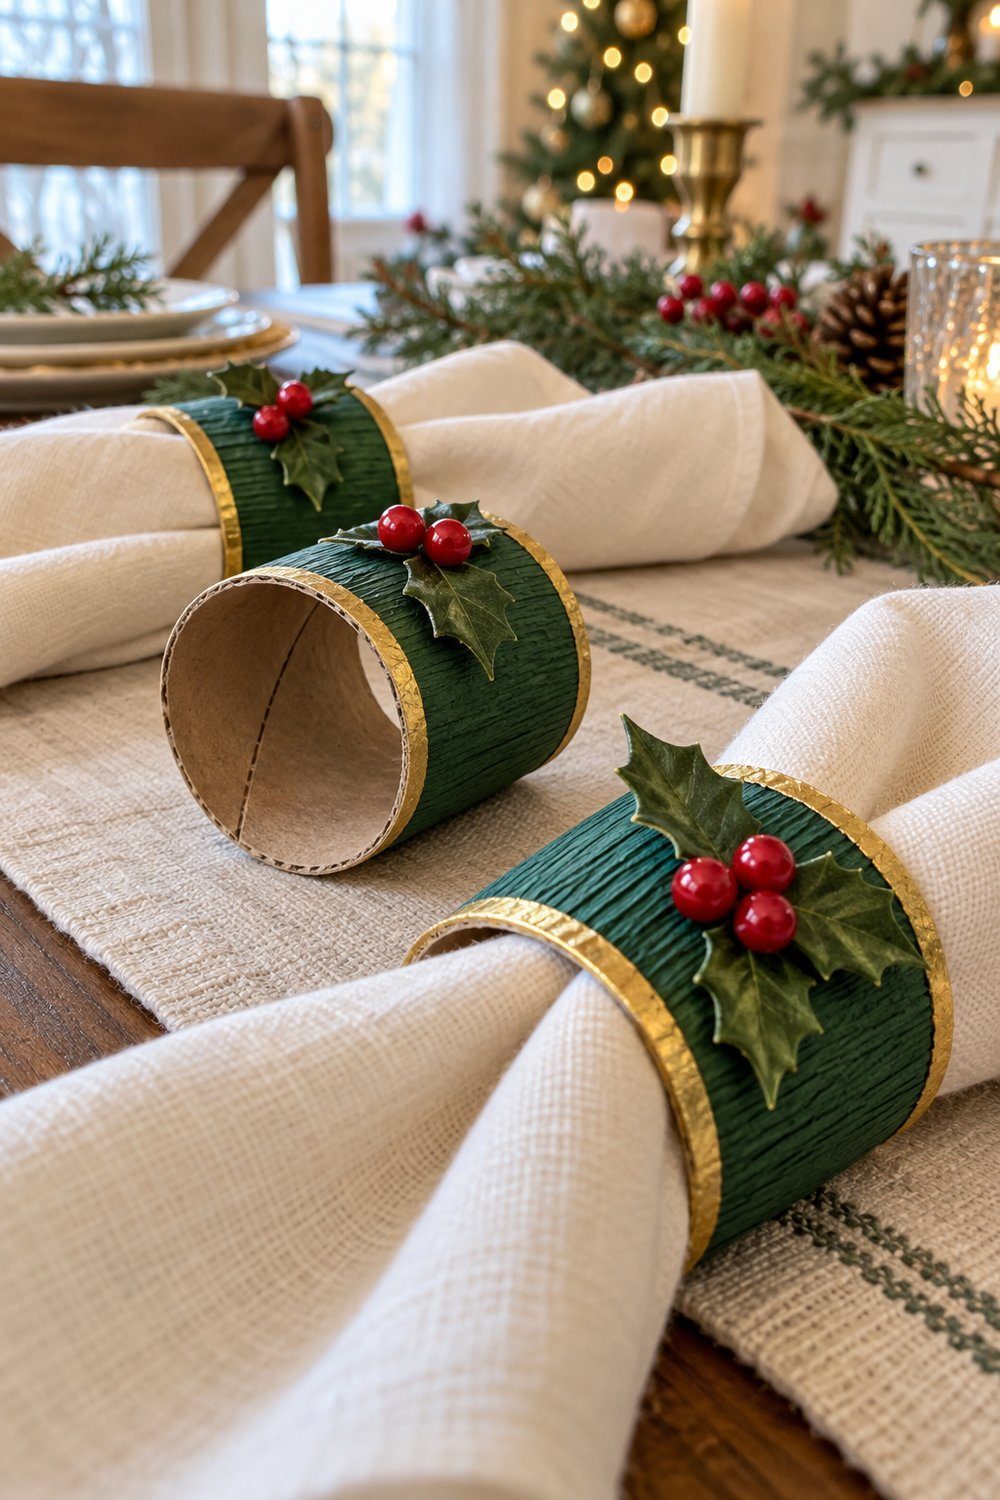
Crepe paper softens the tube while narrow gold trim makes the edges look deliberate. Divide a roll into 3 equal pieces, wrap each with glued crepe paper, and tuck the paper ends neatly inside. Add slim gold edging, then attach artificial holly and a red berry as Susanne Dalsgaard shows. Use a glue stick for the wrapper and let an adult handle any hot-glued finish. Slide over cloth napkins at the table, or gather the finished rings on the dining-room shelf until Christmas dinner.
Materials: Toilet paper roll cut into 3 pieces, crepe paper, glue stick, gold paper trim, artificial holly and berry.
Tutorial by Susanne Dalsgaard, Dagmar Njord
Holly sprig toppers from folded tube slices
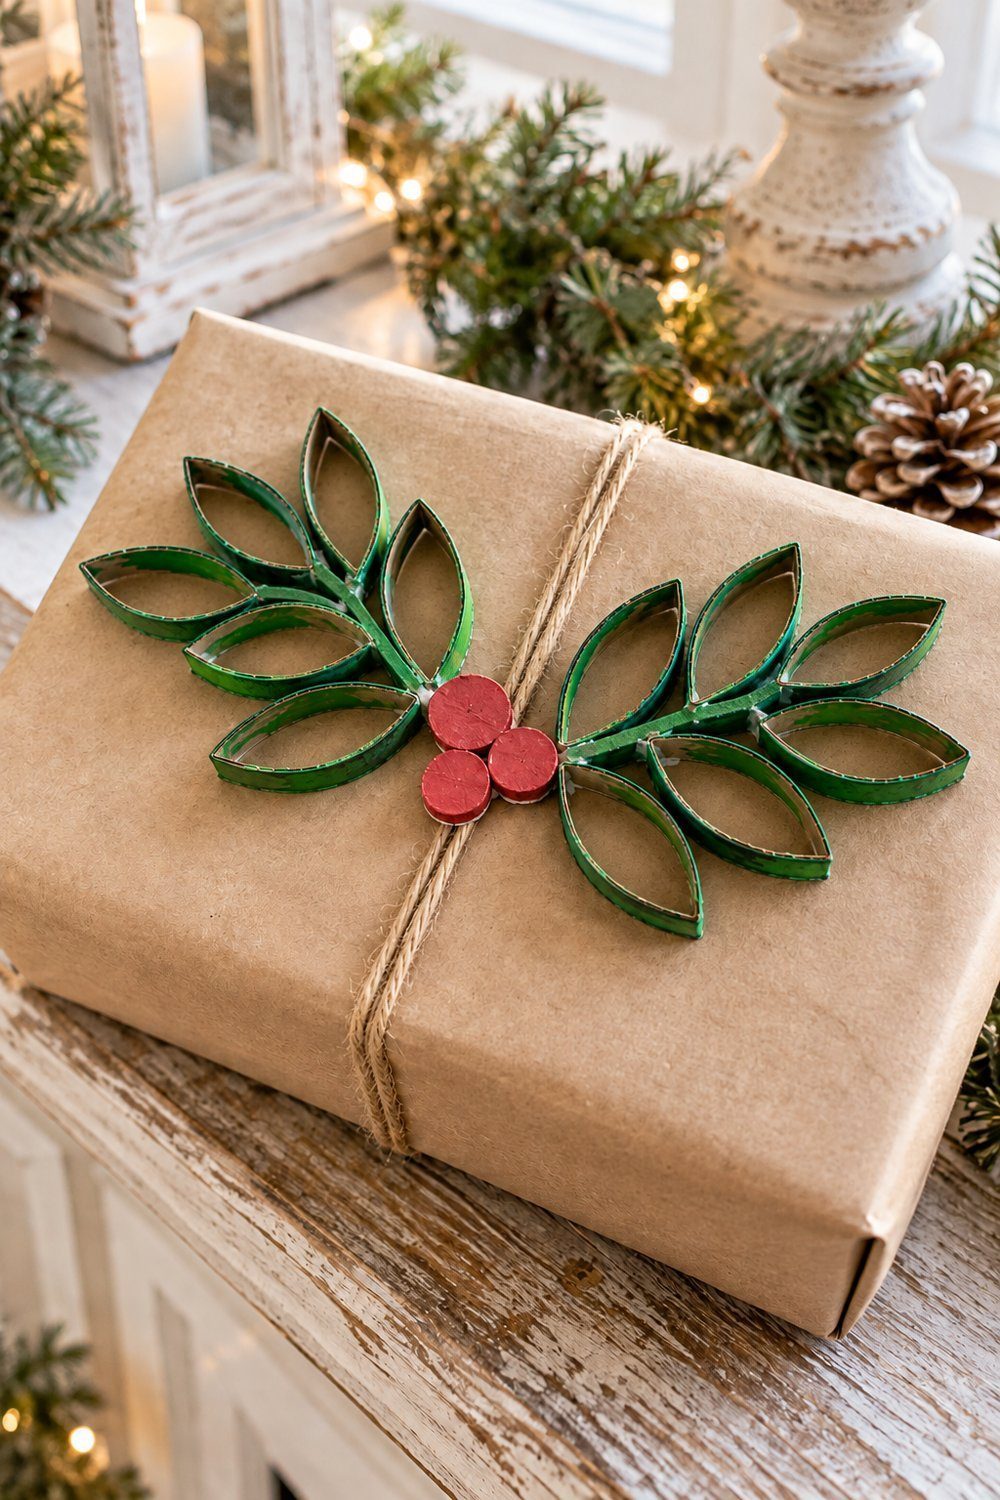
Folded tube slices make graphic holly sprigs that dress a mantel parcel or a shelf arrangement. Paint a roll green, cut it into 12 thin rings, and fold each ring in half. Glue half the folded pieces into a branching sprig, then repeat with the remaining pieces. Finish with red cardboard circles where the sprigs meet. Rachel Bowyer uses the pair as a present topper; place it on an already wrapped parcel rather than making another container. Keeping the red centers in plain card gives the finished piece a crisp, restrained farmhouse look.
Materials: Toilet paper tube cut into 12 thin rings, green paint, glue, red cardboard.
Tutorial by Rachel Bowyer, Tea and Forget-me-nots
What to keep, what to recycle
Keep the pieces with sound joins and the children's favorite marks. Lay the snowman ornaments, holly toppers, and wreath flat in shallow boxes with paper between layers; keep dimensional stars, angels, and standing figures in deeper compartments that protect their shapes. Remove battery lights for storage and keep their batteries secured separately. Save the napkin rings with the linens so they are easy to find next December.
Recycle clean, undecorated tube offcuts under your local paper rules. Glue type alone does not settle recyclability: small amounts may be accepted, while heavy coatings and attached mixed materials complicate sorting. Remove hot-glue lumps and decorations; inseparable hot-glued embellishments belong in general waste under Planet Ark's craft guidance. Glitter-coated paper is non-recyclable under Michigan EGLE's holiday guidance. San Jose accepts cardboard adhesives, illustrating why your local program's rules matter for lightly glued pieces.
Next step: Pair your finished crafts with pinecone Christmas decorations, add warm color with dried fruit Christmas decorations, or find your next project in Christmas Craft Ideas to Enchant Your Holidays.