Beautiful nail designs for autumn

Choose autumn nail designs by the tools you already own: polish and a sponge; a dotting tool and tape; a fine liner brush; or a gel lamp with foil or stamping supplies. The red-to-black sponge gradient is the easiest starting point. Warm mocha plaid is the showpiece, with its blue grid explained step by step below. These fall nail art ideas range from soft-edged color to precise lines.
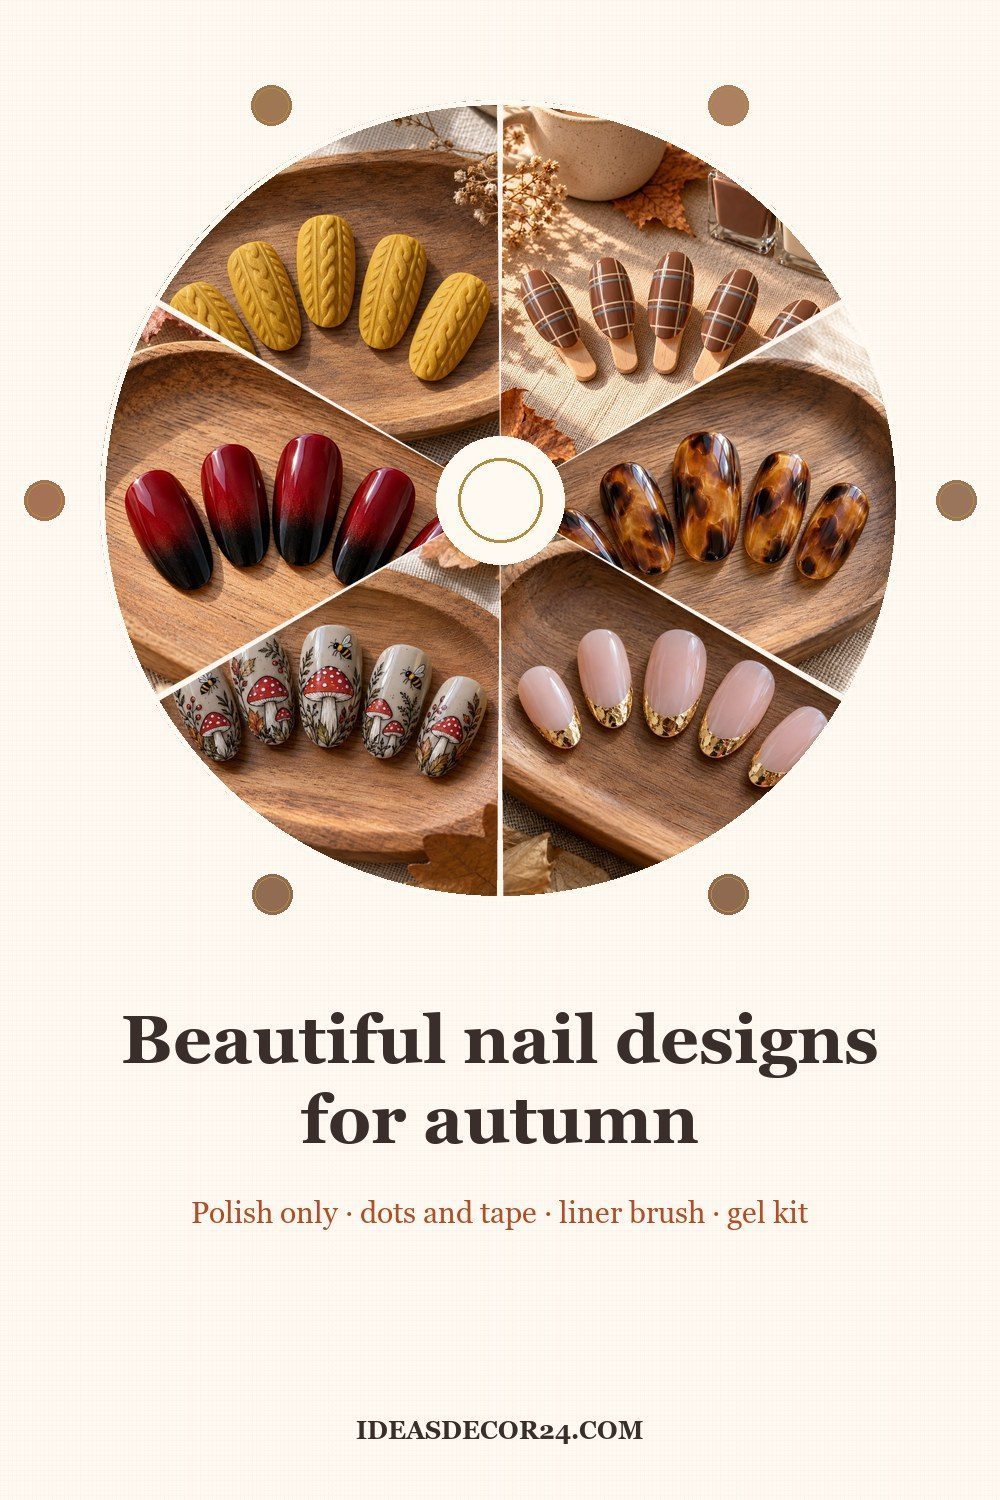
What each kit needs
Use the table to choose a starting method, then read its supplies before setting out your bottles. A kit describes the main tool family; foil flecks also use tweezers, while tortoiseshell and plaid require gel equipment alongside their brushes. Choose by the technique you can already do comfortably: dabbing, dotting, drawing lines, or working with a cured gel surface.
| Kit | Tools | Good first design | Source |
|---|---|---|---|
| Polish and a sponge | Sponge, bottle brushes, clear top coat | Red-to-black gradient; 4 written stages | Burkatron |
| Dotting tool and tape | Dotting tools for circles; tape for straight corners | Dotticure, starting with 4 central dots | The Party Girl Blog; Makeup.com (tape) |
| A fine liner brush | Fine detail liner brush, primer, gel base and top coat, LED lamp | Warm plaid with 2 vertical blue lines | 14 Day Manicure |
| Gel lamp, foil and stamping | For foil: liner brush, foil gel, gold leaf, lamp; stamping adds plate, scraper and stamper | Gold foil French tips; source specifies a 30-second foil-gel cure | Scratch; Insight Cosmetics (stamping) |
Just polish and a sponge
Red-to-black sponge gradient
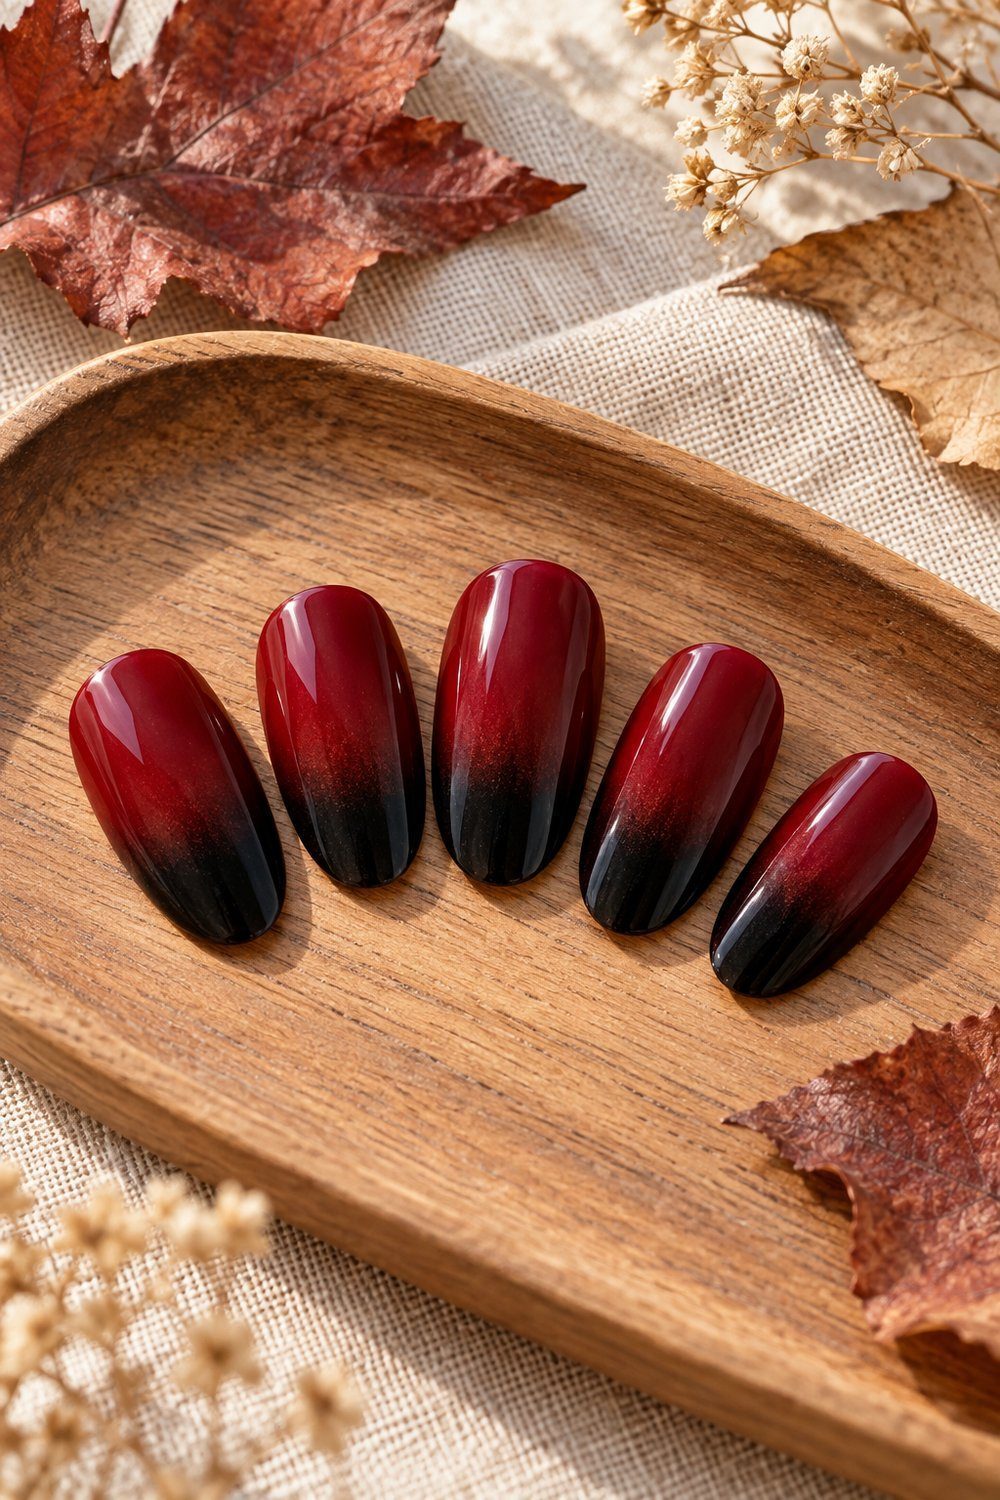
Start here for easy fall nails: Caroline Burke describes this red-and-black gradient as suitable for inexperienced nail artists. Paint the red base and let it dry, load black polish (the source says varnish) onto a sponge, then dab the tips and taper the color upward. Finish with clear top coat. Gradients are a good place to start if you're not experienced at nail art, Burke writes. This is a beginner choice when you would rather blend color than draw a tidy pattern.
You'll need: American Apparel Lipstick lacquer, black polish (the source says varnish), a piece of sponge and clear top coat for the source’s 4-stage method.
Tutorial by Caroline Burke, Burkatron
Dry-brush autumn swooshes
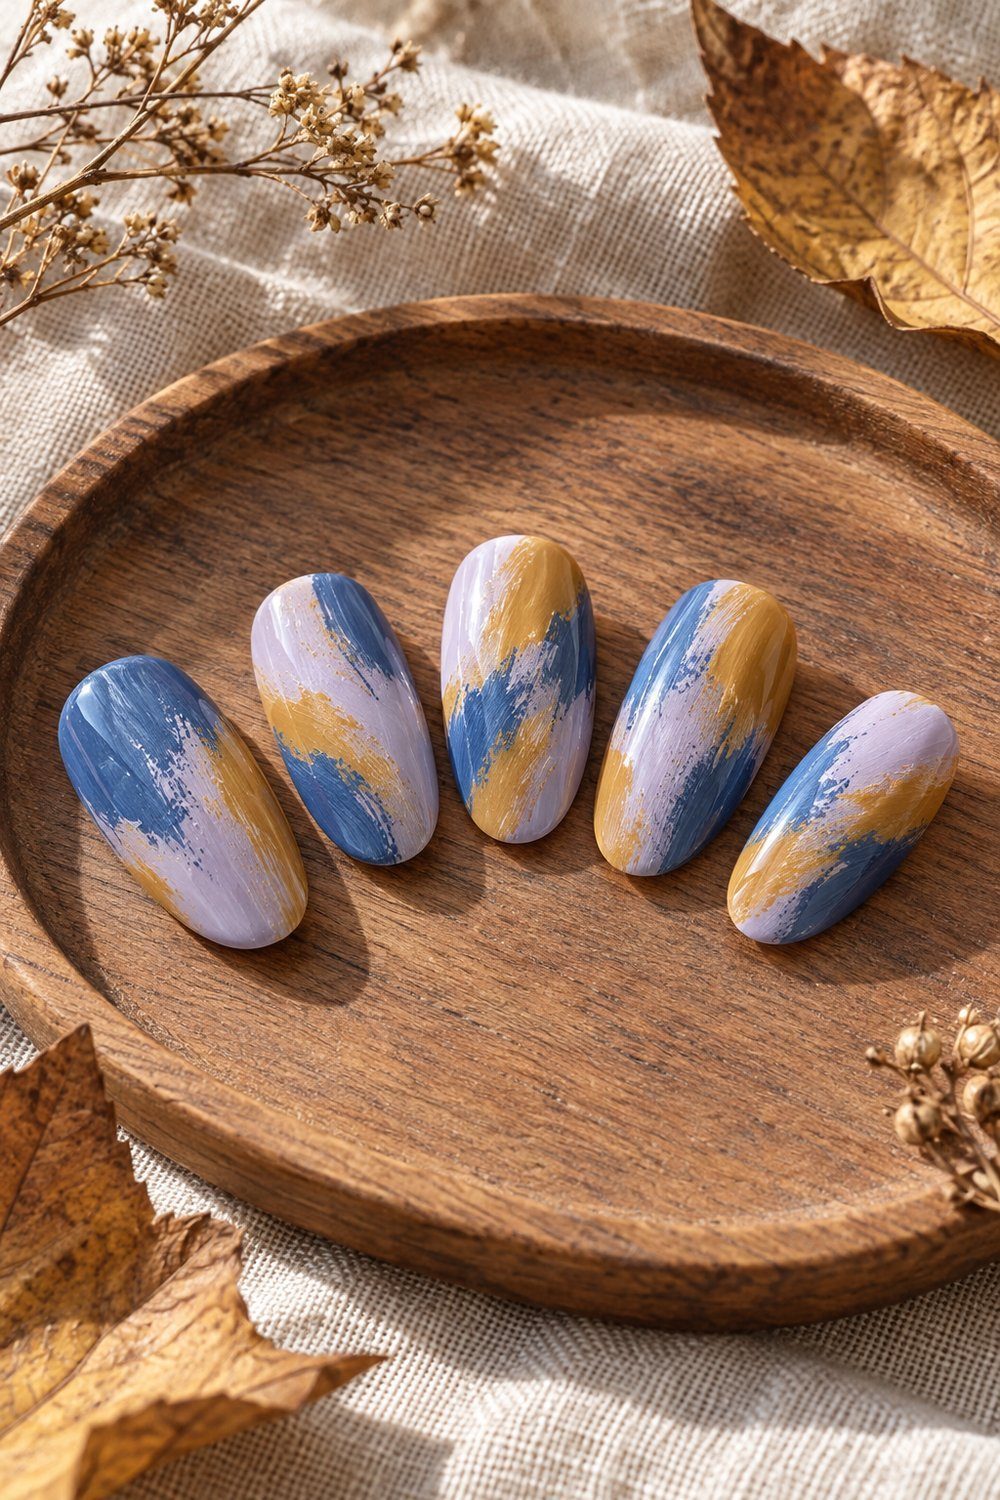
OPI’s Peace of Nature uses the bottle brush almost dry to make streaky swooshes. Apply the base, wipe excess Suzi Takes a Sound Bath from its brush, and brush color down the left side; repeat with Medi-take It All In and Ochre the Moon, drying between colors, then finish with top coat. This beginner adaptation stops at the swooshes and omits the source’s Midnight Mantra detail-brush lines.
You'll need: 1 coat of Nail Lacquer Base Coat; Suzi Takes a Sound Bath, Medi-take It All In, Ochre the Moon and Nail Lacquer Top Coat.
Tutorial by OPI, OPI UK
Burgundy gold-leaf flecks
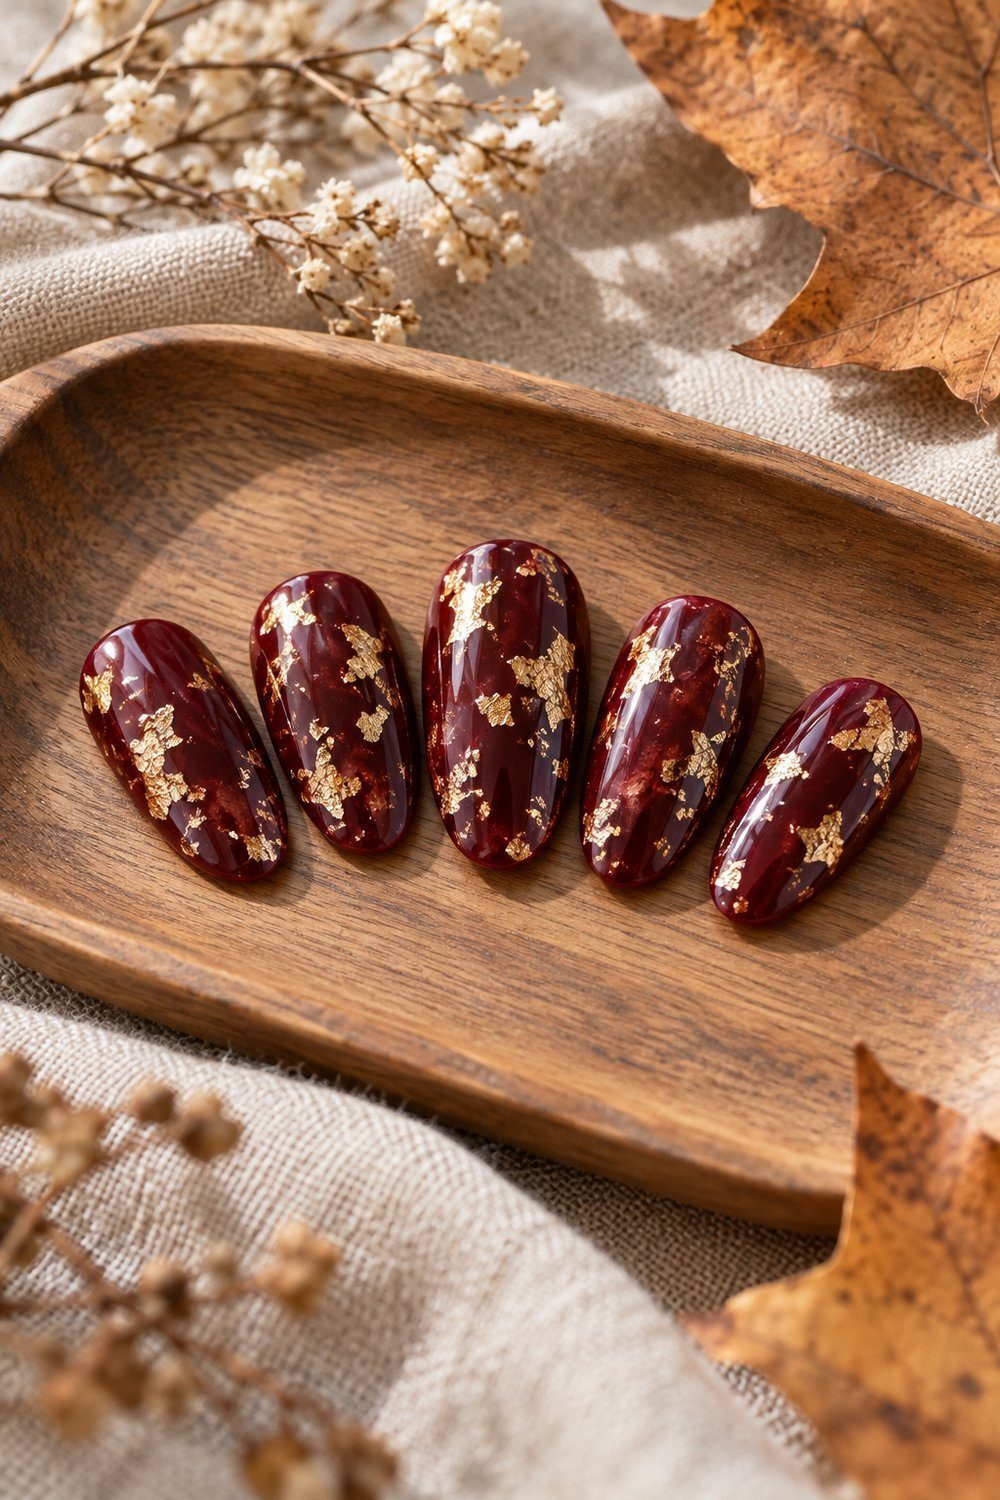
Deep burgundy and scattered gold leaf give this beginner design its warm contrast. Apply base coat and the dark polish, tear the leaf into irregular pieces with tweezers and a wooden stick, then place it while the final color layer is still tacky. Press the pieces flat and seal with clear top coat. Mary Jane Cha’s method uses ordinary polish rather than foil-transfer gel.
You'll need: Base coat, 2 layers of deep burgundy polish, gold leaf foil, tweezers, a wooden stick and clear top coat.
Tutorial by Mary Jane Cha, Jojotastic
A dotting tool and tape
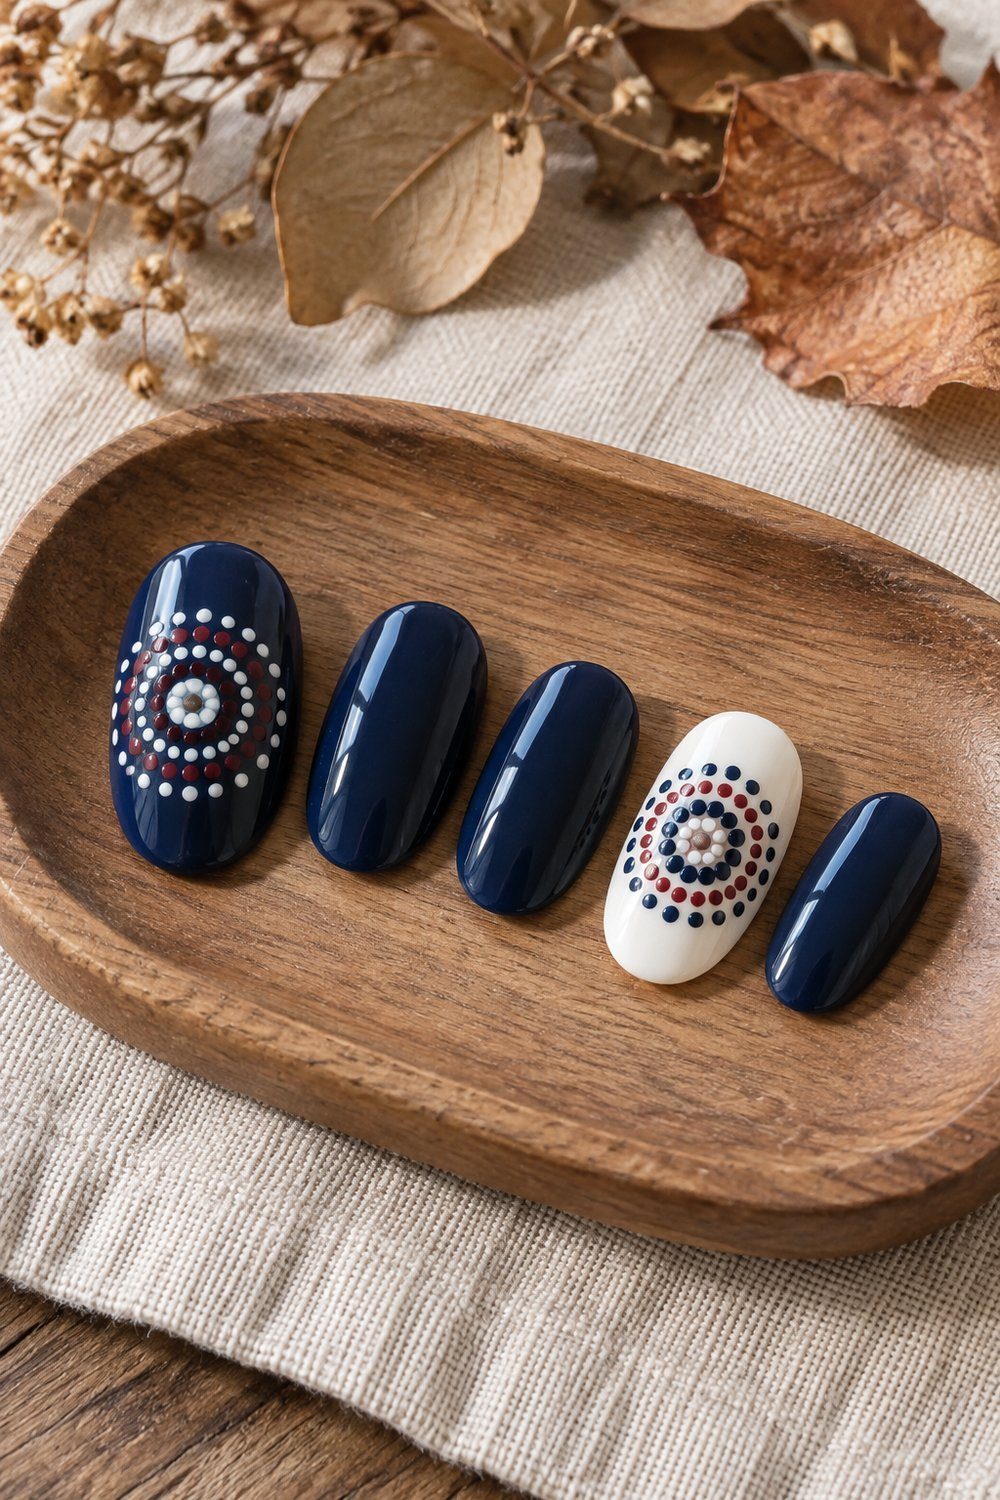
The Party Girl Blog paints the thumb and the other nails dark blue and the ring finger white, then adds dots to only the thumb and ring finger. Paint those bases and let them dry, make the central dot cluster, then surround it with successive rings, including burgundy. Repeat on the white accent using alternate colors and seal after the dots dry. The blog calls this a simple dotticure, making it a friendly beginner project.
You'll need: Dark blue, white and burgundy polish, dotting tools and top coat; begin each cluster with 4 dots.
Tutorial by thepgblog, The Party Girl Blog
Green negative-space corners
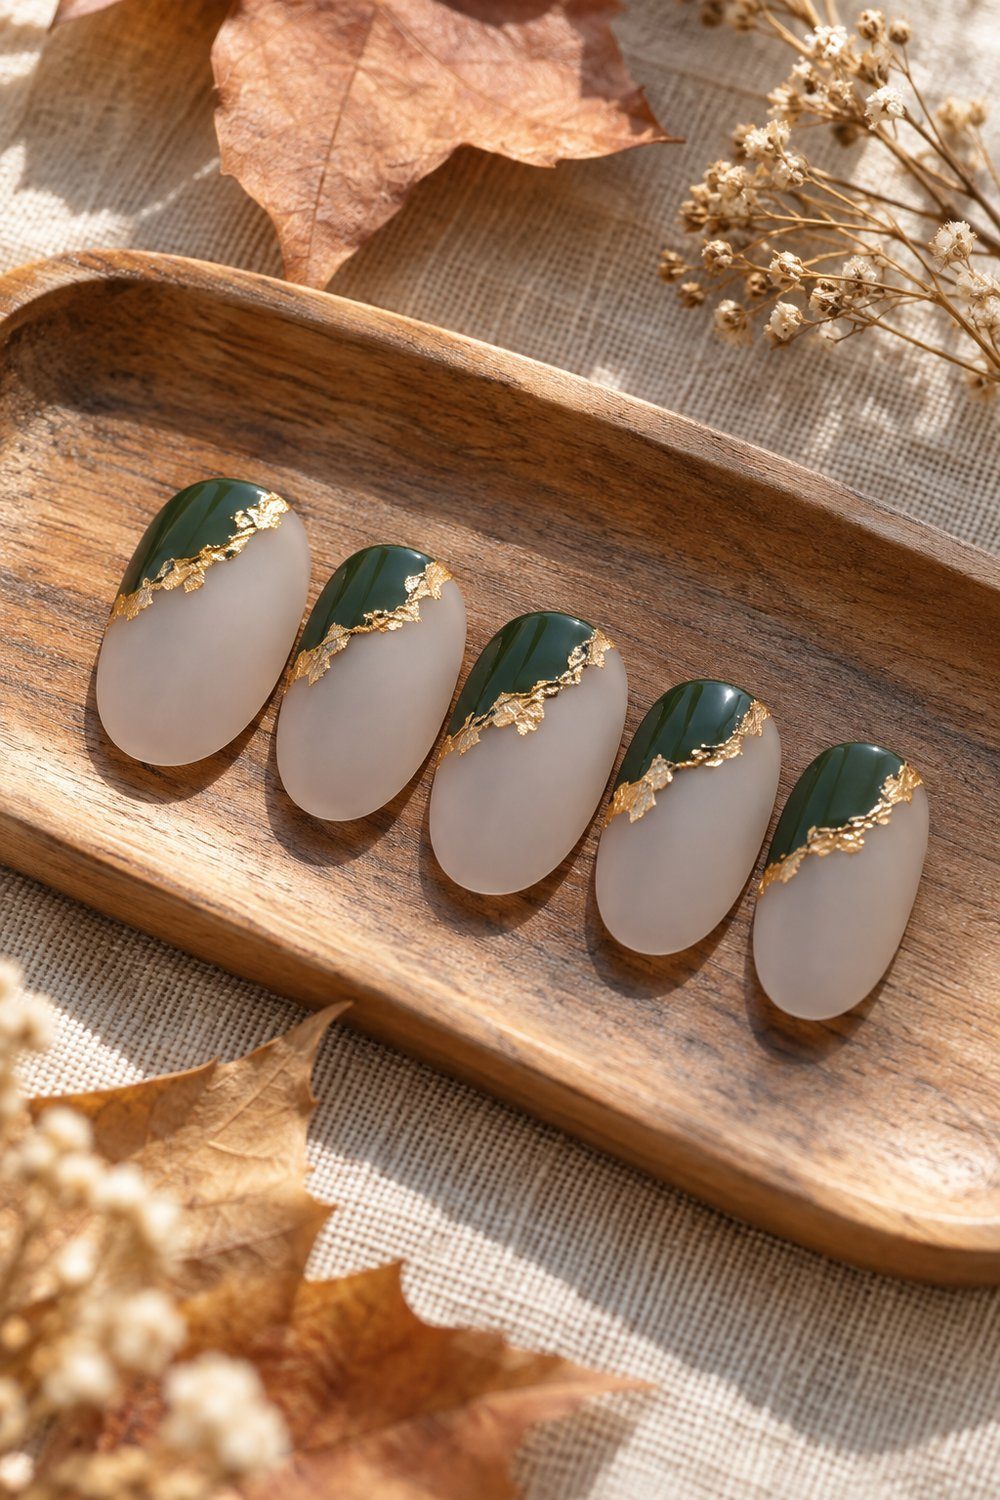
For a geometric alternative, Stacey Bushay combines green corners with bare-looking matte space and gold edging. Apply the matte base and let it dry, use tape to guide the green corner, then remove the tape and gloss the green area. Place gold leaf along wet glossy edging. This beginner-friendly method has more finishing detail than the dotticure, but the tape guides the straight boundary. The source shows square nails; the oval swatches pictured here adapt the shape while keeping its corner placement.
You'll need: Tape, tweezers, gold foil flakes, green polish such as Essie Off Tropic and matte finish such as Essie Matte About You; the linked method has 4 stages, with glossy top coat for the green and edging.
Tutorial by Stacey Bushay, Makeup.com
A fine liner brush: autumn plaid step by step
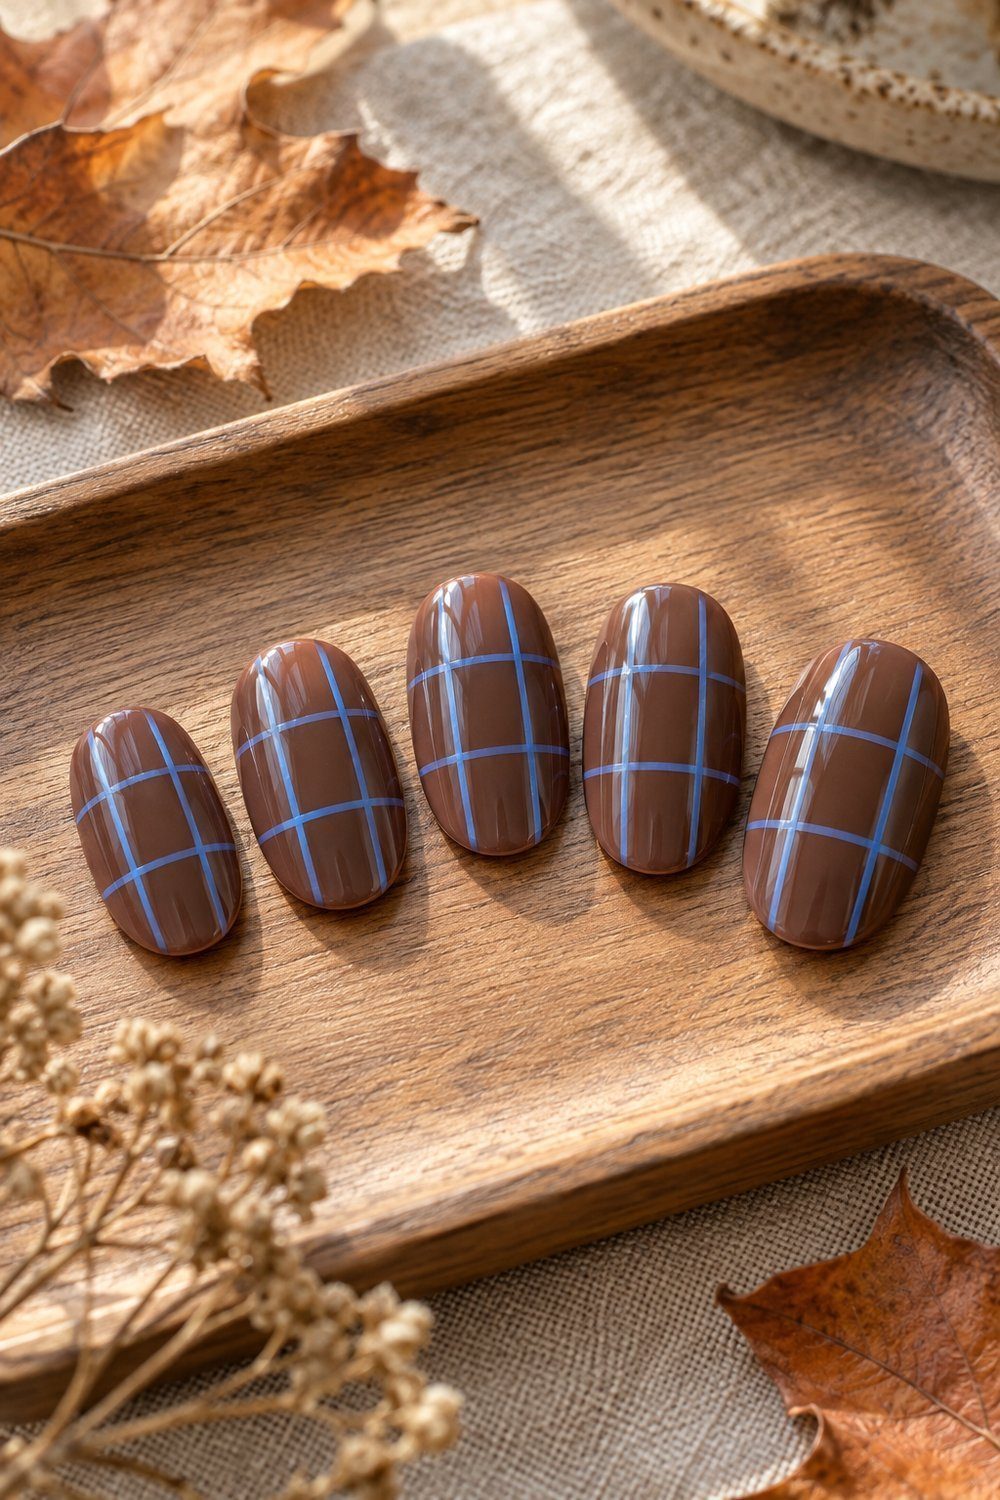
Make plaid your next project when you are comfortable guiding a thin line. The warm base and cool grid give it a clear pattern to follow, and the crossing stripes make this the centerpiece of the collection. Set out the gel equipment as well as the brush: this source teaches a gel manicure. Work through the stages in order, using the intermediate pictures to follow the change from base color to grid to finished plaid.
Warm mocha plaid
Tutorial by Suzanne, 14 Day Manicure
Suzanne’s beginner-friendly plaid nails pair Gentle Gels Mocha with Blue Dreams. Prepare the base, add the warm brown, build the grid with 2 vertical and 2 horizontal blue lines, then seal it. The optional Black Paint accents add depth. Follow the gel brand’s curing instructions for the products and lamp you use; the times below belong to this tutorial’s system.
- Gentle Gels Mocha, Gentle Gels Blue Dreams and optional Black Paint.
- Fine detail liner brush and buffer.
- Perfect Prep Primer, Base Coat, glossy Top Coat and LED lamp.
- Gently buff away shine and tidy cuticles.
- Apply Perfect Prep Primer, then Base Coat; cure for 60 seconds.
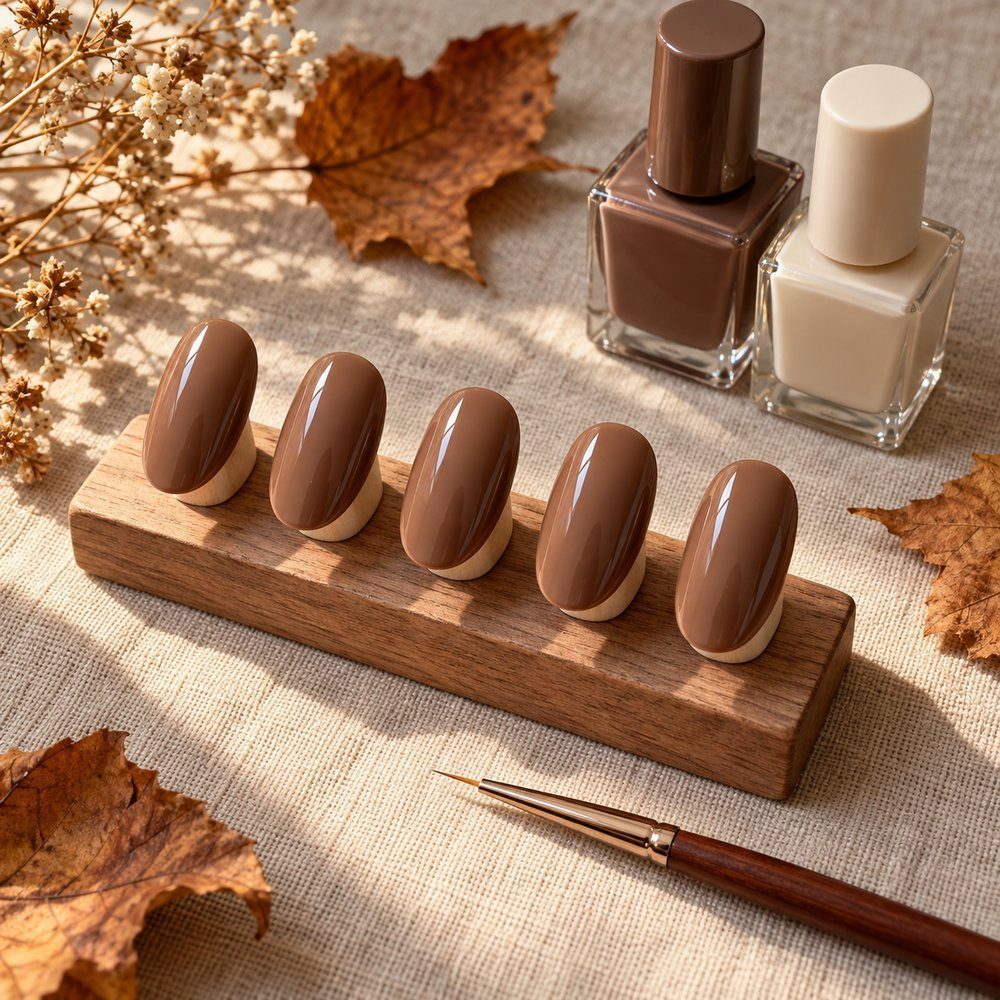
- Apply Mocha, curing each coat for 60 seconds.
- Slowly paint 2 thin vertical Blue Dreams lines; cure.
- Cross them with 2 thin horizontal blue lines; cure.
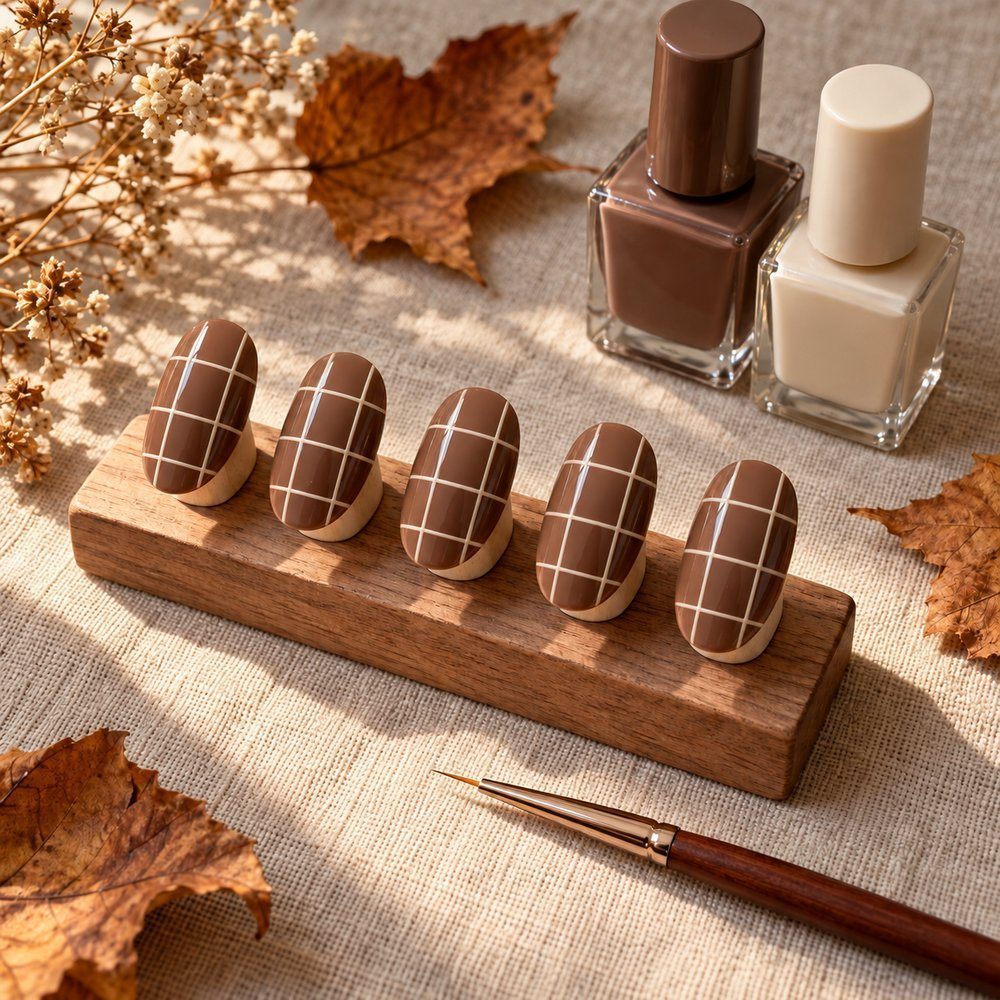
- Optionally add 1 vertical and 1 horizontal Black Paint line; cure again.
- Apply glossy Top Coat; give it the final 60-second cure.
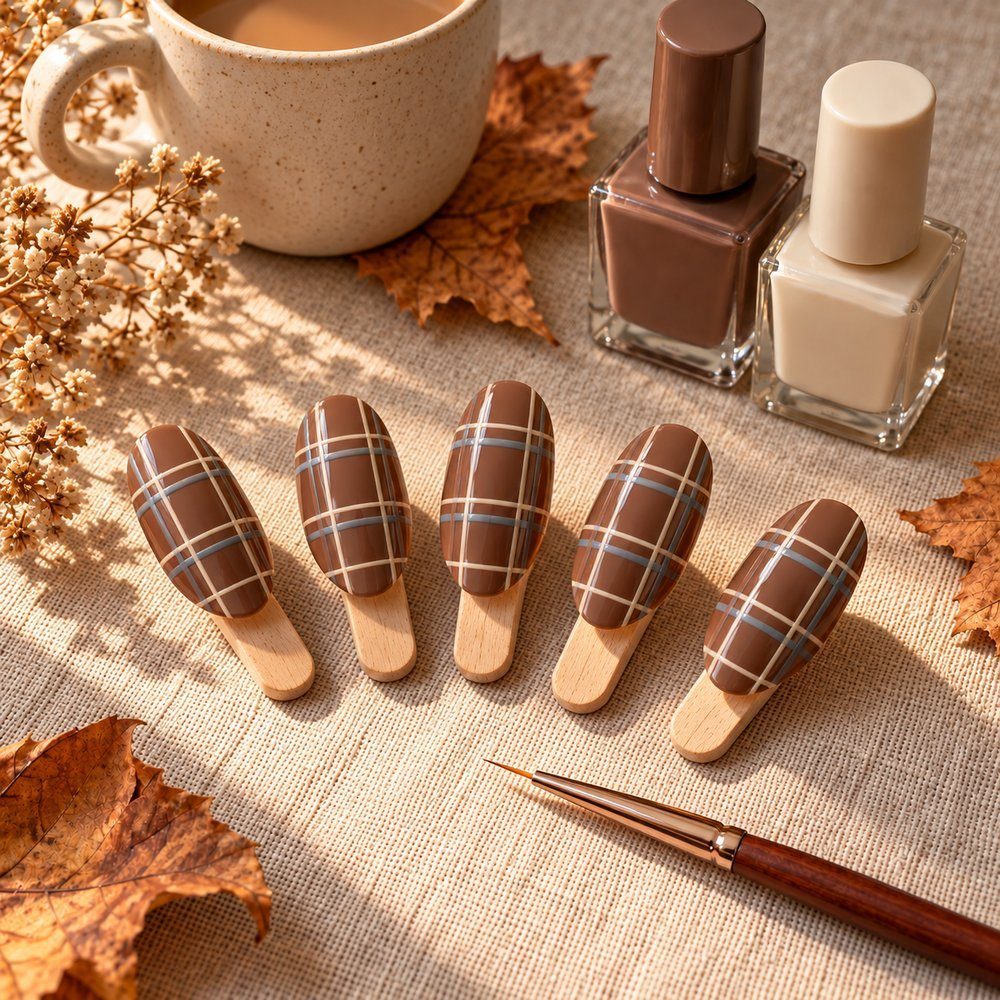
For a separate moving demonstration of plaid painting, watch cutepolish’s Easy Plaid Nails. The creator presents a plaid-print tutorial and invites viewers to choose their own colors. Use it as additional visual inspiration alongside the written mocha-and-blue method, whose products and curing directions remain specific to Suzanne’s tutorial.

Matte cable-knit stitches
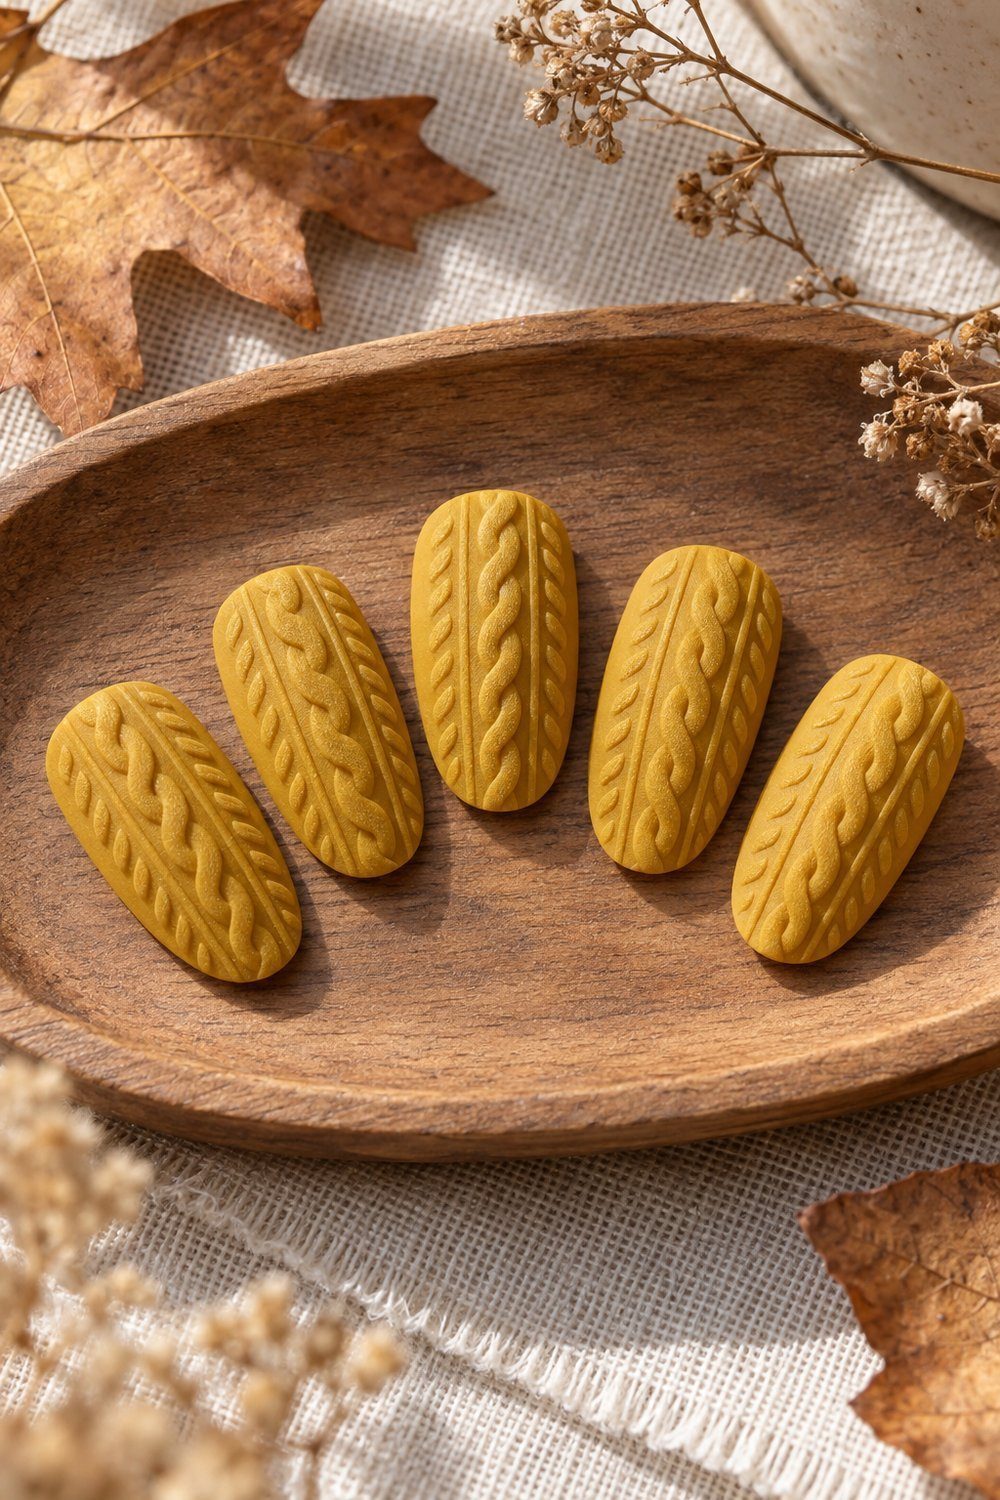
Keturah Moody’s sweater pattern uses parallel guides, diagonal stitches and curvier center marks to suggest knitted fabric. Clean and file the nails, apply your chosen base, then draw the guides and stitch pattern with a thin detail brush. Finish with Gel Velvet Matte Top Coat. This pattern needs steady freehand lines with a thin detail brush. The mustard example supplies the color inspiration; this selection focuses on the knit pattern rather than the photo’s separate plaid accents and charms.
You'll need: A nail file, thin detail brush, base color of choice and Gel Velvet Matte Top Coat; 2 parallel lines create 3 columns. Use compatible gel equipment and the brand’s curing directions for the gel finish.
Tutorial by Keturah Moody, BarBella Co.
Amber tortoiseshell layers
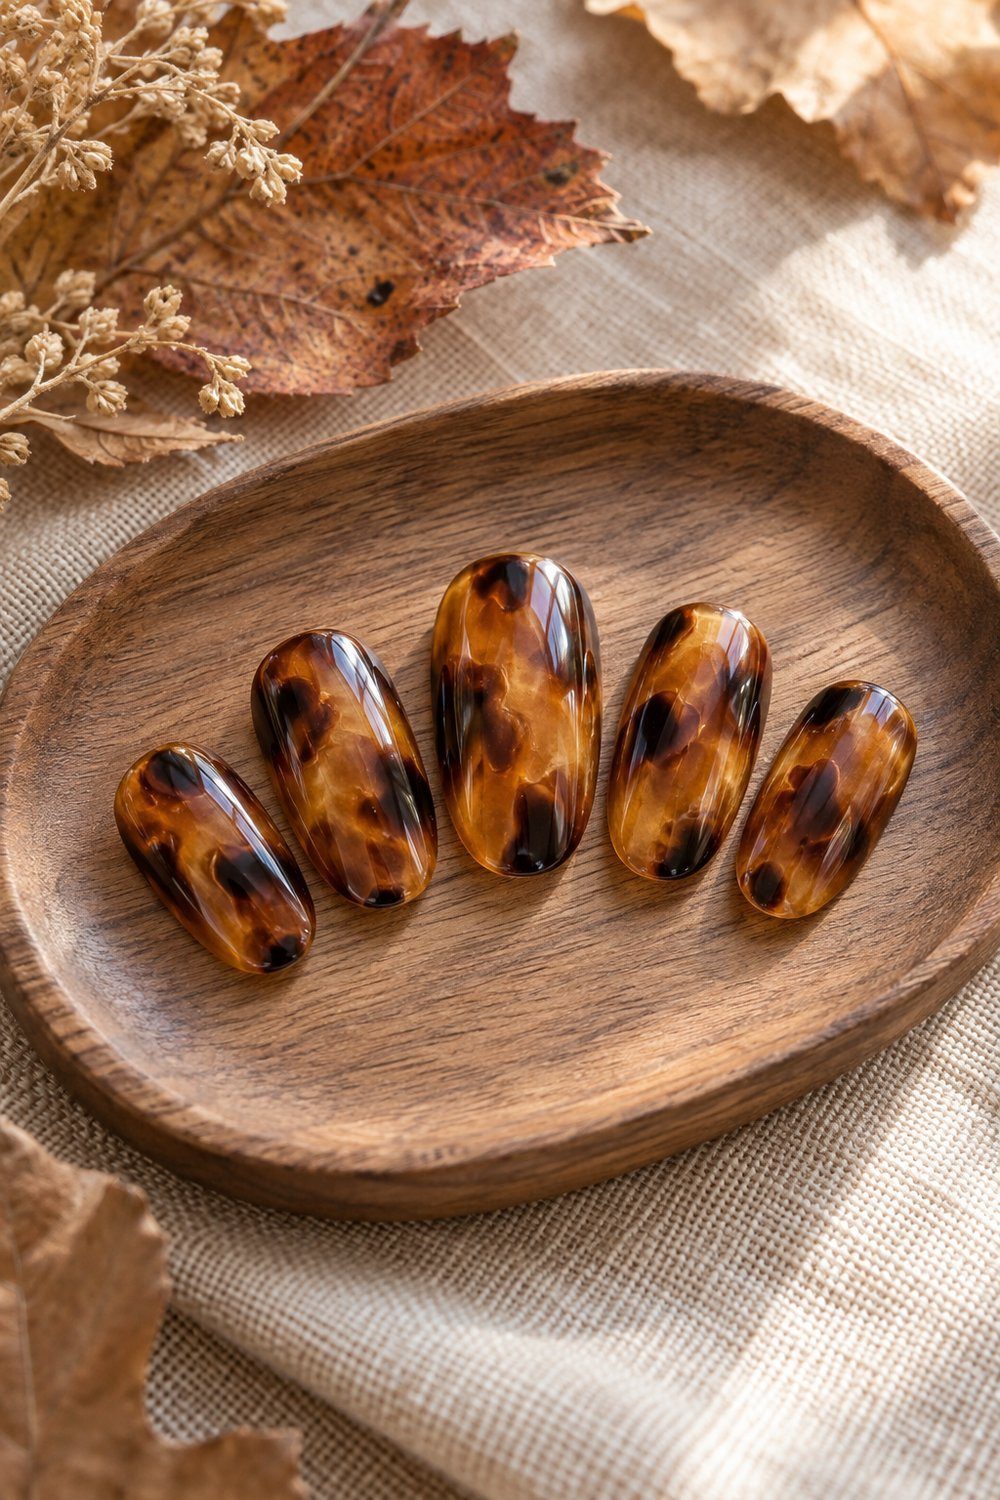
Halyna Kaliugina’s tortoiseshell nails build translucent depth with irregular amber and brown patches. Apply amber gel and work medium brown into it before curing; layer offset dark brown patches, then add partial black shadows with the liner. Glaze with amber and seal with glossy gel top coat, curing at the source’s stages. This technique needs a gel kit and lamp, with curing between the patch layers. A flat brush joins the liner here, and the gel lamp remains essential.
You'll need: Kokoist NT-12 Tortoise Shell, E-240 Marrone Brown Glass, E-223 Midnight Chocolate and E-148 Blackest Black; flat and fine liner brushes, lamp and glossy gel top coat for the source’s 6-step method.
Tutorial by Halyna Kaliugina, Scratch
With a gel lamp, foil or stamping plate
These versions need a gel kit and lamp; follow the gel brand’s curing times with its compatible equipment. For the stamped design, this selection uses the source’s SHELLAC preparation option. The foil and marble tutorials supply their own product-specific timings. Choose the finish before beginning: a defined gold edge, a woodland picture, or flowing earth-tone color. Each asks you to handle a different material, so gather the foil adhesive, stamping supplies or marbling brush named in its method.
Gold foil French tips
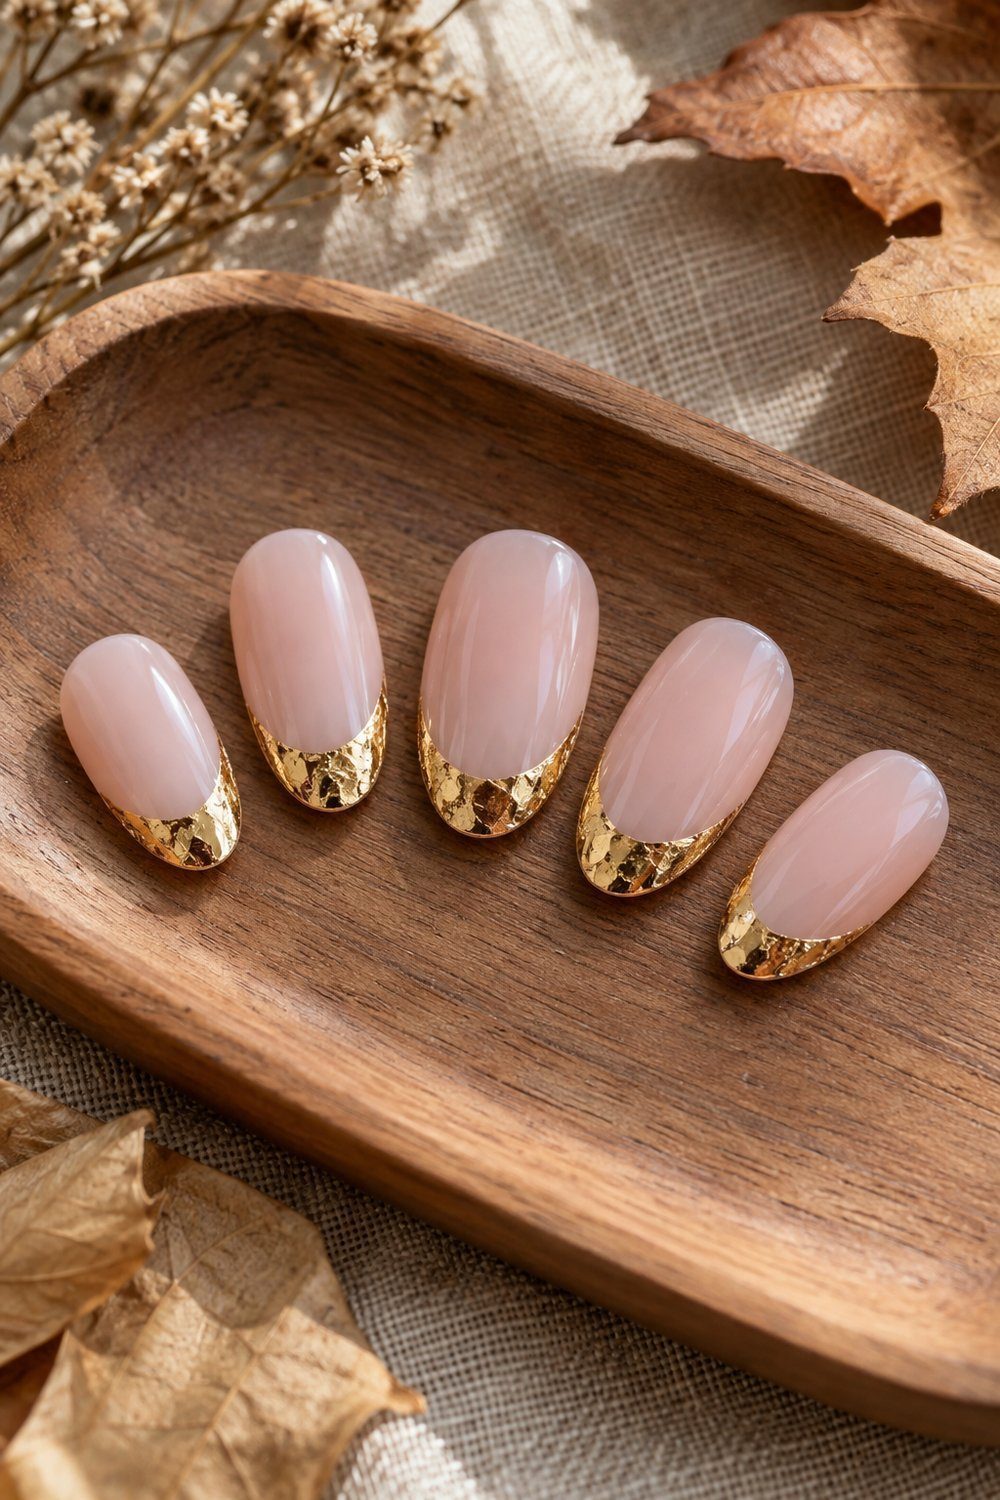
Bryony Howell’s gold foil French tips place a crisp metallic edge over Dolly BIAB. Apply the neutral base and wipe its tacky layer, paint the French shape with foil gel, then cure that adhesive before pressing gold foil or leaf onto it. Pull the foil away, clean the outline as needed and top coat to finish. This design needs a gel kit and lamp, plus control when painting the French outline with foil gel. Here the foil defines the tip itself, rather than scattering across a dark base.
You'll need: The GelBottle Inc Dolly BIAB, fine liner brush, Nail Stamping Queen UK Stick it! Clear Foil Gel in a Pot, gold foil or leaf, UV lamp and top coat; the tutorial gives the foil gel a 30-second cure.
Tutorial by Bryony Howell, Scratch
Reverse-stamped woodland mushrooms
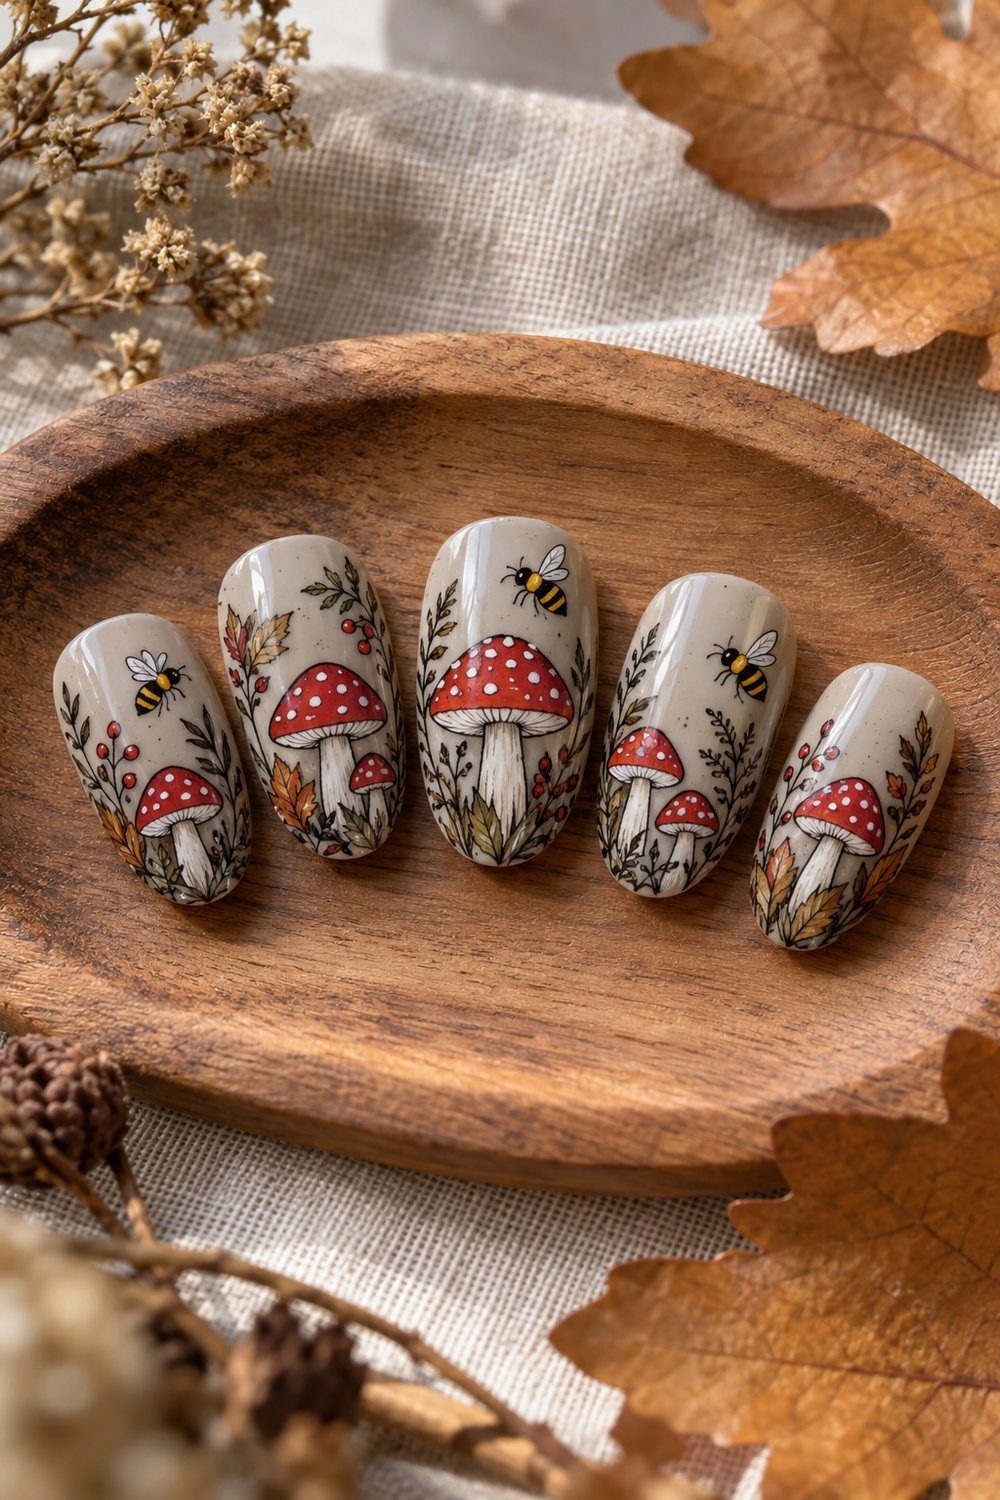
Nicole Fernando’s woodland design combines red-and-white mushrooms with a small bee. Prepare the SHELLAC surface with a thin top-coat layer and cure, pick up the black outline from the autumn plate, then color the bee on the stamper and transfer it. Repeat for the mushroom, add white cap spots and finish with top coat. Coloring the image on the stamper needs quick, controlled work. The source also allows a fully dried regular-polish base; this version uses its gel option.
You'll need: YOURS Graphic Autumn plate, HALO stamper, scraper, Black Out, White Light, Yellow Mustard, Red Flame, coloring tool, SHELLAC setup and top coat; the source sets out 6 stages.
Tutorial by Nicole Fernando, Insight Cosmetics
Ochre and rust marble
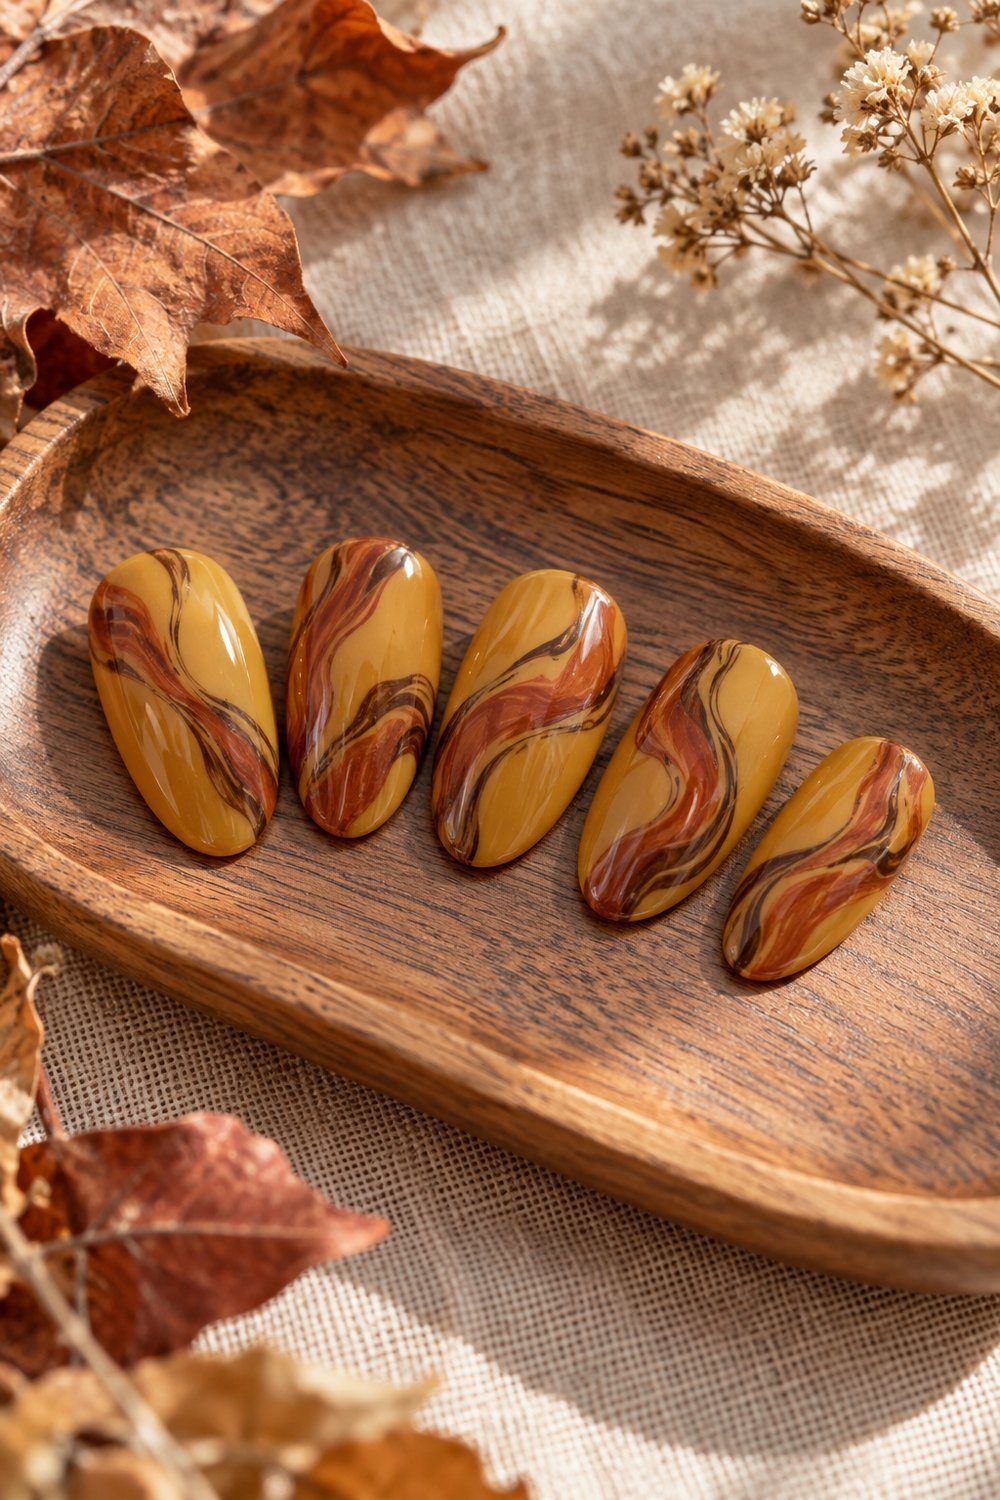
OPI’s Earth, Wind, & Fired Up layers ochre, rust and brown into flowing marble. Apply the base and ochre color, then leave a thin Stay Shiny layer uncured while adding Rust & Relaxation and Brown to Earth swipes. Flash cure, outline the marble with Brown to Earth and a detail brush, then cure and finish with top coat. This design needs a gel kit and lamp, with deliberate wet blending. Follow the linked sequence for the separate flash cure and full cures rather than treating every layer alike.
You'll need: GelColor base coat, 2 coats of GelColor Ochre the Moon, Rust & Relaxation, Brown to Earth, Stay Shiny Top Coat, detail brush and OPI LED Light; color coats cure for 30 seconds each and the brown marbling gets a 5-second flash cure.
Tutorial by OPI, OPI Nail Art
Making an autumn manicure last
Give the finishing layer the same attention as the art. The regular-polish tutorials finish with top coat and drying; let the dots dry before sealing, and let the gold-fleck manicure dry completely after its clear top coat. OPI’s dry-brush method also lets the separate color stages dry. Keep these stages in your plan when choosing fall nail designs, especially if you want to move straight from painting to another activity.
For gel, use the compatible top coat and the brand’s curing directions throughout. Run the top coat over the tip edge too (capping the free edge) so the color is sealed.
Next step: Save Christmas Nail Designs for the Holiday Season for your next seasonal manicure, carry the warm palette into fabric pumpkins for fall, or style the table with DIY Thanksgiving centerpieces.