Beautiful Pumpkins Made with Fabrics: A Creative and Cozy DIY Guide
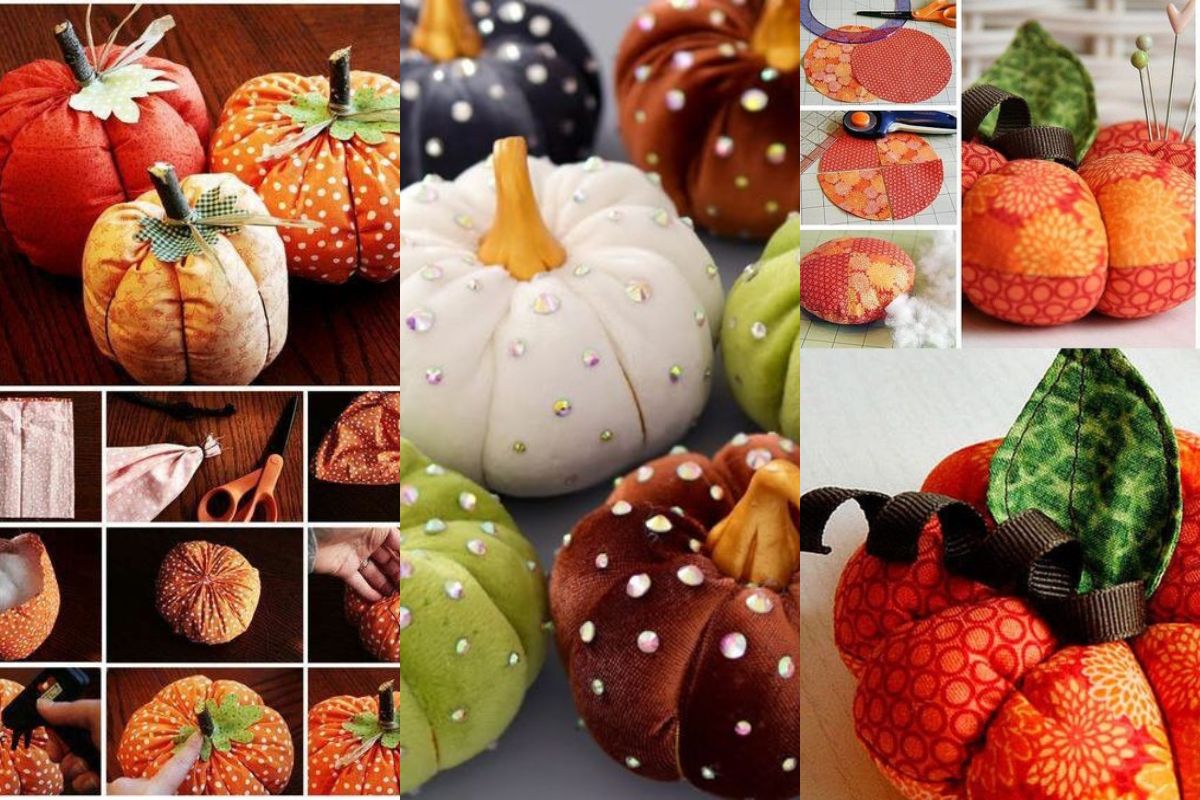
When the autumn season arrives, it brings with it a sense of warmth, cozy nights, and a yearning to decorate homes with elements that capture the magic of fall. Fabric pumpkins are the perfect way to infuse that seasonal charm into your living space.
Not only are these pumpkins easy to make, but they also offer endless possibilities for personalization, making them a wonderful addition to your DIY decor projects. From using various fabrics to embellishing them with ribbons, buttons, and more, fabric pumpkins can add a touch of elegance to any room.
In this article, you'll find an in-depth guide to crafting beautiful pumpkins using fabrics. Whether you're a beginner looking for a simple craft or an experienced DIY enthusiast aiming to add a bit of flair to your fall decor, this guide will walk you through every step. So, gather your materials and let’s dive into the cozy world of fabric pumpkin crafting!
Beautiful Pumpkins Made with Fabrics
Materials Needed to Make Fabric Pumpkins
Before you get started, gather the following materials:
- Fabric: Cotton, burlap, velvet, or even old clothes. Choose fabric in fall colors like orange, yellow, red, or green for a classic pumpkin look.
- Scissors: For cutting the fabric to your desired shape and size.
- Thread and Needle: For sewing the pumpkin together.
- Stuffing: Polyfill, cotton, or scrap fabric can be used to stuff the pumpkins.
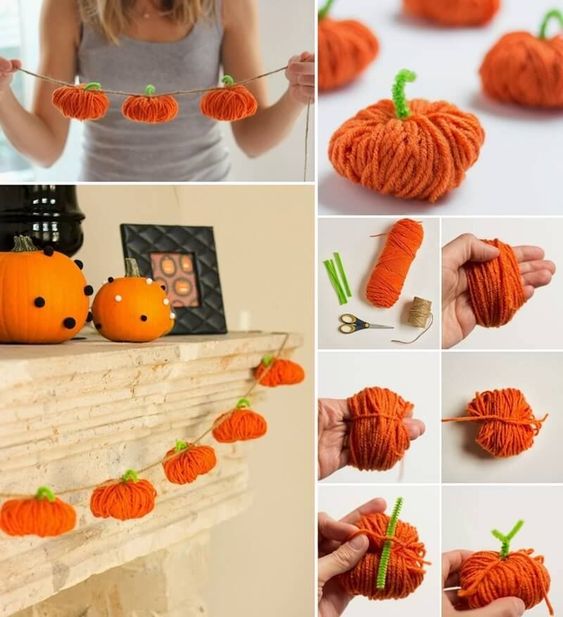
- Twine or Yarn: To create the pumpkin’s ridges and give it that signature pumpkin shape.
- Wooden Stick or Cinnamon Stick: For the pumpkin stem. You can also use a rolled piece of felt or a thick twig.
- Hot Glue Gun: For attaching the stem and any additional decorations like leaves, bows, or ribbons.
- Optional: Buttons, ribbons, lace, or other embellishments for added decoration.
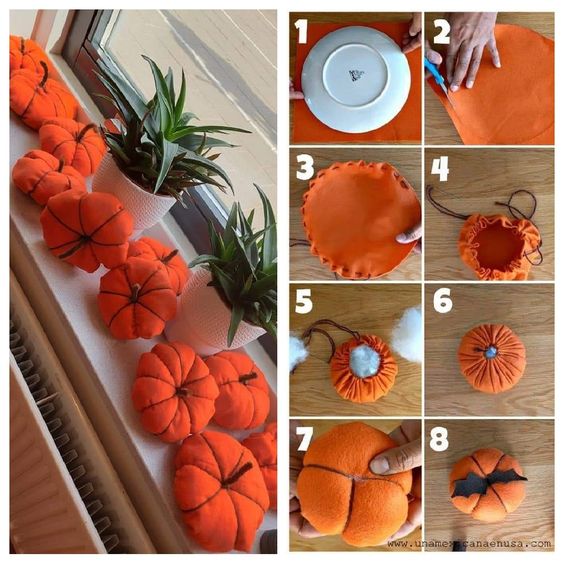
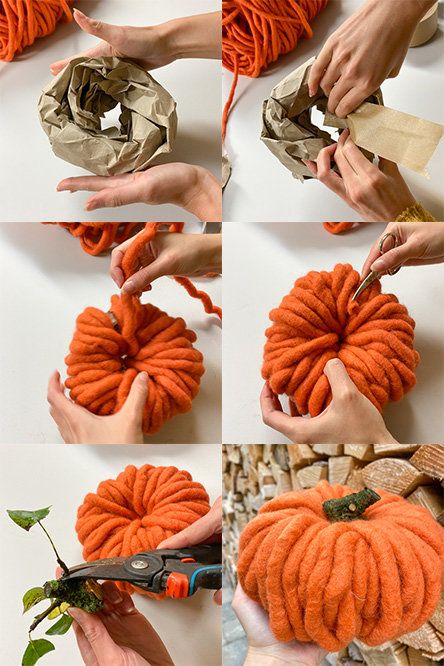
Step-by-Step Guide: How to Make Fabric Pumpkins
1. Cut the Fabric
- Choose Your Fabric: Pick out a fabric that speaks to your autumn style. Cotton is great for a classic look, while velvet gives a touch of luxury.
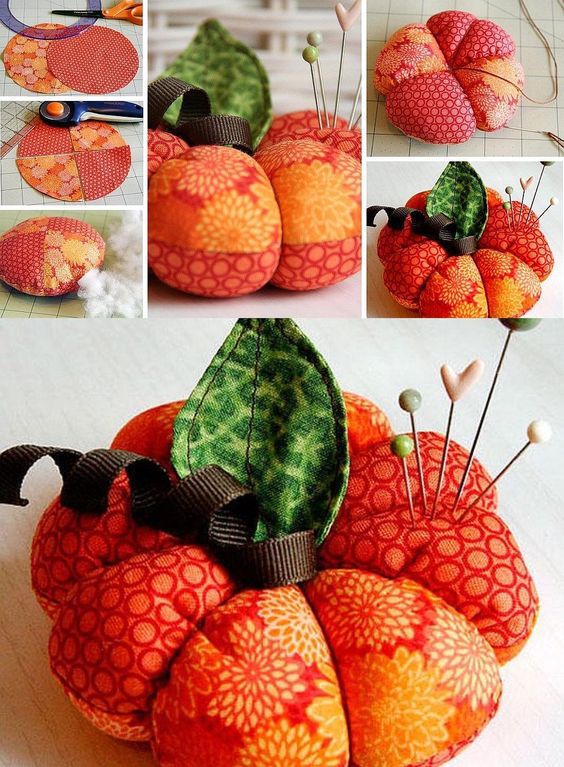
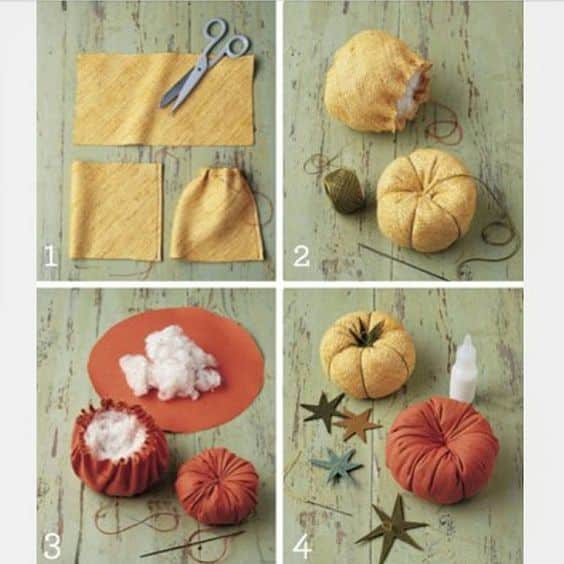
- Cut a Circle: The size of the circle will determine the size of the pumpkin. Use a plate or bowl as a template and cut out a circle from your chosen fabric. A 12-inch circle makes a medium-sized pumpkin, while smaller or larger circles will adjust the size.
Tip: If you want a more whimsical shape, try cutting your fabric into an oval instead of a perfect circle.
2. Sew the Edges
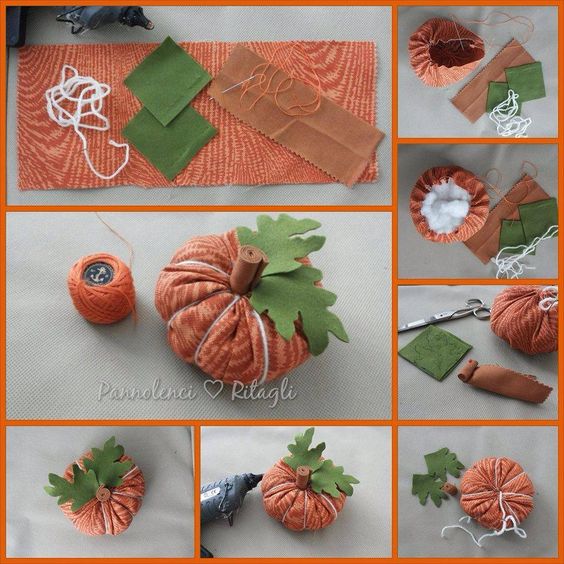
- Sew a Running Stitch: Using your needle and thread, sew a running stitch around the edge of the circle, leaving about 1/4 inch from the edge. Make sure to use a strong thread and keep the stitches loose enough to pull the fabric together.
- Pull the Thread: Gently pull on the thread to gather the fabric edges toward the center, creating a pouch-like shape.
3. Stuff the Pumpkin
- Add Stuffing: Fill the fabric pouch with stuffing until it is plump and has the desired pumpkin shape. You can use polyfill, cotton, or even scrap fabric for stuffing.
- Close the Top: Once the pumpkin is stuffed, pull the thread tight to close the opening. Secure it with a knot, but don't worry if the top isn't perfect since it will be covered later.
"Stuffing the pumpkin generously will give it a full, robust shape that resembles a real pumpkin."
4. Create the Pumpkin Ridges
- Use Twine or Yarn: Cut a piece of twine or yarn long enough to wrap around the pumpkin several times. Thread it through the needle and tie a knot at the end.
- Create Ridges: Insert the needle through the center of the pumpkin, pulling the twine around the outside and back through the center. Repeat this process, dividing the pumpkin into sections (like a pie). Adjust the tension to create pronounced or subtle ridges.
5. Add the Stem
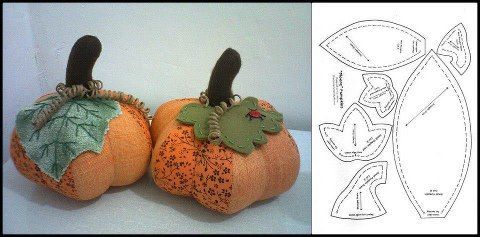
- Attach the Stem: Use a wooden stick, cinnamon stick, or rolled-up felt to create the stem. Attach it to the top center of the pumpkin using a hot glue gun.
- Embellish: For an added touch, glue on fabric leaves, ribbons, or buttons around the stem.
Tip: For a fragrant twist, use a cinnamon stick as the stem to give your pumpkin a subtle, warm scent.
6. Customize Your Pumpkin
Here’s where your creativity comes into play! Here are a few ideas to personalize your fabric pumpkins:
- Rustic Style: Use burlap or linen fabric and twine for a natural, rustic look. Add a raffia bow around the stem.
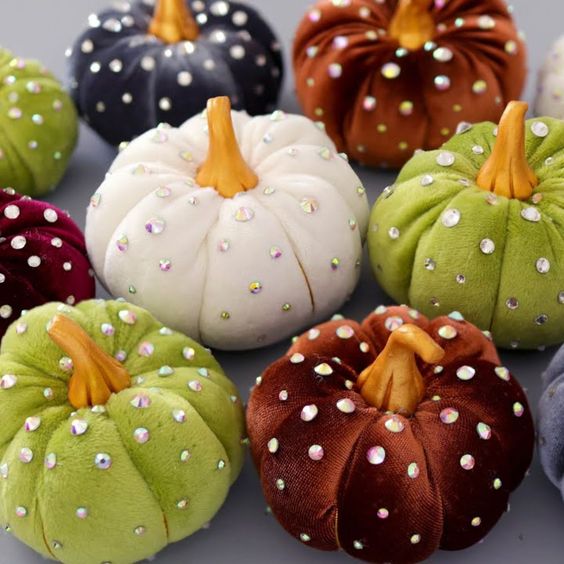
- Elegant Touch: Opt for velvet or lace fabric and embellish with pearls, lace, or delicate ribbons.
- Patchwork Pumpkin: Combine different fabric scraps to create a unique, quilt-like pumpkin.
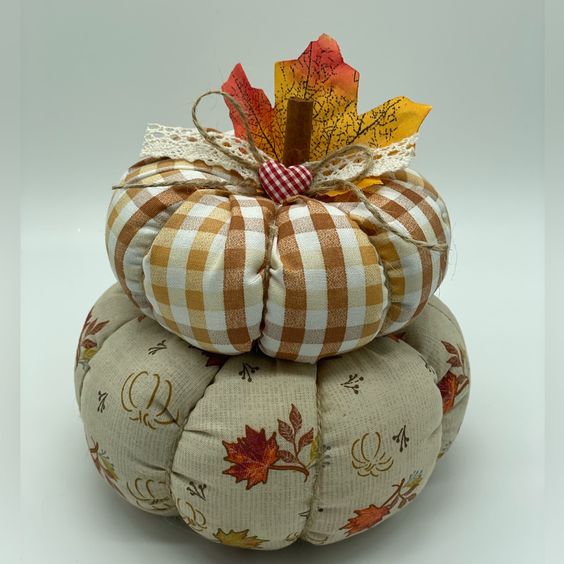
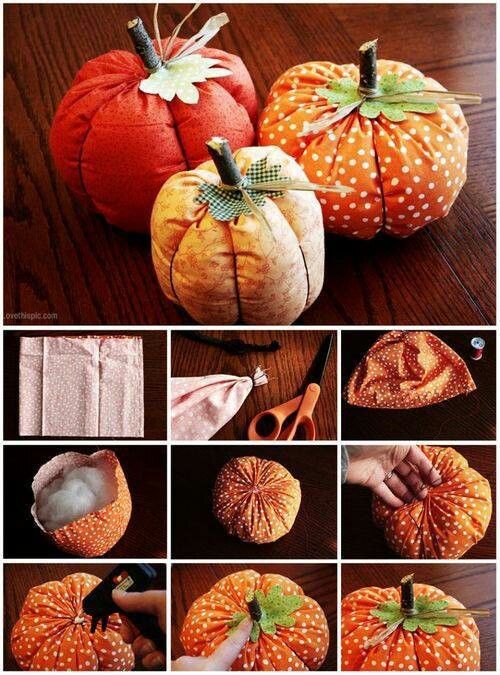
Ideas for Using Fabric Pumpkins in Your Decor
- Centerpieces: Group a few fabric pumpkins of varying sizes together as a dining table centerpiece.
- Mantle Decor: Arrange pumpkins of different colors and textures on the mantle for a cozy, fall-inspired look.
- Shelf Accents: Tuck a small pumpkin or two into bookshelves for a subtle nod to autumn.
- Gift Toppers: Use small fabric pumpkins as adorable gift toppers for seasonal presents.
You can use almost any type of fabric to create these pumpkins. Cotton, burlap, velvet, and even old clothes work wonderfully. Different fabrics will give the pumpkins a unique look and texture.
Create stunning fabric pumpkins for your fall decor with this easy DIY guide. Learn how to use different fabrics, customize with embellishments, and add warmth to your home this autumn.
With these beautiful fabric pumpkins, you can bring a touch of homemade charm to your autumn decorations. This fun and creative project is perfect for crafters of all skill levels and is a wonderful way to make use of fabric scraps while adding a warm, festive feel to any space.